DIY Outdoor Sauna


Intro: DIY Outdoor Sauna
Hi guys,
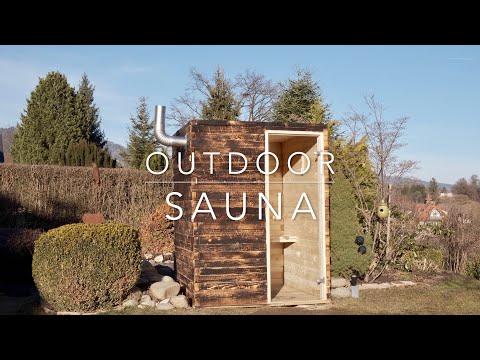
I wanted to share with you my outdoor Sauna build. It's inspired by a log cabin and simple to build. It took my 2 weekends to finish. Measurements are around 1500*1500*2000mm / 5*5*6.6ft. This build is suited for 1 to 2 Sauna guests. Overall, I kept the costs below 1000$ by using a 2nd hand stove and cheap timber beams.
STEP 1: Groundwork


First, you need to do the groundwork. I decided to go for a simple foundation. Depending on the nature of the ground, you might need to go for a more stable solution like a concrete foundation.
- Excavate soil
- Fill with gravel
- Put concrete slabs in each corner flat on gravel
- Make sure that all slabs are at the same height and level
STEP 2: Floor


Second, you need to do the flooring of the sauna. I used decking planks, as they are robust and good looking. Moreover, you can walk on them barefoot.
- Make a wooden frame; the frame is sized onetime the length plus the width of the beam; I used 1500*80*50mm beams, so my frame was sized 1550*1550 mm (1500+50mm)
- Screw the decking planks on the frame
- Cut the decking planks in size
STEP 3: Walls
Now you need to build the side walls of the sauna.
- Drill holes at one end of the timber beams. The hole is for the steel rod which helps to align the beams.
- Make a template for the drilling (I used a thick steel plate). The hole needs to be drilled in the middle of the width of the beam half the width away from the end. I used timber beams with 50mm width. Thus I needed to drill the holes 25mm away from the end of the beam.
- Screw the first row of timber beams on the wooden floor. Make sure that at each corner as well as at the door opening a steel rod is inserted
- Stack the next layers on top using the steel rods and wood glue. In order to make the walls more stable stack the beams in an offset fashion. Overall, I stacked 24 rows
STEP 4: Roof
For the roof I used the same timber beams as for the wall. However, I didn't drill holes.
- Screw the first beam on the top of the walls
- Connect the other beams by using wood glue
- Screw the final beam on top of the walls
- Cut bitumen felt roofing in size
- Put the bitumen felt on the wooden roof
- Use the flame scarfing device to glue it to the wood
STEP 5: Exterior - Shou Sugi Ban
To keep a natural look I decided to go for a traditional Japanese technique for the exterior: Shou Sugi Ban. Basically it means burning the wood to increase its longevity and give it a cool dark look.
- I used the same flame scarfing device as for the bitumen roof
- WARNING! Be careful not to burn your Sauna to the ground! keep a fire extinguisher near you! After finishing keep an eye on your build to make sure that no fire starts!
STEP 6: Door
The most expensive part of my Sauna build was the glass door. You can keep the costs down by using a wooden door.
- You should insert the door with a partner, as it is quite heavy (and glass tends to break)
- The door should open outwards
- Screw the doorframe to the walls
- Add hinge cover and door handle
STEP 7: Interior - Sauna Bench
You can buy a Sauna bench but I wanted to create also the interior myself. In addition, it is cheaper and made to fit.
- Cut a frame in size. I used 2 longitudinal struts and 4 cross struts. The width of the bench should be around 600mm/2ft
- Use wood screws to assemble the frame
- Screw the frame on the wall. I put it at a height of around 600mm/2ft
- Use planed planks for the top. Screw them on the frame.
- Install a RGB LED strip for the lighting. You can remotely control the color which helps to create a cosy atmosphere.
STEP 8: Interior - Sauna Stove
Now it's time for the most important part, the wood burning stove.
- Put a protective plate under the stove
- Mark the outlet of the chimney on the wall
- Drill a hole for the outlet in the wall
- Seal the connection between stove and steel chimney up
- Install the chimney
STEP 9: Final Steps
Just a few steps are now missing.
- Add stones to the Sauna stove
- Install a thermometer/hygrometer and hourglass
- Tighten the screws on top of the steel rods
- Cleaning
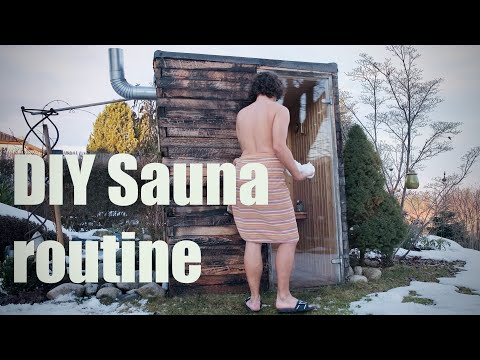
STEP 10: Enjoy!
I hope you had as much fun reading my outdoor Sauna Instructable as I did building it. Maybe it inspires you to build your own Sauna. If you like this Instructable feel free to give it a like.
15 Comments
ronniee 1 year ago
I told if is ok for your winter, need to be ok for us also.
But I whant to enlarge with one more step(50cm) to back to can fit easly 4 persons.
your opinion would help me, thanks
originalrumplesnitz 2 years ago
Unboxingexperience7 2 years ago
Unboxingexperience7 2 years ago
edgyed123 2 years ago
Unboxingexperience7 2 years ago
ronniee 2 years ago
I have a question, if you want to expand a little extra space for 4 people, how would you do it?
I was thinking of increasing the side by 50 cm at the back + a steel bar in the middle and putting an extra bench higher. Maybe need to enlarge it on the other side also with 50cm.
But it has to be fixed somehow, maybe the winter storms will solve it.
thanks for your opinion
Ron
kimblethenimble 4 years ago
Unboxingexperience7 4 years ago
Yonatan24 5 years ago
chuckyd 5 years ago
samnjoeysgrama 5 years ago
Dangernon 5 years ago
GothamCity1 5 years ago
Gusgonnet 5 years ago