

Introduction: DIY Smart Assistant AC Terminal Using LVGL, ESP32, and Arduino


Have you ever come back to your office from outside and wanted to turn on the air conditioner to cool down, only to find that the remote control is missing? It's frustrating, especially during the summer. To solve this problem, I decided to make a smart air conditioner terminal using an infrared module. I collected all the information from the air conditioner remote control on my development board, and used it to control the air conditioner through the infrared module. The terminal also displays the current temperature and humidity, so I can know the environment's conditions. Plus, I won't lose the remote control anymore because I fixed it on the wall. Now, let me share with you how I made it.
Supplies
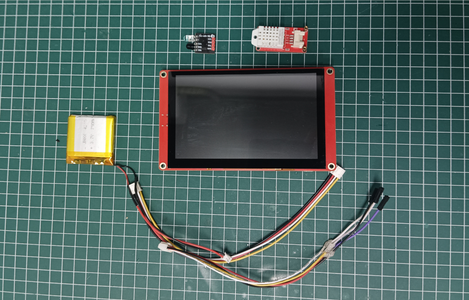
The ESP32 Display-5.0 Inch is used as the main control board to control the infrared module and read temperature and humidity information from the sensor. It can also display the user interface designed with LVGL on the screen for human-machine interaction.
The Crowtail-AM2302 Humidity & Temperature Sensor 2.0 is used to help me obtain the temperature and humidity information of the surrounding environment, which is then transmitted to the main control board via IO port.
The Infrared Transceiver Module is used to help me receive and record the infrared signals sent by the air conditioner remote control. It can also transmit the recorded infrared signals to the air conditioner via infrared emission. This enables my main control board to easily control the air conditioner.
Step 1: Make a Case

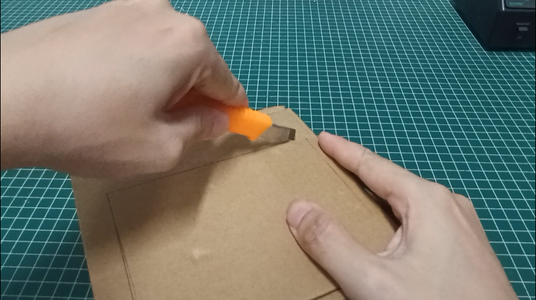


The casing I made is very simple. I just needed to cut the cardboard box to meet my requirements for the casing. During the cutting process, it's important to draw the marking lines in advance to ensure that we accurately cut the required size
Step 2: Collect the Infrared Info of the AC
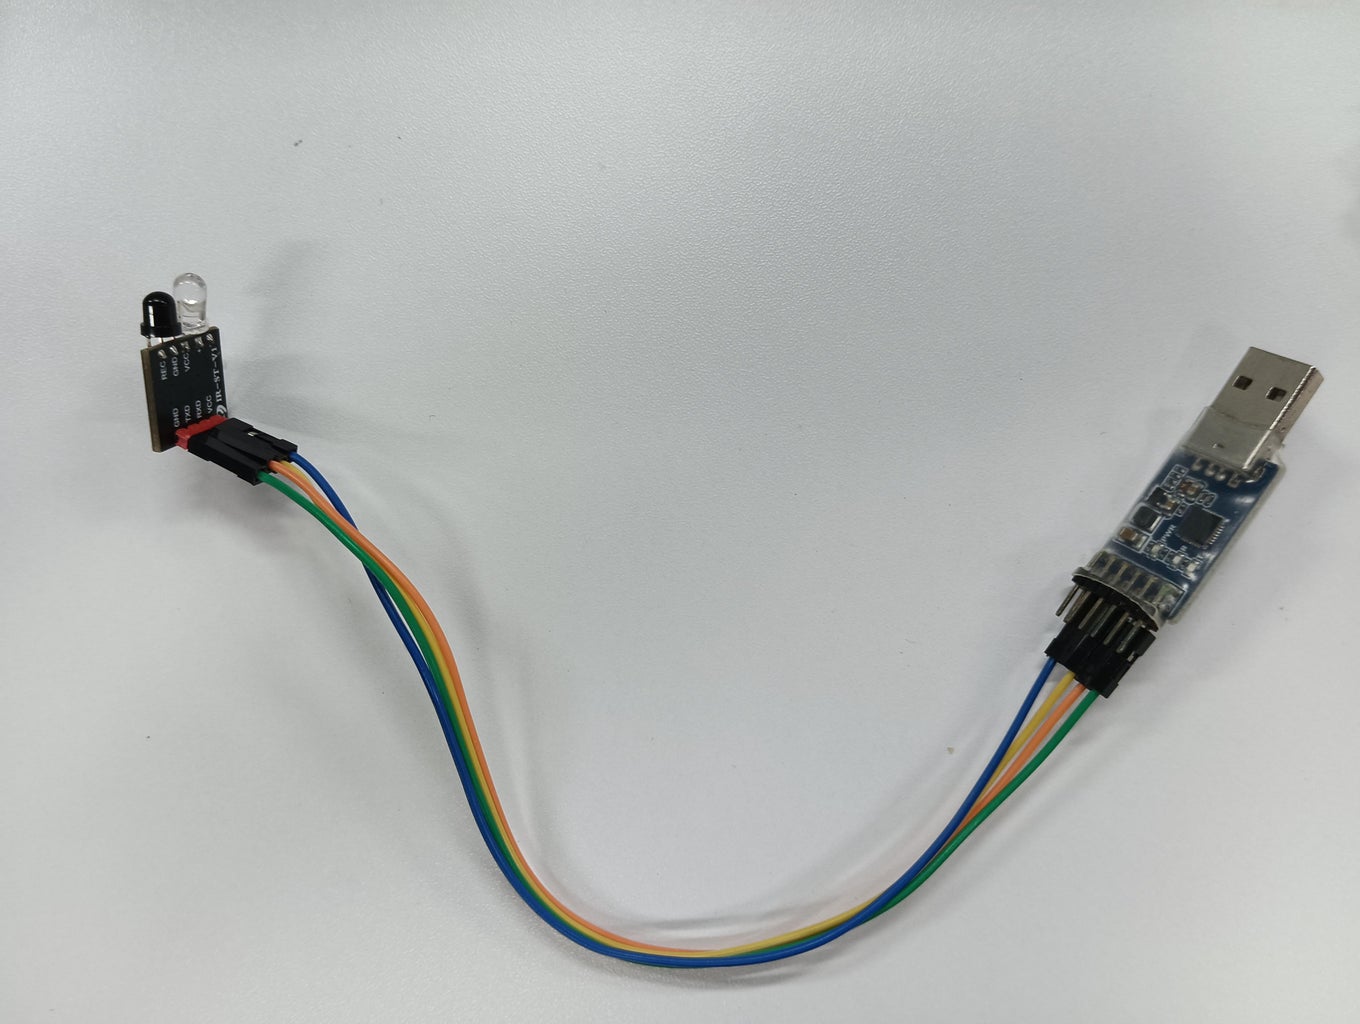


In this step, we need to connect the infrared transceiver module to the computer via a USB to the TTL module. Then, we can monitor the serial port using a serial port tool on the computer. We can send commands on the computer, point the air conditioner remote at the infrared transceiver module, press the button, and the infrared transceiver module will print the infrared information of the button on the serial port tool on the computer. This infrared information will be used when coding, so it is essential to record them all meticulously.
Step 3: Connect and Fix the Modules

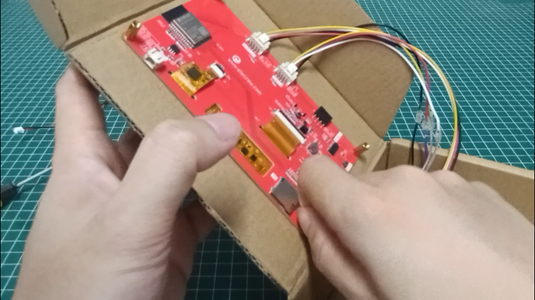


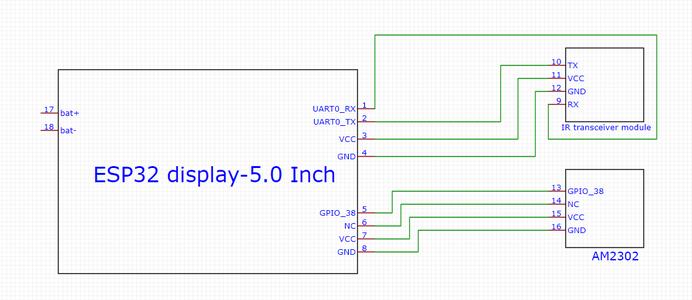
Because this project only uses the ESP32 main control board, infrared receiver and transmitter module, and temperature and humidity sensor module, the circuit connection is very simple. Therefore, I completed this step in just three minutes.
Step 4: Design the UI
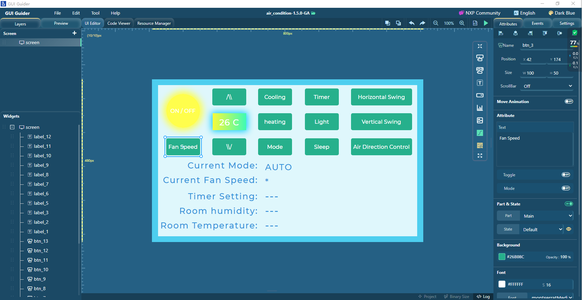
When designing UI, I prefer to use NXP's GUI GUIDER software, which is also an excellent PC-based GUI design software based on the LVGL library. It offers a vast array of controls, making interface design a breeze.
On the interface, I utilized 13 buttons, with the power switch designed to emulate a glowing sun effect achieved through button shadowing. The remaining buttons were ordinary function buttons found on an air conditioner remote, and were not given any special effects. Below the buttons, there were several labels used to display the air conditioner's status and environmental information collected by temperature and humidity sensors. Finally, in the bottom right corner, I added an adorable image of a bear blowing air, which was hand-coded by myself after using the GUI GUIDER software. You can find the specific code in my implementation.
Step 5: Download the Program


In this project, I used the LVGL library, so I needed to install the LVGL library in Arduino before starting the project and configure it according to the official getting started documentation. Otherwise, the program would not compile successfully. In addition, I also used the DHT_sensor_library, which helped me quickly obtain information from the DHT sensor.
Libraries used:
- LVGL
- Arduino_GFX-master
- DHT_sensor_library
File details:
- air2.ino --->Main file
- custom.c --->I used the user-defined files generated by LVGL tools to store some of my functions.
- custom.h
- events_init.c --->Files generated by LVGL tools used to store events.
- events_init.h
- gui_guider.c --->Files generated by LVGL tools.
- gui_guider.h
- guider_customer_fonts.h --->Used to declare user-defined fonts.
- guider_fonts.h --->Used to declare the fonts used in LVGL.
- IR_ARRAY.h --->Used to store the infrared codes for air conditioner remote control.
- lv_font_montserratMedium_xx.c --->Font files.
- s_bear.c --->C files converted from images.
- setup_scr_screen.c --->File for initializing the LVGL interface.
- touch.h --->Files related to touch driver.
Step 6: Testing
After testing, I found that the remote control I was using sends all the information on it to the air conditioner when any button is pressed. However, my infrared receiver and transmitter module only records one of the effects in a certain mode, and cannot completely replicate the exact same signals as the remote control. It's possible to change modes, temperature and other settings, but it's a bit complicated and requires patience. However, my ultimate goal was to solve the problem of not being able to find the air conditioner remote control, which was affecting my work, so I only needed to be able to control the mode and temperature of the air conditioner, which met my needs. From now on, I no longer have to worry about losing the remote control! This is really great!


![Tim's Mechanical Spider Leg [LU9685-20CU]](https://content.instructables.com/FFB/5R4I/LVKZ6G6R/FFB5R4ILVKZ6G6R.png?auto=webp&crop=1.2%3A1&frame=1&width=306)


