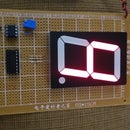
Introduction: Design Your Own Decoder
So that you can design your own decoders, you only need to define the binary code of each input in your state table and in that same table you can also describe the binary code of each resulting output that will define each wished character respectively. However, remember that if you want to see a segment LED lit, you will need to write a "1" for that segment of your display; and therefore, you have to use common cathode display. In contrast, if you want to see a segment LED lit with a "0", it's necessary to utilize a common anode display. Once understood the previous issue, you could design your own decoders.
Step 1: Decoder's Inputs
In this step, you need to define what you want to do at the beginning of the process and having a clear idea of your project. Although the structure for designing a decoder can be something simple if you know how to design logic circuits, the truth is that you only need to understand the process and knowing something of digital electronics so that you are designing your own decoders. The first step would be which characters you want to generate so that in your second step, you can define the kind of display that you are going to be utilizing. That is, you can design your own display too and the most interesting one is that you can design each character with the INPUT code what you want, For example, if you are utilizing a counter from 0 - 9 and you don't already need to generate those numbers anymore because you want to change the resulting OUTPUTS to A, b, C, d, E, F, H, O, P, U from the INPUTS 0000, 0001, 0010, 0011, 0100, 0101, 0110, 0111, 1000, 1001 respectively. Then you can begin with the previous table if you are going to use a 7- Segment Common Cathode Display for doing the most illustrative project: In this table is the information about of your decoder and the resulting equations of the submitted inputs.
Step 2: Decoder's Equations
In this step, you can realize how to obtain the equations of your decoder for drawing the entire project in the following step. However, if you don't know how to manage the Karnaugh maps, you will have the option still of taking the equations and drawing the project. But if you have problems in understanding the equations, you will have the option too of taking the decoder's diagram directly of this instructable for its analysis later. Good luck!
Step 3: Decoder's Diagram
In this last step, I'm including the whole project together with the equations of a counter that I designed for this project. However, you can use a different one because this project is only an example and therefore, the decoder introduced is an instance too that can be as extended or reduced as you want. The most important thing is to understand the process of designing a decoder with the resulting characters and inputs what you want.


