Introduction: Dewalt Drywall Scrugun Repair
Well hello everybody!
Pak here, and today I am making an instructable on a DeWalt brand drywall screwdriver. I found this rather used fellow off of my local craigslist for $10. The seller just had the description of it was broken and needed parts, or better said cavet emptor. Brief exchange with the seller showed he didn't have the time or patience to figure out what was wrong, being the electric motor worked "like new" but the screw bit didn't spin.
So being I have much more time than money, sounded like a fun project to disassemble and see what could be done.
So here we go.
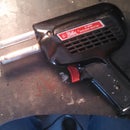
As you can see, the body had a decent amount of wear and tear, though mostly cosmetic damage, and permanent marker. The sheet rock dust in all the small crevices was settled in there for awhile and resisted initial blowing out with air.
Though luckily, running the motor and the direction level worked without pause, the electric motor didn't give off that "burning electric" smell old or dirty motors tend to give off. So, until it gives me pause to investigate, lets take a look where I know the trouble is, the front.
So before we take anything apart on a power tool, its best (in my opinion) to get the technical specs and parts diagram. Which is freely available off of Dewalt.com. So finding the right model and type of gun, then downloading then printing the manual and parts list.
Step 1: Materials
The materials and tools I needed for this instructable are as follows:
1. Your personal protective equipment, safety glasses and gloves (both leather and nitrile)
2. Flat (or torque) screwdriver.
3. Wire brush, wire wheel brush.
4. Grease and application brush.
5. Parts diagram and operators manual.
6. Cleaner/degreaser.
7. Rubbing alcohol.
8. Paper towels/ rags.
9. Magnet parts tray for screws.
Step 2: Condition and What Do We Need.
So looking over the front end of the gun, it requires three screws to be removed (and then brushed out) with either a torque or flat screwdriver. I used a flat being I had one on hand. As well as per the instructional book, to remove the adjustment collar it requires it just to be pulled off, though with how gunked up it was I had to use a small steel shaft (Screwdriver!) to lace through the tip for a better pulling handle.
Step 3: Front End Dis-assembly
The front end is easily removed with only the three screws taken out. Placing the screws into the metal parts tray to not lose them.
Opening up the front a large and was greeted with the old green, and now very dirty, grease. The plate that separates the electric motor and the gear/screw mechanism was pitted and the years of grit have taken their toil.
The front piece wasn't in too bad a condition, still some bad green grease, and the seal gasket was complete though dry. A little bit of dirt and rust was what made the adjustment collar stick.
The drive gears had all of their teeth and seemed to spin without catch, so the internal spinning mech wasn't damaged. Listening to it spin, there also was no loose clunking sounds. Removing the front nozzle from the main body exposed the actual catch mechanism. There is where I found the issue!
The inside of the front housing has two "toothed" plates that when pressed together engage the screwdriver. There is a spring and plunger that keeps the toothed plates apart, that spring was impacted with dirt and grime that it wasn't doing its job. So cleaning off the parts with degreaser and a brush/rag, showed there wasn't actually any parts broken or missing. Except for the drill bit holder extension. (easy part).
So cleaning everything off and inspect all surfaces.
Step 4: Cleaned and Re-lube
Fully cleaning out all the parts with cleaner and wiped off any residual mess. Fitting the parts back together I made sure they all linked in and worked. After that I unscrewed it all and gave all interior surfaces a brushing of the synthetic grease. Made sure the spring was free of obstructions that caused the issue to begin with.
The gasket was still in good condition so i gave it a wipe down from dirt and dust, then painted it in grease.
Due to the corrosion of the plate I decided to give it an even coat of grease, especially around the moving parts. then all the outer steel I ran under the wire brush wheel and buffed all the surfaces. As well as a hand wire brush for those tight to reach areas plus the screw faces, scratching out the rust and grime let the original finish shine through.
Step 5: Cleaning Up That Yellow Body
With the mechanism fixed/cleaned, reassemble the drill. With the drill all together it is time to clean up that marked up body.
So taking a high percent bottle of iso alcohol. Being it dissolves permanent marker, and quick drying, it is perfect. So taking time and care, wiping and scrubbing off the dirt and marker. It slowly and surely came out.
Though not new, it is much better looking, and for the low initial price for a working drill, its a good deal.
The only sad part is the information sticker is damaged.
Step 6: Finishing Touches and Parts
After it was wiped down and cleaned up to a fair condition, most of the marker came off, though is still a faded name, it cleaned up. So ordering parts off the Dewalt website was easy with the parts chart. Got exactly what I needed to make it a complete set, including two new stickers to have the info clearly displayed on the driver.
So, with a little time and effort made a repair job into just a cleaning job! So if you got time, it is always worth it to check, even if it is un-repairable, it is a good learning experience.
Thank you all for reading! I really appreciate it and hope it helps!
Pak.


