

Introduction: Disc Lamp
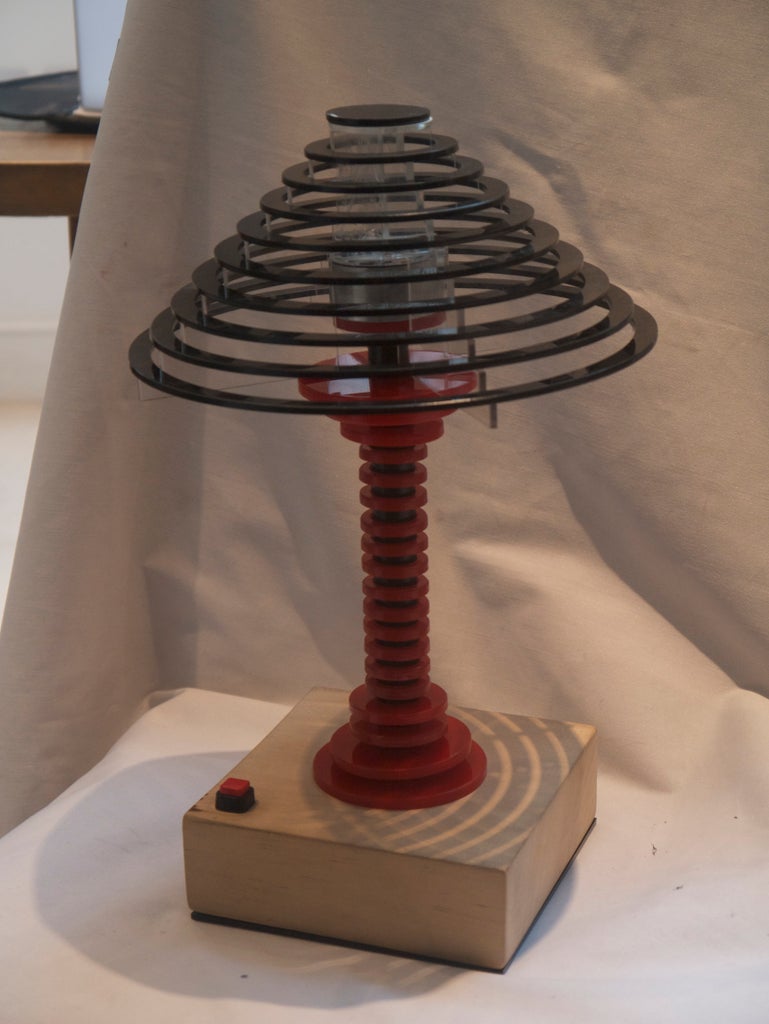
The lamp is made of multiple acrylic rings and a block of jelutong wood at it's base. The making of lamp requires few skills but a laser cutter is required to cut the acrylic discs.
Tools:
- Laser cutter
- wet and dry paper and sand paper
- soldering iron
- A drill
- A saw
Step 1: Laser Cutting: the Shade


The rings are cut concentrically on the laser cutter to reduce wastage and are each 1cm wide.
Step 2: Laser Cutting: the Stem Rings and Shade Holder


The clear shade holder allows light through and will fit around a central hub of LED lights. The staggered edges will sit under each acrylic ring.
The red rings will fit onto a central stem of the lamp order from right to left.
The rings are cut in different shapes but all have a inner circle of 2cm diameter
Step 3: The Light Array


The light array is made of six LEDs. It is made from a metal tube (diameter 5cm) and a silvered piece of acrylic, as well as a red ring to fit onto the stem.
The LEDs are arranged by putting the short leg into the middle and the long leg onto the long leg of the next LED and soldering them together, in the middle and to 2 wires, one on and outer section and one on a inner section.
One complete it should be glued with capillary glue. and hot glue to make sure the LEDs don't fall out of place.
Step 4: The Base


I found this block of jelutong pre cut and i do not have the equipment to make it thinner, though i would if i could. So i stuck with the shape and sanded the top and sides of the block. In the centre a 19mm hole is drilled out for the stem and on the corner a 13mm hole is drilled out for the button i drilled this hole 1 cm for both sides.
On the underside i chiseled a space for wires to go from the switch to the stem and a space for the battery pack. I then cut a piece of black acrylic to screw into the bottom. It is shaped this way so it can swivel open to change the batteries so it is important to put the slice shaped piece over the battery.
Step 5: Other Components


- A switch
- An black PVC pipe (diameter: 2cm)
Step 6: Assembley


- The red rings are slotted onto the tube stem tube leaving a 4.5cm space at the bottom to go into the base and a 3cm space at the top. It is best if the rings are a tight fit so they don't have to be glued onto the stem tube.
- Then push the stem into the base.
- The light array then goes on top of the stem with the 2 wires going through the tube out the bottom of the base
- The button is wired up to the lights and battery. At this point the light should turn on and off using the button. Once the light is working the acrylic base cover is screwed on. Make sure the swivelling side goes over the battery
- The shade holders then slot together over the light array and the rings are put over the holder. The top piece is glued to a mirrored piece and then glued to the top of the light.
