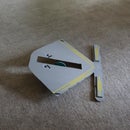
Introduction: Froggy World 2 the Boot

About: I am an author and a maker. My current project is Santa's Shop. I'm working on a science fiction type book--more later. @EngineerRigsby


Froggy World, the amusement park for adventurous plastic frogs, has a new ride!  After being flung from a catapult

https://www.instructables.com/id/Froggy-World-1-The-Catapult/

Froggy must now ride the belt past the boot.  Will he succeed?

Is Froggy ready for the next adventure?

Step 1:

To build a conveyor belt requires a few parts; motor, bearings and belt.

Polybelt.com  for a 40 inch long by 2 inch wide belt
vxb.com  for bearings
sciplus.com  for a motor (I used #40588, a gear motor intended to move automobile seats)

Files for the 3d printed parts are available at:

http://www.thingiverse.com/thing:45303

Start by making a "roller," 2 inches wide with a 2 inch diameter.  I used a 1/4 inch diameter wood rod for the axle.

Step 2:

I placed a couple of "guides" to hold the motor mount and a bracket to adjust the tension on the motor.

Step 3:

Friction fit the 2 inch wide by 2 inch diameter roller (different axle diameter from the other roller) onto the motor. Set the motor on the motor holder.

Step 4:

Put the belt on the non motor roller before securing the roller to the base. 

If you're smart (not like me), you'll put the roller guides on the rollers at this step--to keep the belt from slipping off.

Step 5:

Add the "belt guides" using acetone or super glue.

Step 6:

Mount the servo horn to the top of the boot (backs side, where the holes are).

Step 7:

Screw the servo horn to the servo motor (of course you need to have the servo in the "boot down" position).

Step 8:

Slide the servo motor into the motor holder.

Step 9:

Put the motor holder lid on and run machine screws through the holes.

Step 10:

Attach the motor to the top of the "servo tower."

Step 11:

Route the servo wires through the hole in the servo tower.

Step 12:

Place the photocell and led in their holders, then fasten them to the base.

Step 13:

Add the acrylic shields to the sides.

Step 14:

The base (24 inches by 9 inches) should be raised 5 inches with two wood supports.

Step 15:

Stick the breadboard down with its own sticky tape.  Fasten the Arduino with two screws. Add the motor shield to the Arduino.

Step 16:

Wire it up, according to the schematic. I used a 12 volt, 5 amp power supply, but that's way more amps than are needed (500 mA would probably work).

Step 17:

Now, put the code into the Arduino.

#include <Servo.h>


Servo boot;

int start=10;

int next=7;

int val=0;

const int pwmA=3;

const int brakeA=9;

const int dirA=12;

int trigger=0;

int dummy=0;

int timer=0;

int once=0;


void setup ()

{boot.attach(5);

pinMode(start, INPUT);

pinMode(next, OUTPUT);

digitalWrite(next, HIGH);

boot.write(250);

delay(1000);

}


void loop()

{val=digitalRead(start);

if(val==LOW or dummy==1)

{boot.write(75);//raise boot

dummy=1;

delay(200);

pinMode(dirA, OUTPUT);

pinMode(brakeA, OUTPUT);

digitalWrite (dirA, LOW);//forward

digitalWrite(brakeA, LOW);//release brake

analogWrite(pwmA, 125); //speed motor


trigger=analogRead(5);

if(trigger >200)

{boot.write(250);

delay(500);

boot.write(75);

once=once+1;

}


else if(once>1)

{delay (8000);

analogWrite (pwmA, 0);

digitalWrite (brakeA, LOW);//stop motor

boot.write(250);

dummy=0;

timer=0;

once=0;

digitalWrite(next, LOW);

delay(1000);

digitalWrite(next, HIGH);

}

else if (timer >40)

{once =2;

}

timer=timer +1;


}}

Step 18:

Add shields to the end of the belt, to keep Froggy moving straight.

Step 19:

Connect ground from "Catapult" to ground of "The Boot."   Connect pin 13 from "Catapult" to pin 10 of "The Boot."

Set "The Boot" about five inches from the end of "Catapult," power on and let them go!