Introduction: From Wine Boxes to Stackable LEGO Storage
So this isn't a typical instructable for me, in the sense that it's more about repurposing and adjusting an existing product to suit a completely different need rather than making something from scratch.
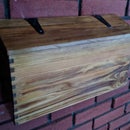
The boxes were initially used to transport wine or liquor bottles, and they looked absolutely amazing. Too beautiful to be thrown out. They sat in the shop for several months waiting for a project idea, and that finally arrived in the shape of an 11 year old girl with way too much LEGO and a self imposed need for organization.
The idea was to alter the boxes by removing the cradle pieces used to stabilize the bottles and gluing extra pieces to the sides to create slots for movable separators. If this were a project being made from scratch, the side panels would have first had dado slots cut out into them, but since they were already assembled it would have been too much work (and I'd risk damaging the boxes) to take them apart, cut the dados, and reassemble.
In addition, we wanted the boxes to be stackable, so we added corner pins with rounded tips that fit into matching holes in the bottoms of the boxes (as well as the one remaining cover). The pins also served a secondary purpose of reinforcing the corners of the boxes. It was hard to tell, but it looked as if the sides were held on only by pin nails, so adding a glued on corner piece helped keep everything permanently attached.
Supplies
Wine crates - these are wooden boxes that liquor manufacturers and stores will sometimes use to ship bottles
Tons of unsorted LEGO pieces
Tools -
A table saw was instrumental in getting the straight cuts, but this could also be managed with a circular saw and a saw guide.
A belt sander comes in extremely handy if you're making the corner pegs
A router, to help cut and smooth out the hand holds.
Spring clamps.
Double sided tape (carpet tape works well for me)
Step 1: Preparing the Separators and Spacers
This may have been the most painful part of the project, as all but one of the beautiful covers had to be sacrificed and cut up. They would end up becoming the separators and spacers. The covers were all cut into 3" strips, and those who would become spacers would then get cut again into pieces just over 2" wide.
When figuring out the ideal size of the spacers I took into account the fact that the dado gaps would be slightly wider than the thickness of the separators (about an extra 1/8") and that extra room would be needed on the ends for the corner braces and hand holds.
Step 2: Corner Braces
Making the braces was done by using some of the left over material from the sliced covers. I glued up a few pieces in pairs, left them to dry, and cut out square rods that were 0.75" wide on a side. This would make a perfect corner brace, and could also serve as a connecting piece to the box (or cover) that would sit on top by having its tip rounded off, matching a hole in whatever sat on top of it.
Once the rods were ready, I measured the lengths to cut by standing one up in a corner and marking off an extra inch on top of that. The rounded tip of the brace would only extend about 0.25" above the top of the box, so this would give me plenty of working room because I would later cut it down to its final size.
To figure out the size of the rounded section and get it perfectly centered I drilled a 0.5" hole in a spare piece of wood and used it as a guide by centering the tip of a peg under the hold and spraying some black paint through the hole. When I removed the guide I was left with a perfect circle that I could then sand around.
Sanding was a breeze by just setting the belt sander upside down on the workbench and twirling the tip of the rods on it until just the black circle was left. Performing regular test fits with the guide piece I had created earlier was also necessary, and as soon as there was a slightly loose fit I was good to start on the next peg.
Once all the pegs were sanded and ready they were simply glued in place, one in each corner. The rounded parts were left long until later, when they would get cut down to the right length.
Step 3: Handholds
Cutting the handles was pretty straightforward and they all came out identical thanks to a reusable pattern and a router. A coping saw and file could have also been used to cut the handles, but that would be a more intensive job and the handles might not come out as identical as they did.
Step one was to cut out a spare piece of fiberboard to the same size as one of the boxes sides, measure and locate the center, and then trace and cut out a nicely sized opening. This pattern piece would then serve two purposes: To draw the handhold on to the boxes so I know how much material to remove from the center, and to guide a router around the edges in order to clean them up perfectly.
With the template complete, it was laid on a box side and the handhold was traced. I removed the template, drilled a pilot hole in the center of the handhold, and then used a jigsaw to cut out most of the material (leaving about 0.25" away from the edge and not on the line itself).
Step two was to attach the pattern to the box with double sided tape and use a router with a straight bit and guide bearing to go around the edges and clean them up.
When all was done, I used some 120 grit sandpaper to smooth out any rough or sharp lines left over by the router.
Step 4: Drilling the Alignment Holes and Trimming the Pegs
So locating the exact location for the holes was a bit tricky but very doable.
The first thing I had to consider was that drilling a hole the same size of the peg would make the fit way too tight and the chance of a perfect alignment slim. So I went with a drill bit slightly larger than the width of the rounded pegs.
Two things had to get done here:
1. Add a marking pin to the center of the peg by drilling a hole through the center, hammering a small nail in, and cutting off the head.
2. Making a quick locating jig by gluing together scrap pieces of wood the same thickness as the box walls, and then attaching guide pieces to those so the jig could sit on the corner of a box and be perfectly aligned with the walls.
With the jig ready and the centering pin installed, I flipped the boxes upside down, positioned the jig over the corner, held the marking peg against the box bottom and pressed down. This left a small mark for where the hole should be drilled. Once done, I went over the mark with a pencil to make it more visible. The hole were then all drilled at the marked spots.
The same process was used for both the box bottoms and the cover, and all holes came out with just enough wiggle room to make a snug fit.
Step 5: Gluing on the Spacers, Peg Trimming and Final Touches.
Adding the spacers was a pretty straight forward step that basically required glue and spring clamps. When setting them in place, I held a divider in between them to get the right amount of space, always accounting for a little extra wiggle room by adding an extra 1/8" or so. So add some glue to the back of the spacer, put it in place, apply a spring clamp, rinse and repeat.
An hour or two later it was time to trim the pegs down, and this was simply done by measuring the thickness of the box bottoms, tracing that on to the pegs, and cutting off the excess.
As a final step, some furniture pads were added to the bottom of all boxes to prevent the floor from being scratched when these would get dragged around. And with that step done, everything was ready for delivery to it's proud new owner :)


