

Introduction: Halloween Wood Burning: Ignite Your Imagination and Feel the Magic of Halloween!


Halloween is just around the corner! Guess what? I stumbled upon a set of wood burning tools at home, and it totally ignited my creative spark! I've made up my mind to craft a set of exquisite wood burning art as a special gift for my friends!
Supplies
Step 1: Tool Preparation


You can also find this kit here
Step 2: Design a Halloween Pattern


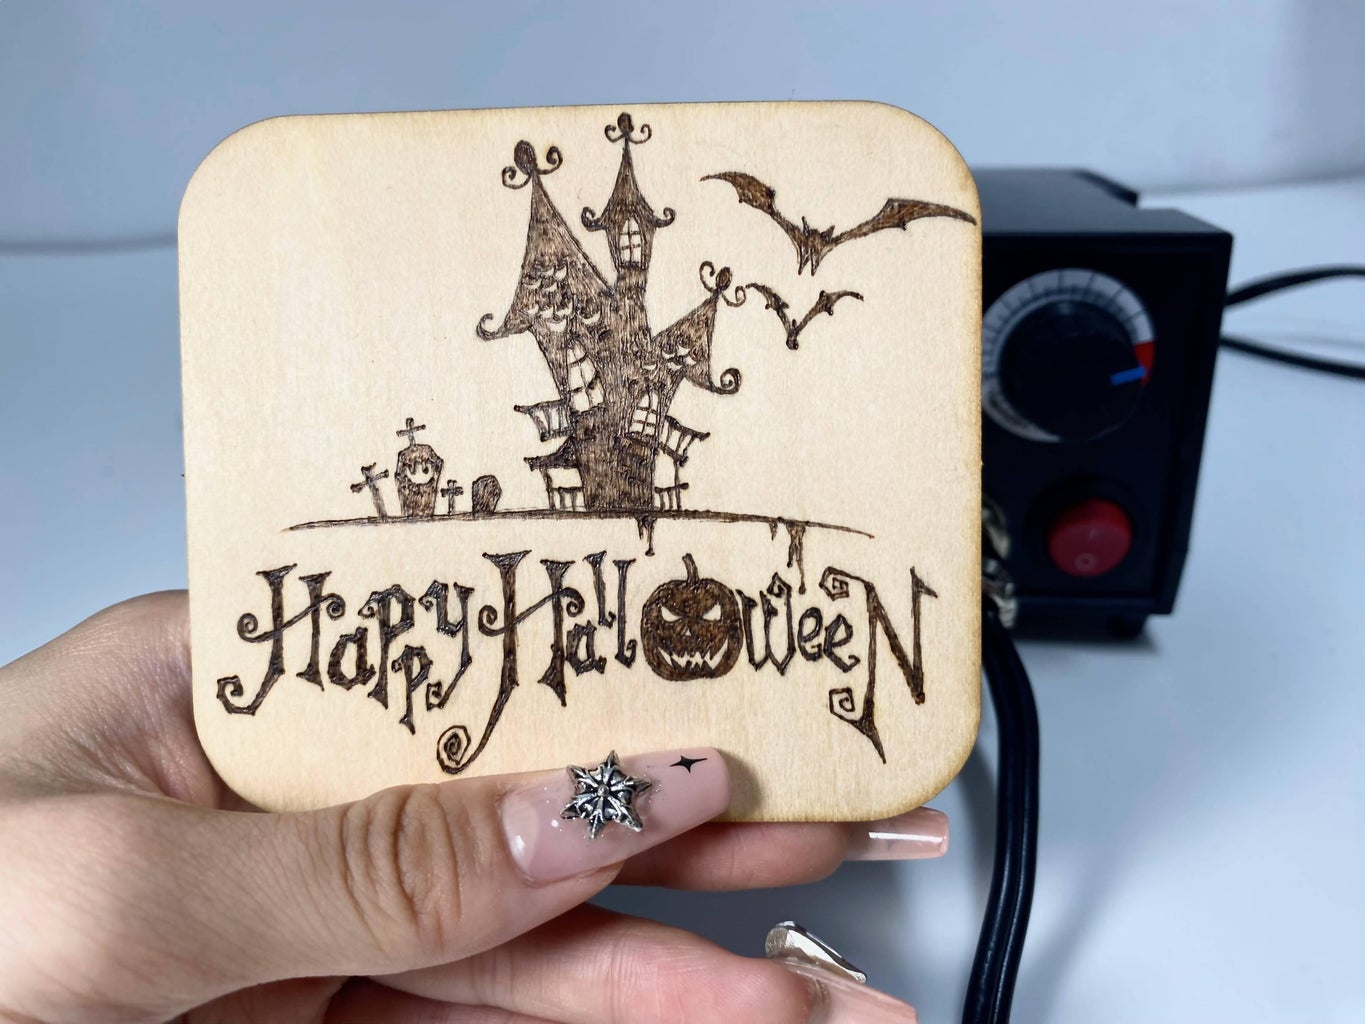
Here I use 10cm×10cm round wood chips and 9cm×8cm square wood chips. First, I'll design the patterns I want to wood burn on the wood slices. For this project, I've chosen elements like castles, bats, and pumpkins. Once the design is complete, I'll use a pencil to trace the outline of the patterns, laying the foundation for creating beautiful wood burning art.
(Of course, you can also explore more personalized themes, such as your shared hobbies with friends, special memories, or favorite Halloween characters. Try combining different elements and patterns to create unique designs.)
Step 3: Assemble the Pyrography Machine


Once you've finished designing your Halloween patterns, the next step is to assemble the wood burning tool. This set of wood burning tools provides a total of 20 different pen tips with varying thicknesses. For this project, I've chosen a finer pen tip. This allows for more precise lines when working on small wood slices. However, if you're working on larger pieces of wood, I recommend using a thicker or rounder pen tip for better coverage.
Assembling TEKCHIC Wood Burning Tool:
- First, insert the chosen pen tip into the pen head of the wood burning pen. Then, attach the screw and tighten it securely.
- Next, plug the plug of the wood burning pen into the wood burning machine.
- Turn on the power and adjust the temperature to the appropriate level. (Excessive temperature can cause the wood to burn, while too low temperature may not produce clear wood burning effects. Adjust the temperature based on the type of wood and the requirements of the pen tip to achieve the best results.)
- Now, you're ready to start wood burning!
Note: The wood burning pen gets very hot, so avoid touching the pen tip directly. It's recommended to wear gloves for safety.
Step 4: Start Pyrography


The temperature I'm using is 150℃. It's recommended to adjust different temperatures and test the effects on a wooden board before starting the actual wood burning.
Next, follow the path outlined by the pencil and start wood burning. Keep in mind that the pressure you apply while burning will also affect the depth of the color. If you're unsure, you can practice a bit to get a feel for the effects of different pen tips. Try experimenting with various patterns and textures on a practice board.
Step 5: Complete!


Looking at these exquisite wood burnings, are you also tempted to give it a try? Why not create your own wood burning masterpiece! Cheers, everyone! Wishing you all a Happy Halloween!
Step 6: Display of Past Finished Products


Sure, I'd be happy to share some of the creations made using this wood-burning tool in the past. If you're interested in pyrography, feel free to reach out to me! Let's connect and discuss our shared passion for this art form.

Participated in the
Woodworking Contest


