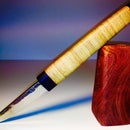
Introduction: Handle Out of Recycled Bamboo
Hello DIY-lovers,
Check out my latest instructable for an easy and stylish bamboo/leather handle.
Cost? Well, like free almost.
Tools? Drumsander and drill,nothing fancy.
Enjoy/Frederik
Check out my latest instructable for an easy and stylish bamboo/leather handle.
Cost? Well, like free almost.
Tools? Drumsander and drill,nothing fancy.
Enjoy/Frederik
Step 1: About Bamboo
Bamboo is a really beautiful and strong material for wood working. The fibers can sometimes cause trouble if you work them recklessly, but it is also the fibers that make the material beautiful.
This handle is sitting on a knife but you could easily adapt it to other things you need to get a handle on! Maybe a door or a a stickshift car or.... ok, so maybe there are not THAT many things which need bamboo handles. But if there is a will, this is the way to do it!
Step 2: Prepare Your Bamboo Scraps
Glue together thin pieces of bamboo with the fibres along the lenght of the piece.
Sand down the shape on the drum sander to get one side rounded(see photo). This piece makes up one half of the front section of the handle.
Sand down the shape on the drum sander to get one side rounded(see photo). This piece makes up one half of the front section of the handle.
Step 3: The Front Section of the Handle
Cut out inner section so the knife's shaft will fit between while allowing the two bamboo pieces to connect. Add a piece of white plastic (Micarta) to become the front of your handle.
I added thin pieces of red plastic (Vulcano fibre) to make nice lines between the section.Optional...
I added thin pieces of red plastic (Vulcano fibre) to make nice lines between the section.Optional...
Step 4: The Back Section of the Handle
This works out pretty much as the front section, but without the narrowed "nose" of the handle.
Step 5: The Mid Leather Section
Cut lots of leather strips and make a suitable hole on the middle. A tool as seem on the picture is useful at this step.
Stack the leather on the shaft adding wood glue between each piece.
Put under pressure and let dry. Oh...and you might want to start with fitting the top piece of the handle first- or things will be complicated(see photo).
Stack the leather on the shaft adding wood glue between each piece.
Put under pressure and let dry. Oh...and you might want to start with fitting the top piece of the handle first- or things will be complicated(see photo).
Step 6: Putting on the End
Glue on the end piece as shown. Use Epoxi glue here.
Step 7: Grinding It!
Grind the handle to the shape you want. A drum sander helps!
Step 8: Finishing Touches!
Sand it with sand paper in steps of 200 from 100 up to a 1000 until you are satisfied with the finish. Add oil and watch the magic transformation!


