

Introduction: Hello Blynk! Interfacing the SPEEEduino With the Blynk App


What is the SPEEEduino?
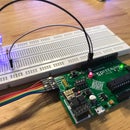
The SPEEEduino is a Wi-Fi enabled microcontroller board based around the Arduino ecosystem, built for educators. The SPEEEduino combines the form factor and the microcontroller of the Arduino with the ESP8266 Wi-Fi SoC, making it a highly configurable and compatible system. It is immediately compatible with the hundreds of libraries that people wrote for the Arduino Uno, as the SPEEEduino shares the same microcontroller unit as the Arduino Uno. This project is done by a group of students from Singapore Polytechnic. We have a total of 3 members in the group: Pan ZiYue, Julian Kang and myself. Our supervisor is Mr Teo Shin Jen. This simple guide is part of the collection of Instructable for the SPEEEduino.
This simple guide is part of the collection of Instructables for the SPEEEduino. In this Instructable, we are going to integrate the Blynk app with the SPEEEduino!
This Instructable will also work with our other product: SSTuino.
Hello Blynk!
Blynk is a Platform with iOS and Android apps to control Arduino, Raspberry Pi and the likes over the Internet. It's a digital dashboard where you can build a graphic interface for your project by simply dragging and dropping widgets. This application is selected due to its ease of integration with the SPEEEduino.
Link: https://www.blynk.cc
Step 1: Let's Get Started!
Things you need:
1. A computer loaded with the Arduino IDE, available here.
2. The SPEEEduino or the SSTuino
3. ESP8266 ESP01 Module
4. USB to Serial Converter (For this instructables, we are going to use the CP2102)
5. An active WiFi connection The ESP8266 does not work with Enterprise Networks, neither could I use it with 5GHz networks.
6. Most importantly, yourself! :)
7. A compatible smartphone with the Blynk app installed, which can be downloaded using the App Store or Google Play.
We will go through the steps to get started with Blynk and how to connect the app to the device!
If you happen to be new to the SPEEEduino or the Arduino environment, please read this Instructables to get started!
Step 2: Getting Started With Blynk!


After you have downloaded the application from the App Store/Google Play, simply launch the app.
After you have launched the app, simply select either "Create New Account" or "Log In".
Following which, you should be able to see the main menu!
Step 3: Creating a New Project With Blynk


After you have reached the main menu in the previous step, simply select "New Project" and a menu would appear.
1. Change the hardware from ESP8266 to Arduino Uno
2. Give your project a name!
3. After which, your autentication token, which is a code will to be sent to your registered address. We will be using that in the Arduino IDE later.
4. When you are in the project, simply swipe to the left and you should be able to open your widget box.
5. Add in a button and select the button. This will open the options for the button
6. Following which, select the pin to be D13. This is to select PIN 13 on the SPEEEduino as the pin we would like to interact with later.
Step 4: Arduino IDE Configuration


After you have set up the app, it is now time to move to the Arduino IDE!
1. Download the Blynk library from here. Select the circled item shown in the picture.
2. As specified from Blynk documentation, the library must be installed manually:
- Download the latest release .zip file. Unzip it.
- You will notice that archive contains several folders and several libraries.
- Copy all these libraries to your_sketchbook_folder of Arduino IDE.
- To find the location of your_sketchbook_folder, go to top menu in Arduino IDE: File -> Preferences (if you are using Mac OS - go to Arduino → Preferences
3. After the library is installed, go to the Example as shown in the picture above (ESP8266_Shield)
4. There will need to be a few tweaks for it to work with this code.
Here is the modified one:
After you have modified the code, simply change the "YourAuthToken", "YourNetwork" and "YourPassword" to your authentication token code, and your wifi SSID and password accordingly. Unfortunately, the ESP8266 does not work with Enterprise networks.
Step 5: Upload the Code... and You Are Done!
Once the code is uploaded to the SPEEEduino, you can run the project in the Blynk app! As you play with the switch you placed from the widget box, the LED on the SPEEEduino (The inbuilt LED) will light on and off respectively.
This Instructable is part of a interesting series where a few projects are done with Blynk. Stay tuned to the next one!
