

Introduction: How to Design a Temple Using SelfCAD


Learn How to Design a Temple Using SelfCAD with the help of this article
Step 1:
How to Design a Temple Using SelfCAD
Designing a temple in 3D involves combining architectural creativity with technical precision, and SelfCAD offers the perfect platform to bring such intricate designs to life. As a user-friendly, browser-based 3D modeling software, SelfCAD provides a wide range of tools that enable both beginners and experienced designers to create detailed and realistic structures. In this article, we will delve into the process of designing a temple using SelfCAD, covering everything from conceptualization to the final touches. By following this guide, you will gain valuable insights into how to utilize SelfCAD's features to construct a temple that is both aesthetically pleasing and structurally sound. Whether you aim to recreate a traditional temple or design a modern interpretation, this step-by-step approach will help you realize your vision with precision and ease.
To access the interactive tutorial to this article, check out https://www.selfcad.com/tutorials/2e3w4g4o442p276x9r242r32704zn6w1z41e
Once you’ve launched the editor;
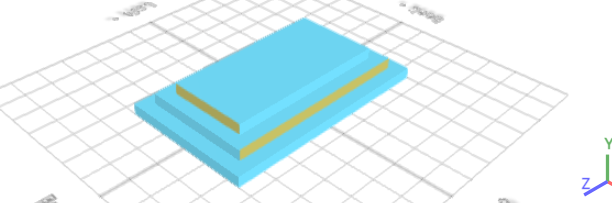
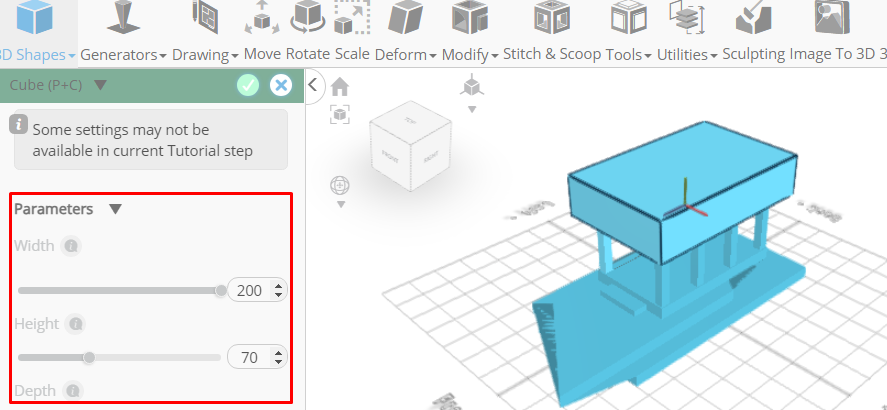
From the 3D shapes category on the toolbar cube; Set width to 250, height to 20, depth to 400
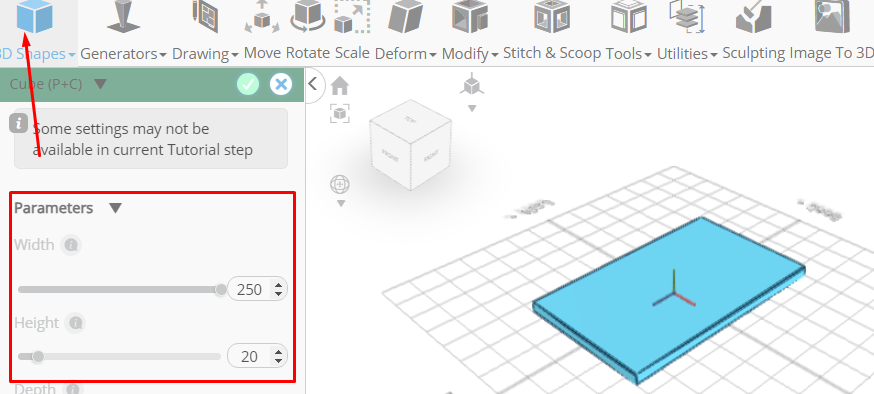
Click to finalize cube
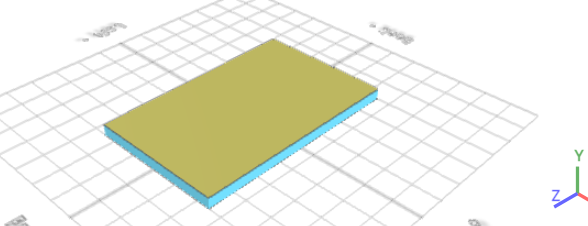
Click to activate face selection; Click on highlighted region to select it
From the modify category on the toolbar choose inset; Set inset amount to 25
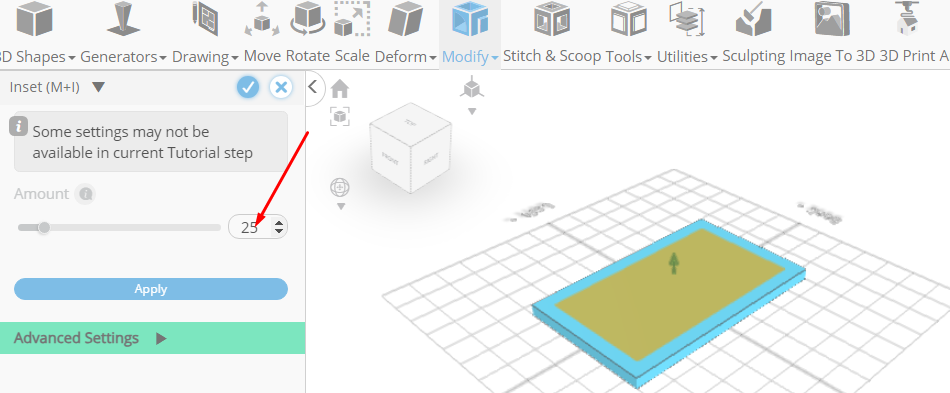
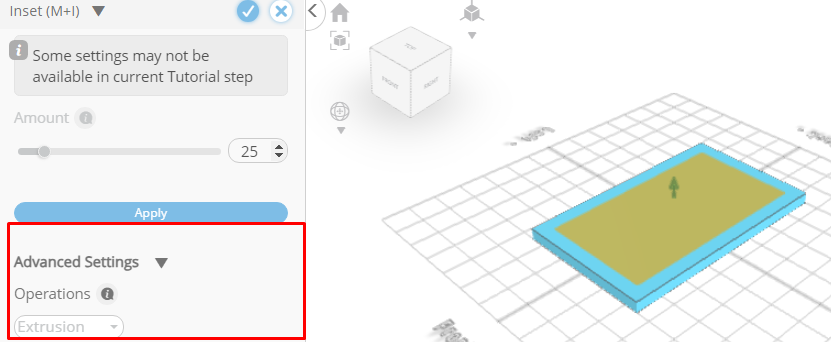
Click add option to add next macro step, Set operation to extrusion, amount to 20
Click to finalize inset
Click on highlighted region to deselect it
Click on highlighted region to select it
Click move on the toolbar; Set z to 140
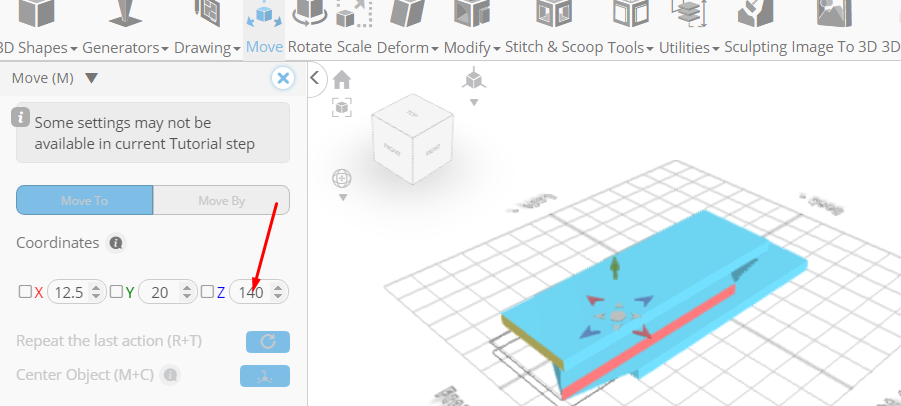
Click on highlighted region to deselect it
Set y to 40, z to 100
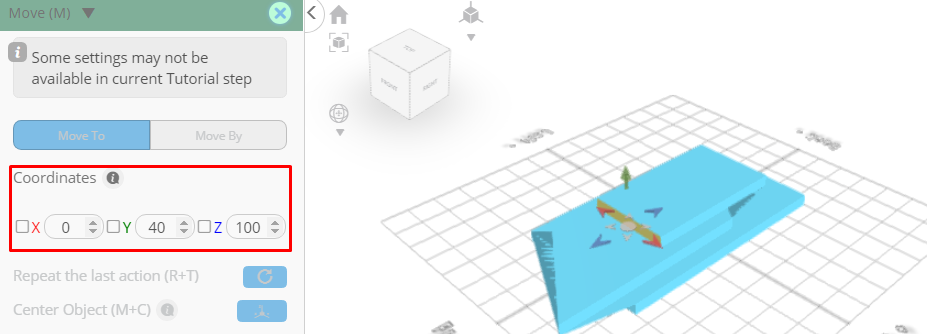
Click ‘x’ to close transformation panel
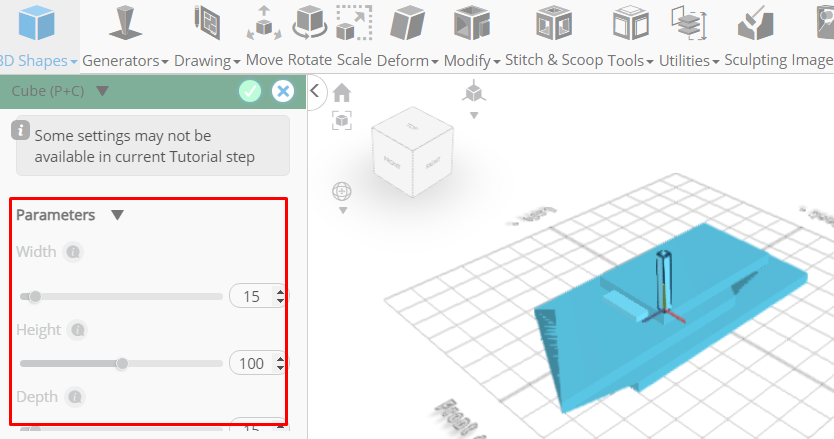
From the 3D shapes category on the toolbar cube; Set width to 150, height to 10, depth to 25, position z to 212.5
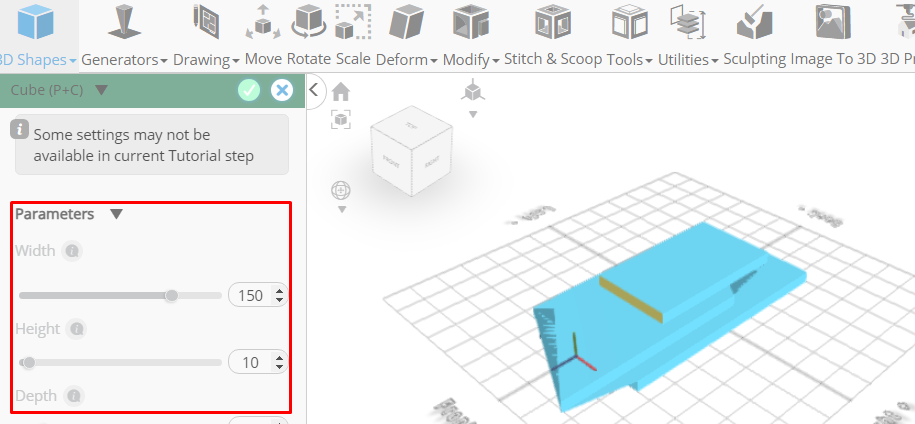
Click to finalize cube
From the tools category on the toolbar choose copy offsets; Set y to 20, z to -50, Click add option to add next macro step, Set operation to scale, x to -35, Set amount of copies to 2
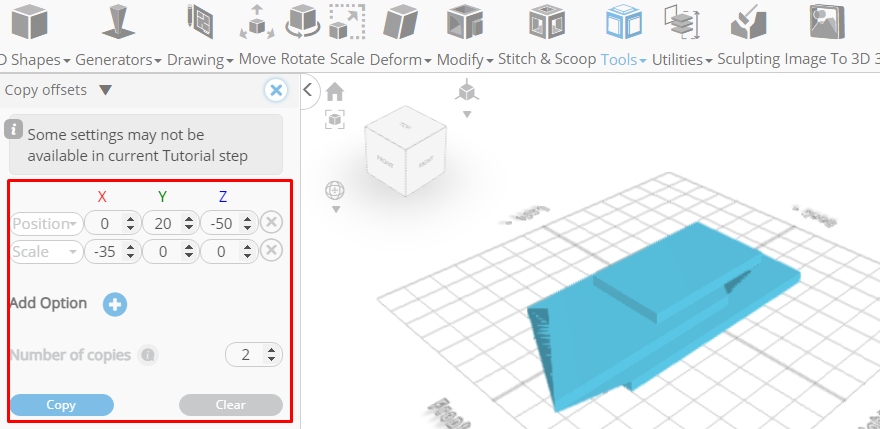
Click copy button to create copies
Click ‘x’ to close copy offsets panel
From the 3D shapes category on the toolbar cube; Set width to 15, depth to 15, position x to 55, position y to 60, position z to 90
Click to finalize cube
From the tools category on the toolbar choose copy offsets; Set z to -77, Set amount of copies to 3, Click copy button to create copies
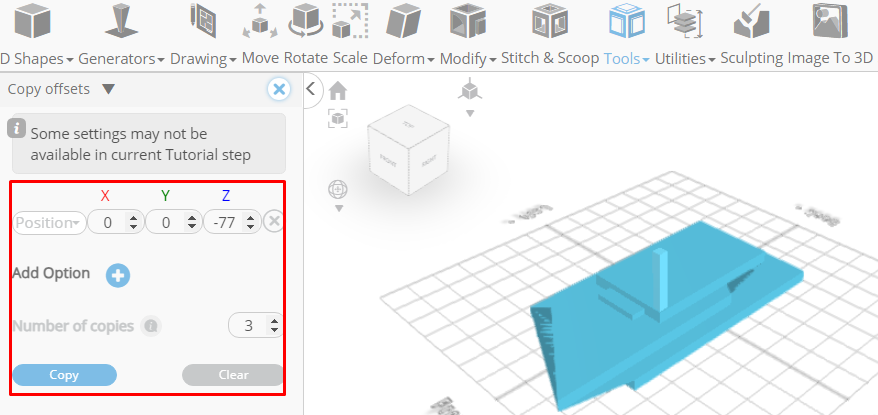
Click ‘x’ to close copy offsets panel
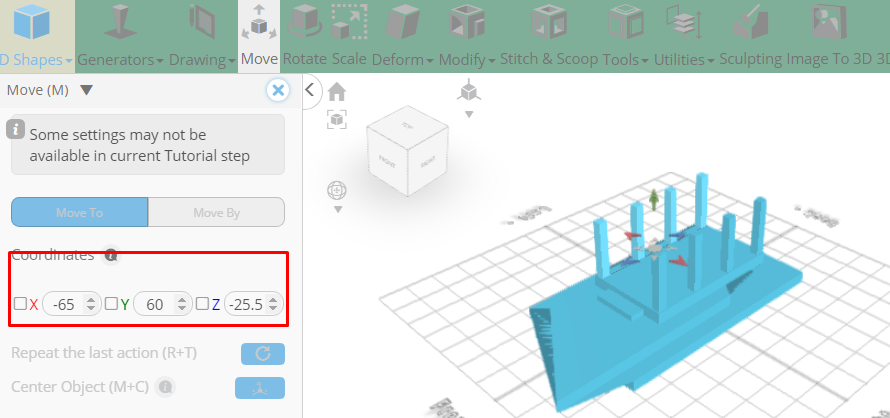
Click copy button to copy selected objects
Click move on the toolbar; Set x to -65
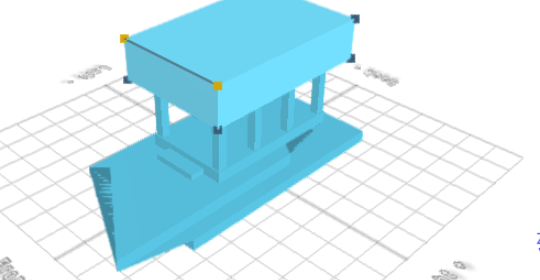
From the 3D shapes category on the toolbar cube; Set width to 200, height to 70, depth to 300, position y to 160, position z to -25
Click to finalize cube
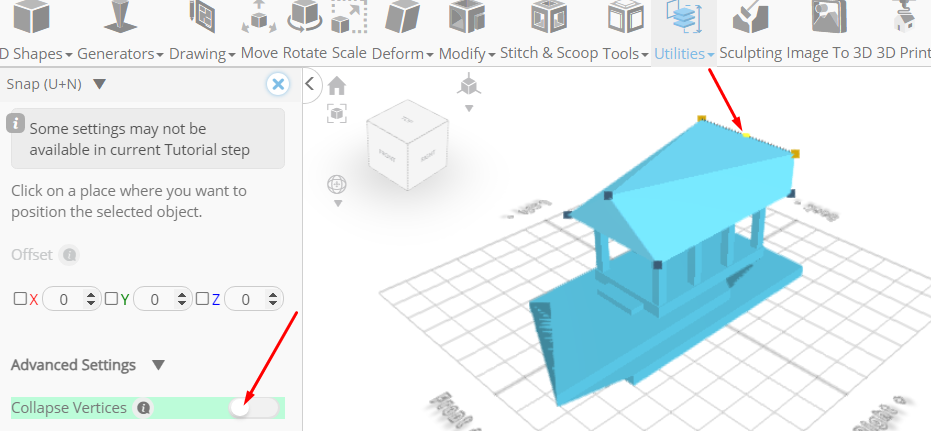
Click to activate vertex selection; Click on highlighted region to select it
From the utilities category on the toolbar choose snap; Set collapse vertices to true, Click on highlighted point to change position of the selected object
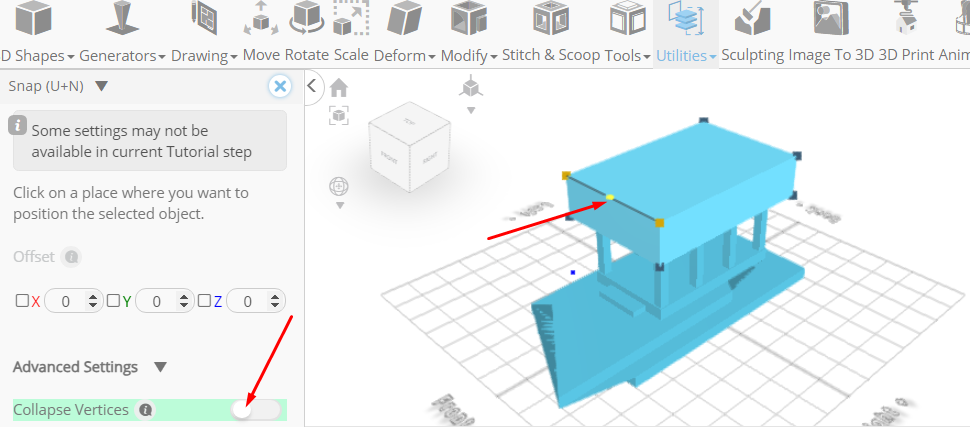
Click ‘x’ to close snap panel
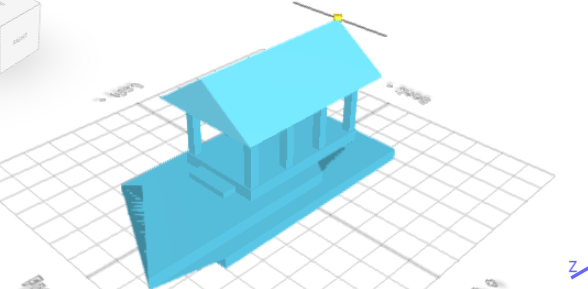
Click on highlighted region to deselect it
Click on highlighted region to select it
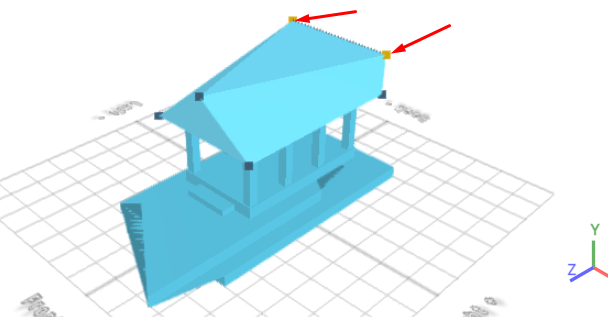
From the utilities category on the toolbar choose snap; Set collapse vertices to true, Click on highlighted point to change position of the selected object
Click ‘x’ to close snap panel
Click on selection cube to turn off region selection
As you continue honing your design skills, remember that SelfCAD offers a wealth of resources to support your learning journey. To deepen your understanding and explore more advanced features, consider checking out the interactive tutorials (https://www.selfcad.com/tutorials) available on the SelfCAD website. The tutorials page provides a treasure trove of guides, tips, and tricks that cater to designers of all levels.
More structured learning experience can also be accessed at the SelfCAD Academy (https://www.selfcad.com/academy/curriculum/), https://www.youtube.com/@3dmodeling101, and 3D Modeling 101 series (https://www.youtube.com/playlist?list=PL74nFNT8yS9DcE1UlUUdiR1wFGv9DDfTB). This comprehensive resource offers in-depth courses taught by industry experts, allowing you to master the intricacies of SelfCAD at your own pace.
