Introduction: How to Make Smart Flood Detection Alarm System Using Raspberry Pi and Particle Argon


Having standard flood sensors are great to prevent massive damage to your home or work place.
But it makes it hard if you're not home to attend the alarm.
Of course you could buy those smart
This flood alarm system detects any liquid and triggers alarm and updates the web page about flood which can be accessed anywhere in the world, whether you're having relaxing vacation or just at work and you want to know about the status of your house.
Supplies
Raspberry pi (I m using model 3 B+) running raspbian
Particle Argon
Grove Water Sensor
Raspi Camera
Buzzer
Jumper wires
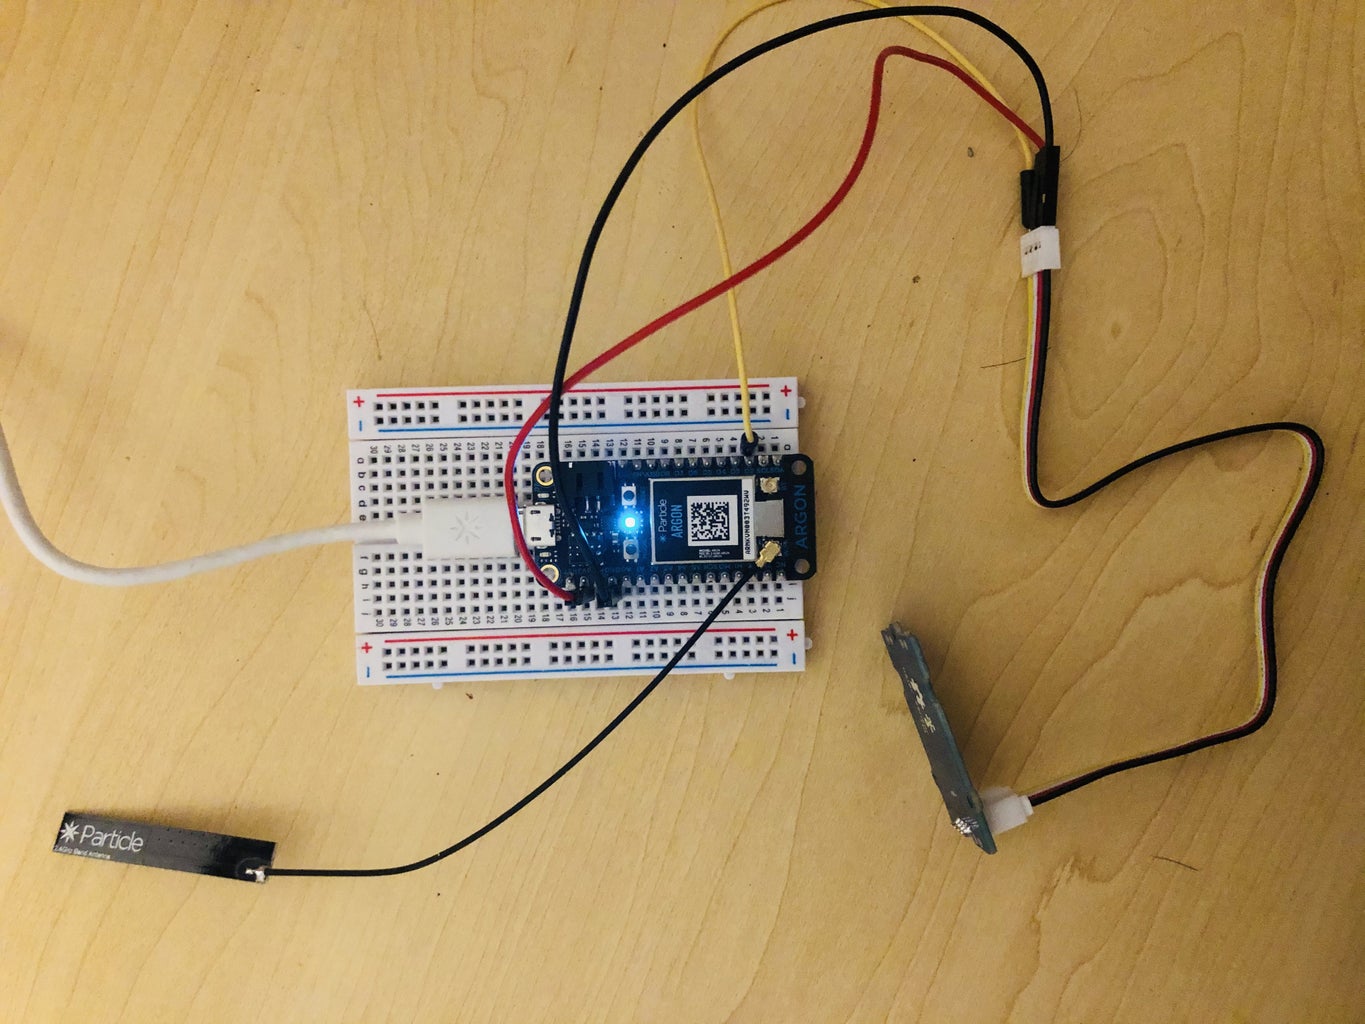
Step 1: Connect Water Sensor to Particle


water sensor has 4 pins, which are GND, VCC, NC and SIG and we are going to use only three of them
I m connecting SIG pin to D2 on Argon.
Now, you can launch Particle Web IDE to write the code and flash to Argon
So we have registered Particle function liquid and defined a variable isFloodPresent, that can be called from Particle Console and obtain the boolean value of isFloodPresent and also call function liquid for mock testing that takes value 1 as input which means true for flood (water) present.
make sure you are able to see that function and variable from Particle Console of your Particle Device.
Attachments

Step 2: Connect Alarm Source to Raspberry

On breadboard you can connect Buzzer to Raspberry's GPIO pin
I have connected smaller end of buzzer to GND( PIN 6) and longer end to pin 7 on raspberry.
Now run the code to see . We will need this python file be running all the time so it can receive the triggers from web server and respond accordingly.
Alternatively you can run this file on startup on your raspberry which you can do by editing /etc/systemd
and this file will be placed in cgi folder of your apache server,
I have made new directory flood-cgi inside /var/www/html/ and placed this .py file which will communicate with my cgi script
Step 3: Configure Apache Server

you can install apache server by typing sudo apt-get install apache2
when it is installed, you can verify by typing hostname -I
and you will get your local IP address and you can head to your browser and should see server running
Step 4: Enable CGI on Apache

you can enable cgi by typing sudo a2enmod cgi
By Default cgi_bin of apache is located in /usr/lib/cgi-bin
this is where you can put your cgi scripts after enabling cgi
to take the effect, you need to restart the apache server
I wanted custom directory for my cgi scripts so I created directory in /var/www/html/ called flood-cgi
to enable this directory I had to make conf file by typing
sudo nano /etc/apache2/conf-available/flood-cgi.conf
and adding commands as shown in screenshot
then enable this directory by typing
var/www/html $ sudo a2enconf flood-cgi
now you can restart your apache server again and all cgi from this folder will be readable by apache after the permission.
Step 5: Set Up the Web Page

For this simple web service, I m using HTML, Javascript, CSS, jquery and ajax.
I have five control labels that are clickable ,
In the event when take photo is clicked from web page, it will trigger the photo button click function and this function looks like this
$("#photobutton").click(function () {
var floodDate = new Date();
var floodImageName = "Flood_IMG_" + floodDate.toLocaleTimeString();
$.ajax({
url: 'flood-cgi/flood_cgi.py',
method: 'post',
data: { name_for_image: floodImageName },
success: function (data) {
alert(data, status)
$("#recentpic").attr("src", "flood-cgi/" + floodImageName + ".jpg");
}
})
});
this will call the flood_cgi.py script to take photo and saves image with custom name generated by current date and time and ajax loads up to the page.
in the event of Alarm , we can use this function
function callAlarm(alarmType) {
$.ajax({
url: 'flood-cgi/alarm.cgi',
method: 'post',
data: { alarm_type: alarmType },
success: function (data) { alert(data)
}, error: function (XMLHttpRequest, textStatus, throwError) { alert(throwError) } });
}
the function callAlarm will be called when buzzer label is clicked,
$("#buzzer").click(function () {
callAlarm("test");
})
below code is when you want to click mock flood i.e. calling the Particle API and call the function and change the liquid value 1 and check the system if the whole is working as expected by conducting a mock flood event
$("#mockFlood").click(function () {
console.log("mock flood has requested");
var floodVal = 1;
$("#signal2").css("font-size", "small");
var varName = "isFloodPresent";
var deviceID = "YOUR DEVICE ID";
var accessToken = "YOUR ACCESS TOKEN";
if (floodVal) {
$.post("https://api.particle.io/v1/devices/" + deviceID + "/liquid?access_token=" + accessToken,
{ liquid: floodVal },
function (data, status) {
if (status == "success") {
alert("Mock Flood has conducted!!!");
} else {
alert("Sorry, there was a problem");
}
});
}
});
These are the main functions you need to make connection with Particle Api and your raspberry so your raspberry pi and particle device Argon can communicate.
note: I wanted to upload all code, but it doesn't allow me to upload .html file
Step 6: Create Script for Raspi Camera
we are creating simple .py to capture image and that will have annotation of current date and time on it.
then we will create cgi script flood_cgi.py so it will be called from web and this will command .py file to take photo.
make sure to start cgi script with #! /usr/bin/env python
and also give apache permission to run these files.
apache server runs on user www-data so once we create the .py or .cgi file, apache needs to be owner of the file
sudo chown pi:www-data flood-cgi.py
and give permission to execute
sudo chmod a+x flood-cgi.py
you will have to do this for all files that needs to run from apache server.
NOTE: exposing your raspberry to internet and giving all these permissions makes your raspberry very vulnerable for security reasons so strict user and permissions should be followed and install firewall like uncomplicated firewall(ufw)