Introduction: Introduction to ArtCAM Premium
In this first lesson, we will take an introductory look at ArtCAM Premium by jumping right in and designing our first Project! After that, we'll take a deeper look at the user-interface before moving on through the class.
Step 1: Flourish Tutorial
The following tutorial is quick introduction into the world of ArtCAM.
With a few simple steps, an image is imported, traced with vectors, and then modelled into a 3D relief.
- OpenArtCAM

The start up page is displayed. The Open option will load in existing ArtCAM Files and import images.
- Click Open

- Navigate to the training Data Files and open Flourish-Image.jpg.
- In the Set Model Size screen, choose the Units as mm or inch and change
the Height as follows
then click OK:
- 300 mm or
- 12 inches

The image opens in ArtCAM in the 3D View.

The images contains multiple shades of black and white and needs to be reduced to allow ArtCAM to quickly trace vector wireframe around the image.
- Open the Bitmap to
Vector function


- Click on the Reduce Colours button.
This form allows the number of colours in the Bitmap to be reduced by entering the required number or moving the slider bar.
- Change the Number of colours to 2 before selecting Apply.
- Click the Create Vectors button

- Close the Bitmap To Vector page with the X
Next hide the image and use the vectors to create a 3D relief.
- Click on the Display Material button to hide the image and show the model in ArtCAM gold relief colour.

- Drag a window with the mouse to select all the vectors.
- Open
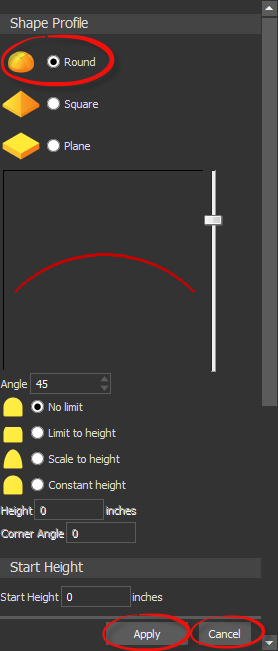
the Shape Editor
function

- Choose the Round as the Shape Profile.
- Then click Apply and Cancel.

The relief is now created and visible in the 3D view.
- Hide
the vectors in the 3D by turning off the Toggle Vector Visibility button

- Rotate the relief by holding down the mouse wheel and moving the mouse.

The tutorial is complete!


