Introduction: Mickey Mouse Disco Pole
This is a simple addition to idea we developed last year in the instructable https://www.instructables.com/id/North-Pole/
The middle school students need a dance prop. Last year we redesign a standard disco ball and instead of hanging it from the ceiling, we mounted on a ball and created a North Pole.
This dance was themed Disney, so the challenge how do we make the disco pole more versatile.
Here's what a little bit of paper and imagination can do.
Step 1: Cover the Black
Using some long construction paper we measure out 170 cm of black paper.
Tape down one side and wrapped around to create a nice secure seam.
Cut to trim, bottom will get a "tree skirt" to cover it and we will tuck in extra paper at the top.
Step 2: Red Pants
We estimated that we wanted the pants to be about one third of the pole. Grab some red paper and wrapped it around the black being sure to line up the seams so there is a consistent backside.
Step 3: Yellow Base
We grab some some yellow paper and cut a line halfway into the paper. Once in the center of the paper we cut a small circle approximately the same size as our pole. No need to be accurate here as we are going to bunch on the base as a skirt to cover up legs on the tree stand.
Step 4: Ears
Keeping it simple, we took a Mickey hat from one of my children. It sits perfectly on top and requires nothing to hold it in place.
Step 5: Finish Product
All the decoration prop needs is a light.
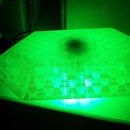
The Mickey Ears creates an interesting Mickey Shadow which adds another element.
The Disco Ball Pole is very easier to re-purpose for any season or event. All it takes is taking the original revolving design and making it your own. Check out the original design on https://www.instructables.com/id/North-Pole/ to figure out how we turned a disco ball into a reusable prop for multiple occasions.


