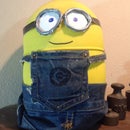
Introduction: Minion Light
Just in time for the Minion Movie, your very own Minion light Instructable!
Step 1: Gather the Parts
The Minion Light is based off of the FrogLeggs Tumbler flashlight that is sold at Lowes and other fine retailers. I really like this light as it has a nice glow and really shines brightly. FrogLeggs did a nice job with the diffuser and it kind of looks like a minion so I decided to put some yellow LEDs into it and see what happens.
Parts
1 FrogLeggs light
5 yellow LEDs (Wide Angle, 5mm Straw Hat)
2 captive nuts
Soldering iron and Solder sucker
Electrical Tape
Step 2: Take Out the LEDs
To open the lamp, unscrew the top plastic piece and the 2nd piece. This will allow you access the circuit board that holds the LEDs. Break out the solder sucker, heat up the solder joint and suck the molten solder away. Once the LED is removed, replace with a 5mm straw hat wide angle LED. At first I tired a regular 5mm LED I had laying around. It was not good for this light as the LEDs are normally too focused and it cast a light spot on the plastic diffuser. The wide angle LEDs are the way to go. The last picture on this page shows the wide angle LED next to a normal 5mm LED that you grew up with.
Step 3: Glue on the Eyes
I glued the eyes on with Shoe Goo and the goggles strap and mouth are made of black electrical tape. Enjoy!


