

Introduction: Modification of Arduino Automatic Pet Feeder With Servo Motor


This project is a modification of the Automatic Arduino Pet Feeder by Techpins. As a student learning Arduino with a beloved canine family member at home, I decided to modify Techpins' project by making a few small changes in the code and fitting the circuits into a more convenient cardboard structure. I used the Arduino Leonardo board for this project. It is very simple and suitable for beginners.
In the original project by Techpins, the automatic pet feeder has a timing system which controls the servo motor to move after a certain amount of time. The time between each feeding can be changed inside the code. For my modified project, I kept this function while adding another set of code that produces three beeping sounds with the buzzer a few seconds before the servo movement. This way, the sound will alert the people living in the house that the dog is about to be fed. I also made some small changes to the turning angle of the servo motor and the feeding time.
Supplies
- Arduino Board (I used Leonardo, but similar ones such as Uno are also compatible)
- Servo motor (shown in the first picture)
- cardboard box, plastic bottle...etc to hold pet food
- small piece of cardboard or similar material
- one toothpick
- tape
- sticky-tack (optional)
- buzzer for Arduino (second picture)
Step 1: Set Up the Code
After installing Arduino IDE, download and open this code (written by Techpins, modified by me): https://create.arduino.cc/editor/ccgiraffearduino/...
Step 2: Circuitry
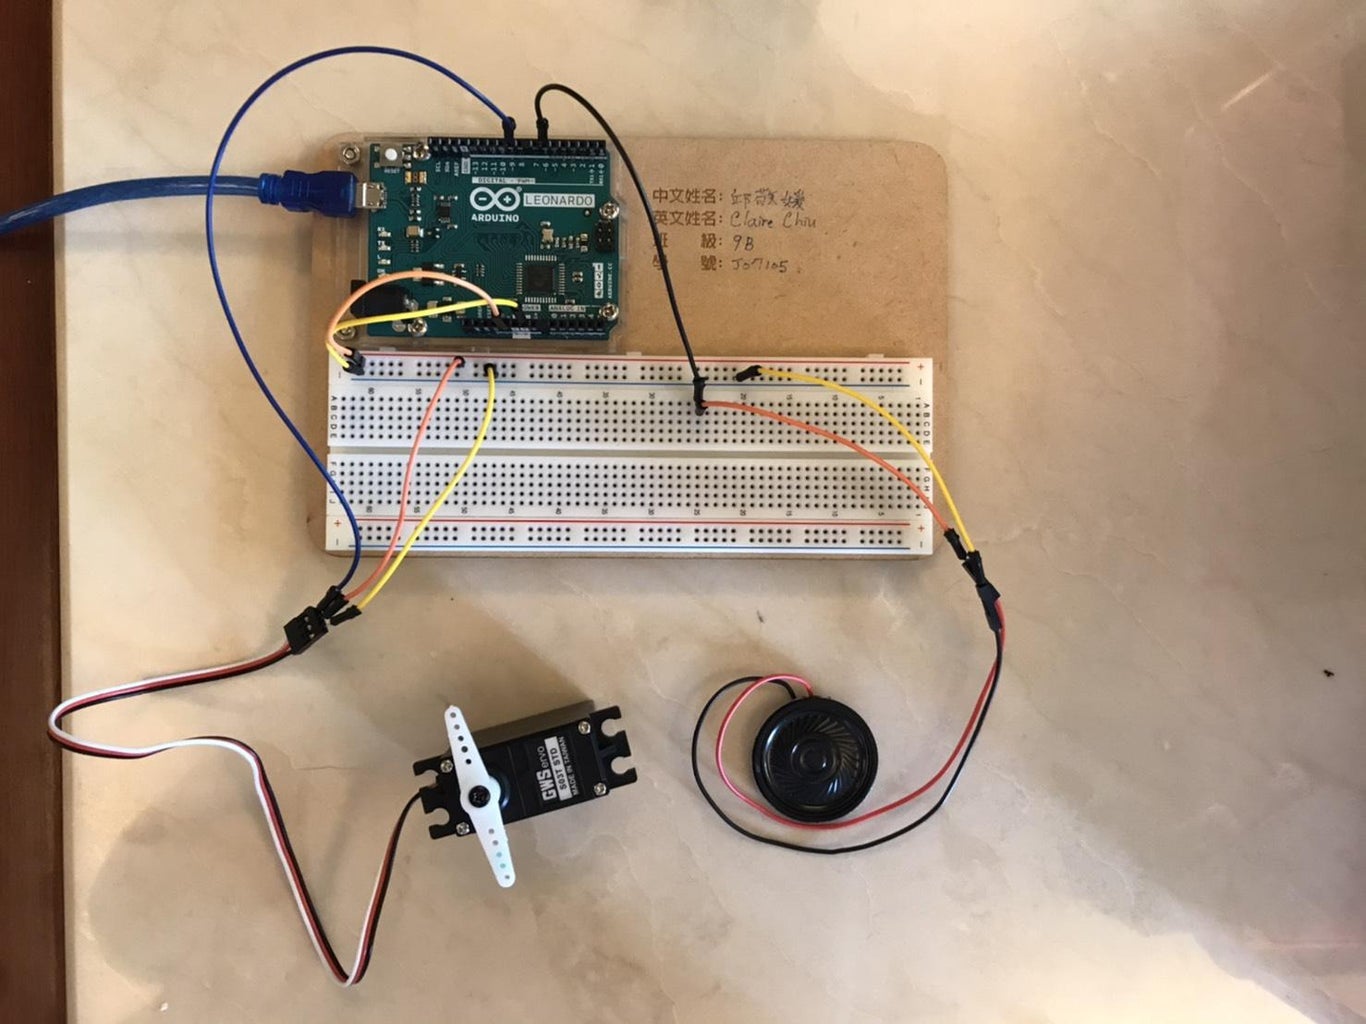
Connect the buzzer to digitalpin 6, and the servo motor to digitalpin 9, as shown in the image. Remember to connect the right wires to the 5V and GND. Use long wires for the servo and buzzer so that later they can stretch out of the box that contains the breadboard.
Step 3: Physical Structure


Upload the code to your Arduino. The time interval between each feeding is preset as 10 seconds. You can change it in the code (look for FEED INTERVAL unsigned long). After each increment of 10 seconds, the buzzer should play a sequence of three notes, then the servo should turn 90 degrees, then turn back. This action is looped and will continue as long as Arduino is connected to a power source.
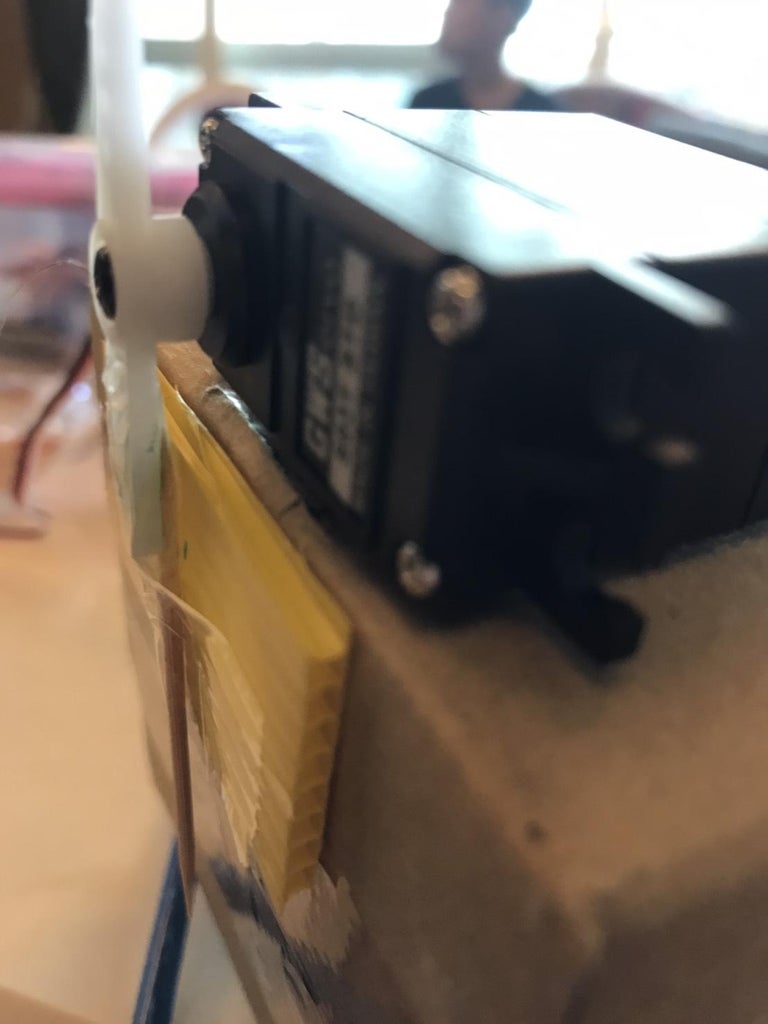
If the Arduino functions correctly, attach the toothpick to the servo motor's arm with tape (if the arm is already long enough, skip this step). Next, tape the small piece of cardboard to the servo arm as shown in the photos.
Find a suitable box or bottle, then attach the servo motor to it, letting the small piece of cardboard cover the opening that will release the pet food. Run the code and see if the servo's movements uncover and cover the opening as desired.
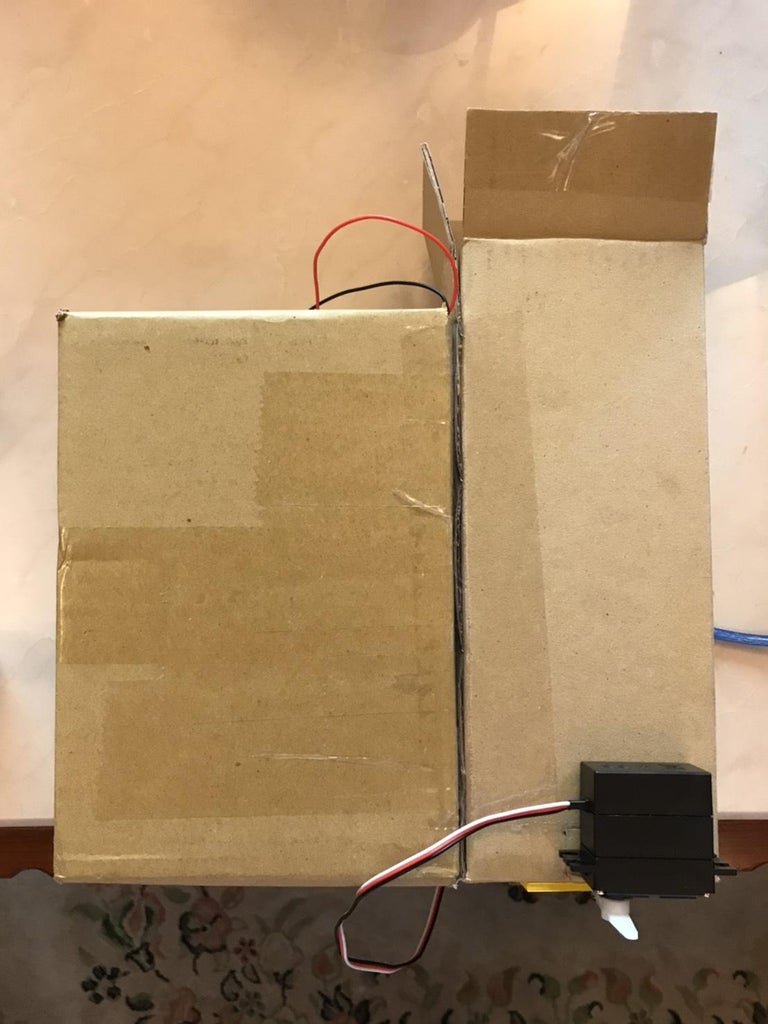
If so, add pet food or other materials to simulate pet food (such as beads) and make sure that the machine functions properly. Finally, put the Arduino breadboard inside a box to cover the circuitry, and attach the box to the container holding pet food. Remember to place the buzzer outside of the box so that its sound won't be muted, and leave a space for the wire for the power source to stretch out of the box. I performed this step with two cardboard boxes, as shown in the photos.
Step 4: Final Test/Completion

You can attach this product to a wall above your pet's food bowl, and see if the machine works for you! Customize the length of time the servo motor opens the feeder, the length of time between feeds...etc, by changing the code and re-uploading. Here's the video of my final product:
Thank you~
