

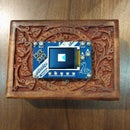
Introduction: Peace Tree - an Internet-responsive String of Lights


The Reach and Teach Peace Tree was designed to ask and hopefully answer the question: "Can a holiday decoration change the world?"
NOTE: In May, 2023, we changed the peace tree response logic to respond to Instagram posts about peace instead of Twitter posts. We have done this for a variety of reasons including Twitter's termination of a free API.
Peter Drucker, a guru of business management, is quoted to have said, "If you can't measure it, you can't change it." The lights on this tree are connected to the Internet and blink in response to people talking about peace on Instagram with the hashtag #peace. The lights will twinkle in a special way when anyone posts on Instagram with the combined hashtags of #peace and #peaceaction. So whenever you are feeling a bit down about the state of the world, you can look at a peace tree and be reminded that there are many people working to make the world a better place.
The hope is to get as many Peace Trees out into the world as possible. Eventually, we hope to have a peace tree at the United Nations.
You can see a live video feed of a Peace Tree at our shop in San Mateo, CA by visiting https://shop.reachandteach.com/reach-and-teach-peace-tree on the web. You can also purchase a pre-assembled and pre-programmed Peace Tree kit on that page. If you have a Peace Tree kit, just plug it in and skip to Step 5 of this instructable.
Supplies
- Adafruit HUZZAH ESP8266 Breakout
- Adafruit CP2104 Friend - USB to Serial Converter
- Adafruit Soft Flexible Wire NeoPixel Strand - 50 NeoPixels
- 220uF electrolytic capacitor
- USB to micro USB data cable (for programming the CP2104)
- External 5V supply (which can be created by cutting a USB cable at one end and using the red and black leads)
Step 1: Prepare Hardware (requires Some Soldering)

Solder headers for Huzzah ESP8266 (included with the product) to allow it to be plugged into a breadboard. Notice how the header for the FTDI pins on the Huzzah is mounted to make it easy and possible for the FTDI serial interface to be easily attached to program the Huzzah.
Solder the header provided with the FTDI card as shown so that the card can be easily plugged into the Huzzah when programming it.
Step 2: Wire Up the Hardware


The following connections need to be made to the Huzzah ESP8266:
- The 220 uF capacitor should be connected between V+ and Gnd (mind the polarity on the capacitor)
- Connect the power (red wire), DIN signal (middle wire), and ground wire of the Neopixel strand to V+, pin 13, and Gnd of the Huzzah.(Note: It is recommended to attach the Neopixel strand with the power off to prevent damage to the Neopixel strand.)
- Wire the Huzzah's V+ and Gnd to a 5V supply source. An easy voltage source can be obtained by cutting off one connector of a USB cable and wiring the red colored wire to V+ and the black colored wire to Gnd. You can now power the Huzzah by plugging the USB cable into any 5V USB adapter.
I've attached photos of how I placed these elements on a 170 point breadboard.
Attach the Adafruit CP2104 USB to Serial Converter to the Huzzah ESP8266. Attach a micro USB data cable between the CP2104 and a laptop running an Arduino IDE. The external 5V supply should be turned OFF at this point since power will be supplied through the CP2104's cable. Again, the CP2104 is only used for programming the Huzzah. Once the Huzzah is programmed, this board will be removed. So, if you are making multiple Peace Trees or other projects using a Huzzah, you only need one CP2104.
Step 3: Setup a Free Account and Get a Key at Io.adafruit.com

The Peace Tree uses MQTT which is a low overhead, lightweight protocol for exchanging data in Internet on Things (IOT) applications. The Peace Tree feed resides at io.adafruit.com and is publicly available at https://io.adafruit.com/reachandteach/feeds/peacetree. You will however still need to establish a free io.adafruit.com account of your own for your Peace Tree to be able to access this feed. Once you have created your account, signing into io.adafruit.com should give you a menu bar that includes an item called "My Key". Copy the key to your clipboard so you have this key available for the next step.
Step 4: Load the Peace Tree Code on the Huzzah


If you haven't loaded code into the Huzzah ESP8266 previously, check out https://learn.adafruit.com/adafruit-huzzah-esp8266-breakout/using-arduino-ide for instructions on how to do this. In particular, you will need to install the Huzzah library. You will also need the following libraries: DNSServer, ESP8266WebServer, WiFi manager, and adafruit_mqtt and adafruit_mqtt_client.
Now find the distribution code for the Peace Tree at: https://github.com/reachandteach1/peacetree , unzip the repository and open peacetree_dist.ino .
Before you can compile and load the code, you will need to modify the following lines of code:
String aio_username = "yourUsername";
String aio_key = "yourAIOkey";
with the username and key you established in the previous step at io.adafruit.com
After you make these changes and save your code, you are now ready to compile and upload the code to the Huzzah. Make sure you have selected the correct board (Adafruit Feather HUZZAH ESP8266) and correct port number for the USB cable you are using to connect between your laptop and the Huzzah (this should be auto-detected but you will need to explicitly select the port.)
To load the code put the Huzzah into bootload mode:
- Hold down the GPIO0 button, the red LED will be lit.
- While holding down GPIO0, click the RESET button
- Release RESET, then release GPIO0
- When you release the RESET button, the red LED will be lit dimly, this means it's ready to bootload
Click Upload. After the code is uploaded, remove the CP2104 board from the Huzzah, turn on your external 5V supply which is connected between V+ and ground on the Huzzah, and click the RESET button again.
Step 5: Connect the Peace Tree to the Internet


Finally, you will need to configure the WiFi network access to your network.
After applying power to the Peace Tree, you should see a network connection called BobbleConnectAP on your phone or laptop. Connect to that connection with the password "password". Your browser should automatically connect to a configuration screen. If not, open your browser and connect to 192.168.4.1. Click configure WiFi, scan for your own WiFi network, and enter your network's password. Your Peace Tree should produce a brief pattern of red lights followed by green lights. That should be all you need to do.
The Peace Tree should start blinking in less than 5 minutes, but if you are impatient you can navigate your browser to http://www.reachandteach.com/peacetree144.php .
Step 6: I Hope You Enjoy Your Peace Tree!


The Peace Tree data feed is updated every 3 minutes. The color of the lights indicate the number of #peace tagged Instagram posts made during that update period:
- red: 1 to 9 posts
- green: 10 to 19 posts
- blue: 20 to 29 posts
- aqua: 30 to 34 posts
- yellow: 35 or more posts
You can also "feed" the Peace Tree by using your Instagram account and posting an image with the description: #peaceaction (your thought or meditation for peace) #peace which will cause all Peace Trees everywhere to blink in a more festive way.
I hope you build and enjoy your Peace Tree and find it inspiring. Please let me know your thoughts for ways to improve the Peace Tree. Also, please consider sharing a photo of your Peace Tree with me. Just a final reminder that you can view a live cam feed of the Peace Tree at our shop in San Mateo at: https://shop.reachandteach.com/reach-and-teach-peace-tree


