Introduction: Powered Rising Shelf for a Workbench / Outfeed Table
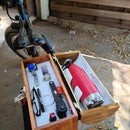
Workbench space is at a premium in my workshop. My outfeed table for my Unisaw doubles as my main workbench. As such it always has an assortment of tools and parts scattered all over it. I wanted a place to quickly put my tools like cordless drills, Impact driver and Drill index etc. so I could use the table for outfeed from my table saw. So I build this shelf with a linear actuator to raise and lower it.
Supplies
Outfeed / workbench motorized lifting shelf parts and tools list.
8 one meter 2020 T slot Aluminum Extrusions
2 48" 2040 T slot extrusions
20mm T slot extrusion corner brackets
1 20" Stroke Linear Actuator 900N/225LBS Pound Max Lift Output 12V Volt DC
1 DPDT 6 Pins 3 Position ON/Off/ON Black Rocker Toggle Switch
2 pieces of 3/4 plywood for the shelves
4 20" full extension drawer slides
Corner brackets to brace drawer slides
14 gauge stranded wire
12 volt power supply
2 2 pin wire connectors #18 gauge
Shrink tubing for sldered wire
8 #12 x 1.25 flat head machine screws
#8 x 1" trim head screws
Tools Needed
Chop saw with aluminum cutting blade
Skill saw in lieu of having a CNC machine to cut plywood
12-24 tap
Drills
Drill press (could be done with a hand drill)
impact driver with bits (could be done with a screw driver)
crescent wrench
soldering iron
Step 1:
Strip your existing table/bench of its plywood top. Then cut a square hole in it to accommodate your shelf, (side mounted) drawer slides and a clearance allowance for front and back.
Step 2:
Build your shelf, I used 2020mm and 4020mm T slot extrusion to buld the frame and filled in top and bottom with 3/4" AC plywood. I also added a layer of 3/16" Masonite as a wear surface on the bench and made the hole and top lage enough to cover the gap between the shelf and top when the shelf is down.
Step 3:
I spent some time adjusting the drawer slides and reinforcing them.
Step 4:
Check out the video for details in the process. There is a lot of thought and planning that goes into all my projects.. It mostly happens late at night laying in bed. Then I can't wait to wake up in the morning and get down to my work shop.I hope you enjoy watching this video as much I I enjoyed making it.
-In the shop with Scott.


