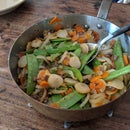
Introduction: Powerful Kimchi
Kimchi is a traditional baanchan (Korean side dish), as well as a crucial ingredient in many dishes. It's strong smell can clear a room, but its spicy-tangy flavor will haunt your dreams until you get more.
The specific sour flavor of this dish is the result of lactobacillium bacteria, which is also used in the creation of yogurt, fermented pickles, sourkrout, and hot sauce. Because of this one of most important parts of making kimchi is making an enviroment where the wanted bacteria can thrive, and ensuring the extermination of other organism. Because of this it is very important to sanitize all your equipment with hot water and soap.
Because this is a fermented product, it takes a couple of days to produce, and requires a relatively constant temperature, ideally around 60 degrees. Higher temperatures are not a problem, but will cause your fermentation to go faster.
Step 1: Gather Your Ingredients
There are a lot of different ways to make kimchi which result in a lot of different textures and flavor profiles The version covered in this recipe is very minimal ingredient-wise, but is none the less delicious for it.
This is a very large batch, so just scale everything to personal preference and amount of cabbage/storage you have.
Ingredients
- 2 medium sized napa-cabbages (green cabbages work as well)
- 2-5 onions
- 2 stalks of green onion
- Rice/rice water
- 4-8 cloves of garlic
- Sesame seeds
- Shrimp paste/fermented shrimp/saeu-jeot
- Gochujang (korean fermented pepper paste
- Gochugaru
- Non-iodized salt
- sugar
- A large non-metal container that can be covered
Optional additions
- Daikon (cut into match-sticks)
- Bok-choy
- Carrots
- Basically anything else that sounds good
Step 2: Slice Your Cabbage
Cut the cabbage into quarters length-wise, and then into strips in the other direction.
Put it in any non metal container/bowl large enough to contain all the cabbage, and salt it like there is no tomorrow. Press the salt into the cabbage and try to spread the salt throughout.
This step creates a hypertonic solution which both kills the unwanted yeast and bacteria and drains the cabbage cells of liquid, producing a crunchier end result.
Step 3: Let the Cabbage Sit
Once all of the cabbage is heavily salted and thoroughly mixed, add enough water to completely cover it, weigh it down so it stays under the water, and leave it while you prepare the other ingredients.
It does not need to be in your fermentation container, but it was the only container large enough available to me at the time.
Step 4: Rice Water
This step is not 100% necessary, but it will speed up your ferment and is traditional.
Put some rice in water and move it around until the water is opaque and full of gluten. Once this is done remove the rice. If you are making rice and are planning on making kimchi soon you can conserve the water you use to rinse the rice for this step.
Step 5: Slice and Mix the Vegitables and Spices
Mince the garlic small to release the most Allicin, which will provide the strongest flavor.
The way you cut your onions is up to you, but it's important to keep in mind that everything will get smaller and wilt during fermentation, so thick slices will provide a sturdier end structure.
Mix everything together with around 3-4 tablespoons of gochujang and 3 tablespoons of gochugaru (adjust according to spice preference). Add 4 tablespoons of your shrimp product and make sure the smell does not put you off the final product.
Add the rice water, which helps feed the bacteria, as well as around a teaspoon of sugar for the same reason.
Step 6: (Optional) Toast Your Sesame Seeds
I personally prefer the deeper nut flavor of toasted sesame seeds, but this is up to personal preference.
If you would like to toast them, put about a tablespoon in a pan on medium high and quickly stir them until they smell delicious.
Mix the seeds into the rest of the vegitables and seasonings.
Step 7: Rinse and Mix in the Cabbage
Wash and drain the cabbage 3 times to ensure you don't overdose on salt, and then mix it in with everything else.
Step 8: Admire Your Work
Place everything in your sanitized container and accept the new member of your family into your heart.
Make sure the top of the kimchi is covered to not let any bacteria in, but if the container is sealed you must remember to pop the top at least once a day to prevent an explosive event.
Keep it in a dark place, and taste it after a day or two. In colder climates you can ferment the kimchi for up to 12 days for really sour stuff, but once it reaches your preferred flavor, just stick it in the fridge and enjoy.
Step 9: Activity Monitoring
After about a day you should start seeing bubbles form in your kimchi, which means the bacteria is doing its work.
If it is not bubbling after a good two days (longer if cold), the kimchi is probably not safe to eat, and you should try again.


