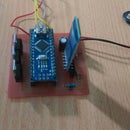
Introduction: RF Transmitter and Receiver
In this project, I will use RF modules with Pic 16f628a. It will be a short tutorial about rf. After you learn ho rf modules communicate with each other you can use these modules with pic microcontroller, ardunio or any microcontroller. I controlled RGB LEDs but If you can control many thing motors or relays.
Step 1: Short RF Lesson
What is RF?
In short term, radio frequency (RF) refers to the rate of oscillation of electromagnetic radio waves in the range of 3 kHz to 300 GHz, as well as the alternating currents carrying the radio signals.
How does it work?
We need two modules which are transmitter and receiver. Our control our data 1 and 0(we use the microcontroller in this project) and transmitter send these data in Seri way in radio waves. After ıt started broadcasting, receiver collect these radio waves and it gives as 1 and 0 again.
Why do we use it?
If we want to communicate some devices without any wire we RF modules is one of the ways.
Step 2: Circuit Schemas
In the first circuit is the transmitter second is receiver.I controlled 3 RGB led by this modules.
Step 3: Component List
Transmitter Part:
- pic16f628a
- 18pin dip socket
- 1n4001 diode
- lm7805
- 220 uf 16v electrolytic cap
- 1 uf cap
- 330ohm ^1
- 4.7k ohm ^1
Rf transmitter (433 MHZ)
- 10k ohm ^4
- 4 push button
- 5mm led
- male header
Receiver Part:
First eight is the same
9.RF receiver (433 MHZ)
10. 5mm RGB led ^3
11.led
12male header
Note:RF modules must be same frequency.
Rf modules link of rf modules
Step 4: Printed Circuit Board
I love using PCB instead of prototype PCB(including many holes), In my opinion, this way is more healthy for circuits. After designing the circuits I printed on the boards but there are some tiny nets so I needed to fix some nets. After fixing operations they go to in acid. Then they are ready for next step.
Step 5: Solder Mask !
Its optional part.
Solder mark has some difficulties but otherwise, it has some benefits.Your PCB can be healthy very long time and short circuit risks become increases.You can find many resources about how can you make solder mask at home.After the solder mask operations, PCB's go drilling operations.
Step 6: Soldering
At last, we soldering the components on PCB. My advice you should solder dip socket first but attach the pics and rf modules after soldering. You should be very careful about short circuits. Besides, rf modules can be effected static electric very easily.
Step 7: Codding
I used PIC CCS for programming. If you have any question about anything just ask it, please.
First, we choose the baudrate you should look that for rf modules datasheet then we define transmitter an receiver pins. Parity is about our data is odd or even but we don't use it in this project, at last, we choose 1 our stop bit.
Preamble Function:
If we try to use the same many RF modules in the same area it will be some provision. We prevent this problem with preamble function. We define an identification for our modules and sent it receiver module.
We can see this function on the oscilloscope.First two pic belong transmitter and second modules belong receiver circuit
Step 8: RUN!
In this project main idea was RF communication thus I did not use qualification pic or oscillator. If you want to obtain better communication you should use high-frequency crystal oscillator and high-frequency RF modules. You should use an antenna.


