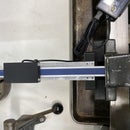
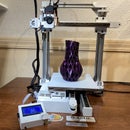
Introduction: Raspberry Pi Camera Module V2 Case and Rotating Mount
I've run OctPrint on a Raspberry Pi for over a year now and most of the time I love it. It allows me to control my printer remotely from a web browser and more importantly it allows me to monitor and take videos of my prints.
I've tried several Web cameras now and have ultimately landed on Camera Module V2, that connects directly to the Raspberry Pi.
When you buy it, it comes bare bones. it has a 6 inch ribbon cable and a little circuit board with the camera on it.
First thing I did was order an extended ribbon camera 2 meters long so I have some more range of movement.
Since all my printers are based on aluminum extrusion (mostly 3030 and 1010) I've designed a camera case with mount that can be attached either vertically or horizontally.
It can also turn on both it's axis so it has a wide range for pointing it in different directions.
The case is available on eBay.com at https://www.ebay.com/itm/263834794011
Also, in anticipation of the request for the allround popular 2020 I've added that version as well.
If you want to skip the purchase and create it yourself, here it goes:
Step 1: Parts Needed
The following components are part of this build. It's assumed you are starting with a RaspBerry Pi 3 and
Raspberry Pi 3 Model B Motherboard. Amazon: $39.00 https://amzn.to/2A73lbY
Raspberry Pi Camera Module V2 - 8 Megapixel,1080p. Amazon: $25.58 https://amzn.to/2mDxZQq
Extended ribbon cable for the Camera Module. Amazon $6.99 https://amzn.to/2JQGCAz
M3 35mm hex socket screw 1x (could only find these as part of a kit). Amazon: $12.99 https://amzn.to/2NCg0oY
M3 15mm hex socket screw 1x. Amazon (pack of 100): $9.79 https://amzn.to/2ObatH4
M3 10mm hex socket screw 1x. Amazon (pack of 100): $8.95 https://amzn.to/2NH1v3j
M3 hex nut 1x. Amazon $6.12 https://amzn.to/2LnO23K
or you can get all these in a combo pack (M3x 4mm 5mm 6mm 8mm 10mm 12mm 15mm 18mm, Nut Hex M3), Amazon $9.99 https://amzn.to/2uMJ7zf (less redundancy).
M3 3030 t-nut (1x) in case of a 3030 mount.Amazon $4.35 https://amzn.to/2OcZEEx
M3 2020 t-nut (1x) in case of 2020 (or 1010 mount) $8.99 https://amzn.to/2OeEVQB
STL parts required for printing:
2020 V-slot $9.00 https://www.cgtrader.com/3d-print-models/gadgets/...
3030 $9.00 https://www.cgtrader.com/3d-print-models/gadgets/o...
Step 2: Assembly: the Case
The pictures above paint a pretty good picture but here it goes.
First, place the raspberry Pi Camera Module inside the case with the lens fitting inside the hole in the front plate. There are 4 extrusions that will fit the 4 holes in the camera circuit board.
The lid of the case in designed to keep the camera in place inside the case so no screws required here. Insert the lid (at an angle) over the round extrusions at the bottom of the case and click the lid in place to close the case and secure the camera in place. There is little gap for opening the case (if needed).
Step 3: Assembly: Vertical Mount
For the vertical mount, you can choose either the long or short swivel arm. I created a shorter version for the vertical mount as it can freely turn around the extrusion (the camera case doesn't get in the way).
Insert the hex nut into the hex receptacle in vertical mount bracket
Insert the 10mm M3 hex socket screw into the screw knob (tight fit) as far as you can but once the socket enter the knob don't turn too hard once it's all in.
Insert the screw (which knob) through the swivel and bracket and tighten
Insert the 15mm M3 hex socket screw into the screw knob (tight fit) as far as you can but once the socket enter the knob don't turn too hard once it's all in.
Insert this 15mm screw with knob through the bracket and attach the t-nut.
Step 4: Assembly: Horizontal Mount
For the horizontal mount I created the longer version of the swivel arm as it needs more room to freely turn along extrusion (with a short arm the case might limit the angle of freedom).
Insert the swivel arm inside the horseshoe shaped bracket till the holes meet.
Insert the 15mm M3 hex socket screw into the screw knob (tight fit) as far as you can but once the socket enter the knob don't turn too hard once it's all in.
Insert this 15mm screw with knob through the bracket and attach the t-nut.
Step 5: Assembly: Add Mount to Case
Insert a 35mm M3 Hex socket nut into a knob and screw it all the way in where the socket inside the knob can go no further.
Regardless of whether you use the horizontal or vertical mount, insert the long tubular cylinder between two cylindrical extrusions on the case.
Insert a hex nut into the receptacle on the case and push the 35mm screw with know through the other side (turn it through if you get resistance) until you screw is all the way through the nut.
Step 6: Mount the Camera to Your Extrusion
Horizontal Mount assembly
Vertical Mount Assembly
T-nuts are designed to automatically align with the extrusion when tightened so go ahead and find a good place to add you camera and turn the knob connected to the t-nut.
Have fun monitoring or taking video of your 3D prints.


