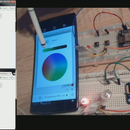
Introduction: Send Data From ESP to the WebPage With Minimal Effort
It's very common that you need to display something to a webpage from your ESP device. There are several ways to do that. In this tutorial, I will show you the simplest one (in my opinion). It requires 10 minutes of your time to get your measurements onto the webpage.
I've used remoteMe.org In this tutorial, briefly learn how to send and display data from ESP (I used WEMOS D1 pro version, but it will be the same for other types of ESP ) on the website. In the example, I used the ultrasonic distance sensor and the measurement from it will be displayed on the website.
Step 1: Assumptions
- we will use the mechanism of variables
- the integer variable will be set by ESP
- the same variable will be displayed on the website in the form of a gauge
- we can display the page on the website opened on the mobile browser by scanning the QR code
Step 2: Connections
- VCC – 5v
- GND – GND
- Trig –throught level converter or resistors set- D3
- Echo –throught level converter or resistors set- D2
Step 3: Add Variable
You need an account at https://app.remoteme.org in sign up tab You can create your account for free
After creating the account, go to the Variables tab and on the right on the top “Add” fill it like in the screen
More about variables here
After this step, we have our variable in the system, which will be update by ESP and displayed on the web page.
Step 4: Adding Website
To add a website.
Go to the “Devices”, “New Device” tab and then “New Web Page”: and fill like in the screen.
More About webPages here
Step 5: Add Gauge
Now we will add a component to display the variable. Open the web page bar, click on index.html, then “Edit With wizard”, and “Insert Component”. fill like in the screen
Choosing the “1” magnifier we choose our variable “distance” – because we want the status of this variable to display our component. And click insert
More about code generation here
Step 6: Checking Website
We can open our website in the new tab (index.html open in new tab) we got what in on the screen:
Of course, gauge shows 0 – the default value of the variable. In order for the gauge to move, we have to change our variable by the ESP code.
Step 7: Add ESP Device
Before upload sketch make Sure You have install all required libraries: https://remoteme.org/network-devices/
To start with, we need to add our device in RemoteMe: Go to the “Devices”, “New Device” tab and then “New Network device”. Filled lik in the screen
Fields Described here
Step 8: Generate Arduino Sketch
It’s time to generate the code for arduino, click “burger menu” and “Code generator wizard” (screen)
In the first step, we mark our variable, in the second the parameters of our Wifi network, in the next steps we do not change anything. In the last step, click “View” to display our code, which should be pasted to the Arduino IDE
Before upload Make sure You've include needed libraries described here
Step 9: Change the Code
After pastes the code its time to modify it to read Distance form the sensor:
asdasd#define WIFI_NAME "ania24"
#define WIFI_PASSWORD "xxxxxx" #define DEVICE_ID 11 #define DEVICE_NAME "esp" #define TOKEN "~155_D49LDj@aBFhdffK." #include <RemoteMe.h>#include <RemoteMeSocketConnector.h>
#include <ESP8266WiFi.h>
#define TRIGGER D3 //added #define ECHO D2 //added RemoteMe& remoteMe = RemoteMe::getInstance(TOKEN, DEVICE_ID); //*************** CODE FOR CONFORTABLE VARIABLE SET ********************* inline void setDistance(int32_t i) {remoteMe.getVariables()->setInteger("distance", i); } //*************** IMPLEMENT FUNCTIONS BELOW ********************* void setup() { WiFi.begin(WIFI_NAME, WIFI_PASSWORD); while (WiFi.status() != WL_CONNECTED) { delay(100); } remoteMe.setConnector(new RemoteMeSocketConnector()); remoteMe.sendRegisterDeviceMessage(DEVICE_NAME); pinMode(TRIGGER, OUTPUT); //added pinMode(ECHO, INPUT); //added } void loop() { remoteMe.loop(); //added static long time=millis(); if (time+700<millis()){//cannot send more frequent since it will be block
time=millis(); setDistance(getDistance()); } // END added } //added int32_t getDistance(){ digitalWrite(TRIGGER, LOW); delayMicroseconds(2); digitalWrite(TRIGGER, HIGH); delayMicroseconds(10); digitalWrite(TRIGGER, LOW); long duration = pulseIn(ECHO, HIGH); return (duration/2) / 29.09; }
Added code lines marked by //added:
better code, and code analyze You can find here since instructables codedisplay is not very good
Step 10: Smartphone
To open the website it is best to scan the QR code available after clicking index.html -> get anymous link -> “green QR code icon”. This will allow us to open and automatically log in to our account, more here
Step 11: Summary
In this article I showed the easiest way to display the measurement on a website, of course variables can be more, and we can display them on different components, and even add your own.
I encourage you to read the articles about the techniques used, the links of which I put in the article. To be up to date You can follow FB page of the project


