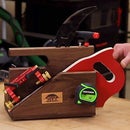
Introduction: Small Box Sled
What is a "Small Box Sled"? A purpose-built table saw sled designed to cut small parts while keeping your fingers out of the path of the blade. This sled will be used for mitered corners, straight cuts, and for cutting splines in those mitered corners for reinforcement as well as aesthetics.
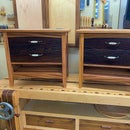
Small boxes are fun easy builds that really end up being useful around the house or as gifts to others. Everything from a place to toss your keys when you come through the door to specialty storage boxes to urns.
This instructable is intended to show you the process of making this multipurpose sled as well as the functionality of the sled.
Step 1: Tools and Materials
Tools:
- Table Saw - Dado Stack
- Miter Saw
- Drill - Counter Sink, Drill Bits
- Hacksaw
Materials:
- 3/4" Plywood
- 1/4" Plywood
- Screws
- T-Track
- Flip Stop
- Togle Clamps or Hold Downs
- Glue
Finish:
Note: Links are affiliate links that help support my sites.
Step 2: Video
Like many of my builds, this one is also available on YouTube and my website.
Step 3: Plans
The full plans are here for you or you can get these plans as well as many others from my website for free.
Special thanks to mtairymd for producing the plans in this as well as collaborating to create this Instructable!
Attachments
Step 4: Dimensioning the Stock
Depending on your table saw, these dimensions may vary. My saw is the Powermatic PM2000B (left tilt) and the miter slots are equal distance from the blade.
Starting with the 3/4" plywood, you'll need the following pieces:
- Base - 15" x 20"
- Fences - 4ea at 3" x 24" (1)
- Spline Jig Base - 2ea at 7 1/2" x 14"
- Spline Jig Support Triangles - 8ea 3" x 3" triangles (2)
From the 1/4" plywood stock, you'll need the following piece:
- Spline Miter Base Platform - 11" x 14"
Notes:
- These will be cut shorter in a later step
- It's easiest to cut additional 3" strips and then cut the 45-degree angles at the miter saw
Step 5: Miter Slot Runner
The table saw slot "runner" needs to fit snugly into your miter slot so there is no side-to-side wobble or slop while still being able to slide freely in the slot. This runner should also sit just below the table saw surface.
The most common material for this runner is hardwood but, I made mine from UHMW Stock which reduces the amount of work I have to do when making this type of sled. If you make multiple sleds, I would suggest this option as it's not prone to wood movement over the seasons.
The runner should be approximately 15" long. This can be longer and trimmed later.
Step 6: Sled
The Sled is the first part of this build. You will use the base, fences, and runners for this assembly.
Step 7: Base
Everything is built off the base. The view shows all the cuts which are explained in later steps.
Step 8: Runner Attachment
Your saw will determine if you need to set up on the right or left side of the blade depending on the blade tilt direction. My saw tilts to the left so, I am setting this up on the right side of my blade. If you have a right tilting side, perform this step on the left side of the saw.
Using some pennies or small washers, raise the runner in the slot so that it sits just proud of the surface. Adjust your saw's fence so that you can place the sled's base square on the table.
Note: Be sure to leave enough on the left side of the blade to account for the 45-degree angle that will be cut in a future step.
Apply CA glue to the runner and place the base squarely on the runner. Allow a few minutes for the glue to cure then, remove the sled and countersink pilot drill, and drive screws from the bottom.
Note: If you're using the UHMW Stock, be sure to not over tighten the screws as this will expand the plastic material making the sled difficult to use.
Step 9: Gluing Up the Fences
Using the 3" strips cut in a previous step, glue 2 pieces together to form a fence that is 1 1/2" X 3" X 24"
Repeat this step for the other fence
We'll attach these to the sled in a future step.
Step 10: Prepping for the T-Track
Since work holding is a major function of this sled, there are several pieces of T-Track to add to this sled. It's important to ensure that none of these T-Tracks are placed in line with the saw blade.
Note: You may need to have slightly different T-Track locations depending on your saw.
With the dado stack installed in the saw and set to the proper height to accept the T-Track, cut dados in the following locations measured from the right side of the sled.
- 1 3/4"
- 10 3/8"
- 17 1/4"
Additionally, while you have this set up in the saw, cut a rabbet in the top of one of the fences to install T-Track for use with a flip stop. Being able to set up stop blocks greatly increases the accuracy and repeatability of cuts performed on this sled. This is very important when cutting perfectly fitting miters.
The last item that will also need a dado is one of the 7 1/2" x 14" pieces cut in a previous step for the spline jig. Locate this track around the mid-point (3 3/4" Up). The exact location is not critical.
Step 11: Base Miter
The next step for the base is to cut the 45-degree miter on the edge. Set your table saw blade to 45 degrees and pass the sled through the saw.
Note: I used a wixey gauge to determine the angle of my blade. These are fairly inexpensive and super handy to have in the shop!
Step 12: Install the Fences
The front fence (outfeed side of the table saw) can simply be cut to the same width as the base, glued, and screwed on flush with the front edge of the base.
For the back fence, it's critical that this fence be as square as possible to the blade. Attach the fence as accurately as possible using only one screw on each end and no glue. Be sure to leave this fence long on the off-cut side to support the pieces being cut and reducing tear-out. Next, install the sled in the opposite miter slot on the saw and raise the blade to just above the sled's base. Make one pass with sled to establish the kerf.
If the fence is not set perfectly, remove one screw, make the adjustment, and install a screw in a new location near that corner.
Note: As you make adjustments, it's important to not drive the screw in the existing hole as this will simply pull the fence into its original location.
Once you're satisfied with square, install several screws in the fence to lock it into position. Be sure to pilot drill and countersink these screws. Driving screws into plywood without a pilot hole has a tendency to split the plywood.
Note: I always like to use the 5 cut method to determine how accurate my fences are. I've linked a video from William Ng who is an outstanding teacher demonstrating this process.
Step 13: Spline Jig
The Spline Jig portion of this sled is a great add on for cutting splines in your finished boxes. It rides on top of the sled and sits against the back fence and is held on by the two outside T-Track hold down clamps.
Note: Make sure that this portion of the jig sits flat against the back fence which will ensure perfect spline cuts.
Step 14: Spline Jig Cradle
Start by using the 7 1/2" x 14" pieces, glue and screw them at a 90-degree angle. It's important that these pieces are 90 degrees.
Note: Ensure that none of the screws are in the path of the blade.
Step 15: Spline Jig Assembly
Using the small triangles and flat surface, glue and screw the triangles at the corners as well as about 3" in on each side. Once all of the support triangles are installed, glue and screw the entire jig down to the 1/4" plywood base to ensure everything is flush on the backside.
Step 16: Install the T-Track
Cut all the T-Track to length using a hacksaw and install in the sled with screws.
Note: Be sure to leave a little room near the front of the sled to be able to get the clamps on and off of the sled. The T-Track for the spline jig can be cut to full length.
Step 17: Wax the Bottom
By applying a coat of wax to the bottom of your sled as well as the surface of the saw, the sled will slide much nicer on the surface!
Note: If you wish to add a finish to the sled, this is the time to do it. I don't usually apply finishes to my shop sleds but, if I do, I usually use whatever is in the shop that needs to be used before going bad.
Step 18: Complete Assembly
Place the Spline Jig on top of the Sled and flat against the rear fence. Use T-Track clamps to lock it down in place.
Note: Once the saw kerf is located in the cradle, try to line that location up each time the Spline Jig is removed and re-added to the sled. This helps identify exactly where your splines will be located each time you use the jig and ensure that it's never in the path of any of the construction screws.
Step 19: Uses
Obviously, the primary purpose of this jig is to make mitered corners.
Remove the spline jig from the sled, set your stop block to the desired setting, and cut all your miters. Once the glue-up of your box is complete, add the spline jig back onto the sled, move the sled to the opposite miter slot, adjust the height of the blade, and cut your spline locations.
Note: A flat grind table saw blade is best for this task. An ATB (Alternating Tooth Bevel) blade will leave a detectable gap when you apply your splines.
As most full kerf blades are approximately 1/8", cut your spline stock to fit the kerfs and glue them in. Flush trim, sand, and finish.
Step 20: Closing
Not accounting for dry time on glue, this sled can be built in just a couple of hours. With the improved accuracy and work holding capabilities, building small keepsake boxes becomes much more fun and easy!
This was a fun project that will get used many times in my shop to create many new projects!


