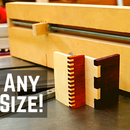
Introduction: Super Easy Wood Spline Jig
Splines are an incredible way to strengthen already created joints. As well as added strength, splines can give a project an added accent that can fully transform the look and add depth. I have always admired the look of a good solid corner paired with a spline, but really didn't know how best to go about making one. I had seen some rather large jigs, complicated table saw sleds and sacrificial creations, but none of them really gave me the simplicity and versatility I was looking for in a jig.
I'll admit, my jig became something larger than I had intended it to become. I had really liked the idea of just using a small rectangle section of pegboard with a few bolts and knobs to hold my project where it needed to be, but safety precautions and the greater ability to hold and clamp the piece I was working on became much more important.
I also used my new found jig to create a beautiful look in a box that I made for my daughter, adding more value to this extremely simple design that requires very few materials to make.
Material List
- 8" x 14" x 1/4" section of pegboard
- 8" x 14" x 3/4" section of plywood
- (4) 1/4" bolts, no less than 2" in length
- (4) knobs with a 1/4" nut (video included to make them if not purchasing)
- (4) 1/4" t-nut's (if making knobs instead of purchasing)
- (4) 2" x 2" x 1/2" hardwood blocks (if making knobs instead of purchasing)
- (4) 1/4" fender washers
- Glue (hot glue or contact glue or glue sticks)
- (2) Fine Sandpaper sheets (8"x10")
- 3/8" x 1/4" scrap strips of wood
Material List (Metric)
- 20cm x 35.5cm x 6mm section of pegboard
- 20cm x 35.5cm x 20mm section of plywood
- (4) 6mm bolts, no less than 60mm in length
- (4) knobs with a 6mm nut (video included to make them if not purchasing)
- (4) 6mm t-nut's (if making knobs instead of purchasing)
- (4) 60mm x 60mm x 12mm hardwood blocks (if making knobs instead of purchasing)
- (4) 6mm" fender washers
- Glue (hot glue or contact glue or glue sticks)
- (2) Fine Sandpaper sheets (200mmx300mm)
- 9.5mm x 6mm scrap strips of wood
Tools Needed
- 6mm drill bit
- 15mm drill bit (or slightly larger)
- utility knife
- Drill press (you better be perfectly straight if you use a drill)
- tablesaw
- glue gun (strongly encouraged although not necessary)
Step 1: Cutting Your Pegboard to Size
In all actuality, pegboard is not an absolute necessity. If you have the ability to cut down a diagonal line and get the perfect results that pegboard offers, a plywood board (accompanying the other plywood board) will suffice. But most of us mortals in the real world might deviate from that diagonal, making this jig a little more sloppy and possibly creating an imbalance that might be dangerous at worst, or inaccurate at best. Another thing to quickly note is that you need to make sure the pegboard is flat and doesn't have any bows or twists in it.
For the mortals among us, you'll need to have a 14" (35.5cm) wide piece of 1/4" (6mm) pegboard. Do not use 1/8" (3mm) pegboard (thickness) as it can flex...something we do not want on our table saw. There are exactly two wide sides to every rectangular 14" (35.5cm) pegboard, a business end and, really, a less important end. The less important end really doesn't have any bearing on the accuracy of the jig...but the other end has to be perfect (it is, after all, the end that will be running across the table saw bed).The holes on the 'business end' of the pegboard need to be about an 1/8" (3mm) away from the first row of pegholes.
On the vertical, or perpendicular end to the bed of the table saw, the pegboard holes need to be about 3/8" (9mm) away from the edge on both sides. The total vertical height needs to be 8 inches (20cm).
(Click here to see this step in motion)
Now assuming that all pegboards are equally spaced in terms of hole placement, count over 7 places from both 8" (20cm) sides and you should be equally away from the absolute center of the board. After celebrating, move on to the next step.
Step 2: Drawing Diagonal Lines and Forming a Perfect 90° Angle
Let's now draw diagonal lines. The lines aren't important once the jig is complete, but it'll give us a good reference point for placement of both the sandpaper and the thin ledge that will hold the work up.
On the vertical sides, we'll go down two holes from the top, above the second hole, and draw lines absolutely perfect hitting the start of each hole all the way down till we reach our center at the bottom. Both line should hit exactly at the end as we draw a perfect (thanks pegboard manufactures!) 90°.
(Click here to see this step in motion)
Now, you'll notice in my video that I waited to cut the final edge on my pegboard to hit exactly where they converged. You can do that, it works, but if pegboard is universal, my measurements shouldn't need to be done like this.
After our right angle has been drawn out, square dance to the next step....
Step 3: Making Our Ledges
Now we're going to cut out short pieces of wood that will rest below the lines of our diagonals, giving something for our future projects to rest on. I made mine 3/8" (9mm) wide, you can make yours bigger but I don't recommend making them smaller. It is absolutely critical that they fit, on the diagonal, between the holes as the bolts will need to fit through them without any obstruction.
(Click here to see this step in motion)
I used the combination of wood glue and hot glue. It's an old trick but it allows me the chance to use a temporary (quick) glue to hold the wood in place while the permanent glue dries. This isn't necessary, but it sure makes it easy to keep something exactly where you want it to be without shifting or clamping.
Step 4: Fitting Sandpaper
Next, let's fit our rectangular sheet of sandpaper to both insides of our jig. This is where the stick glue, hot glue or even contact glue comes in. I used hot glue and quickly added the sandpaper, trimming the upper corner off after I applied it. This is an important step as we don't want any movement in this jig and the sandpaper will help stabilize everything.
Step 5: Drilling Holes and Recessing Plywood
In this step we'll take our finished pegboard and put it back to back with its counterpart, the 8" x 14" (200x300mm) piece of plywood. We'll need to secure the pieces together so that they cannot move. In the video you'll notice I used a few drops of hot glue on the edged...which worked. If I were going to make this a second time, though, I think I might use some masking tape around the sides. Make no mistake, it is absolutely crucial we keep these pieces square with each other and that they cannot move.
(Click here to see this part of the step in motion)
With the sandpaper side on the pegboard face up, we'll use the pegboard as a pattern to drill out the holes below, ensuring we have perfect duplication. I drilled along the diagonal with a 1/4" (6mm) drill bit in the video, but truth be told, you can drill all the holes out if you so desire (yes, you can drill through the sandpaper). The great thing about this jig is that it gives you so much control as to where you can put the bolts to tighten the work.
But make sure, at the very least, we drill out those holes along the diagonal.
(Click here to see this part of the step in motion)
Once that was done, I separated the boards and turned the plywood to the side where the drill bit exited. There I took a 5/8" (9mm) drill bit and recessed each hole I drilled so that the carriage bolt's heads fits neatly inside the hole, allowing the plywood and tablesaw fence an unobstructed connection.
Click here to see the final part of this step in motion)
Phew! Let's move on...
Step 6: Duplicating the Finished Pegboard
Now that we have a mirrored copy of the plywood to the pegboard (in terms of drilled holes), we're going to finish this project by drawing diagonals and adding ledges, precisely the same as what we did with the pegboard. We'll draw our diagonal lines, once again, next to the holes we drilled and add our ledges in the exact same manor and then attach our sandpaper.
(Click here to watch this step in motion)
A quick, maybe obvious note: Make sure that the recessed holes on the plywood (made in the last part of the last step) are on the opposite side of where we attach the sandpaper.
Step 7: Knobs and Bolts
Now that we have all the components ready, all that's left is to assemble and explain how this can be used. If you notice at the beginning of this instructable, I mentioned 4 bolts, longer than 2" (50mm). Longer bolts may be used, as I demonstrate in the video, allowing you to make decorations in table legs or large boxes. Using smaller bolts will allow you to do small projects on maybe a lid or a small picture frame, whereas 6" to 10" (150mm x 254mm" bolts will allow you the ability to do boxes.
To put this jig together, thread the bolts through the backside of the plywood, allowing the rounded carriage heads to sit nestled in the recessed holes we made. The bolts then will thread through the pegboard and from there a fender washer will be added and finally a 1/4" (6mm) knob. If you already have tapped four 1/4" (6mm) knobs (that's a knob with a threaded hole through the middle of it), you're good to go. Attach your wood piece in the middle and tighten it up, you're good to go.
(Click here to watch this step in motion)
Now if you're like me, and don't want to spend money to buy overly expensive plastic parts, check out my knob video for an explanation on how to very quickly make a knob for very little.
Step 8: Troubleshooting
One issue I'll admit with this is getting both sides of the jig to be flat against the table. If both sides (the pegboard and the plywood) aren't coplanar, put the jig on a flat surface (like a tablesaw), loosen the knobs a slight amount, and give the side that's higher a slight whack with the palm of your hand.
For some examples on how to use this jig, follow the link below. If you like this instructable, please +follow me here, throw a subscribe and a bell at my youtube channel for more projects like this!


