

Introduction: Temperature Sensing and Monitoring Using Arduino and Esp8266

This instructable is based on the concept of IoT. This project is going to give the real time temperature of any place. I used the Arduino Uno, lm35 temperature sensor and esp8266 wifi module. Then I am going to send that temperature to the Thingspeak.com.
Step 1: Materials Needed
1. Arduino Uno board.
2. LM35 Temperature sensor.
3. Esp8266 wifi shield.
4.Breadboard.
5. Jumper Wires.
6. Internet (WiFi).
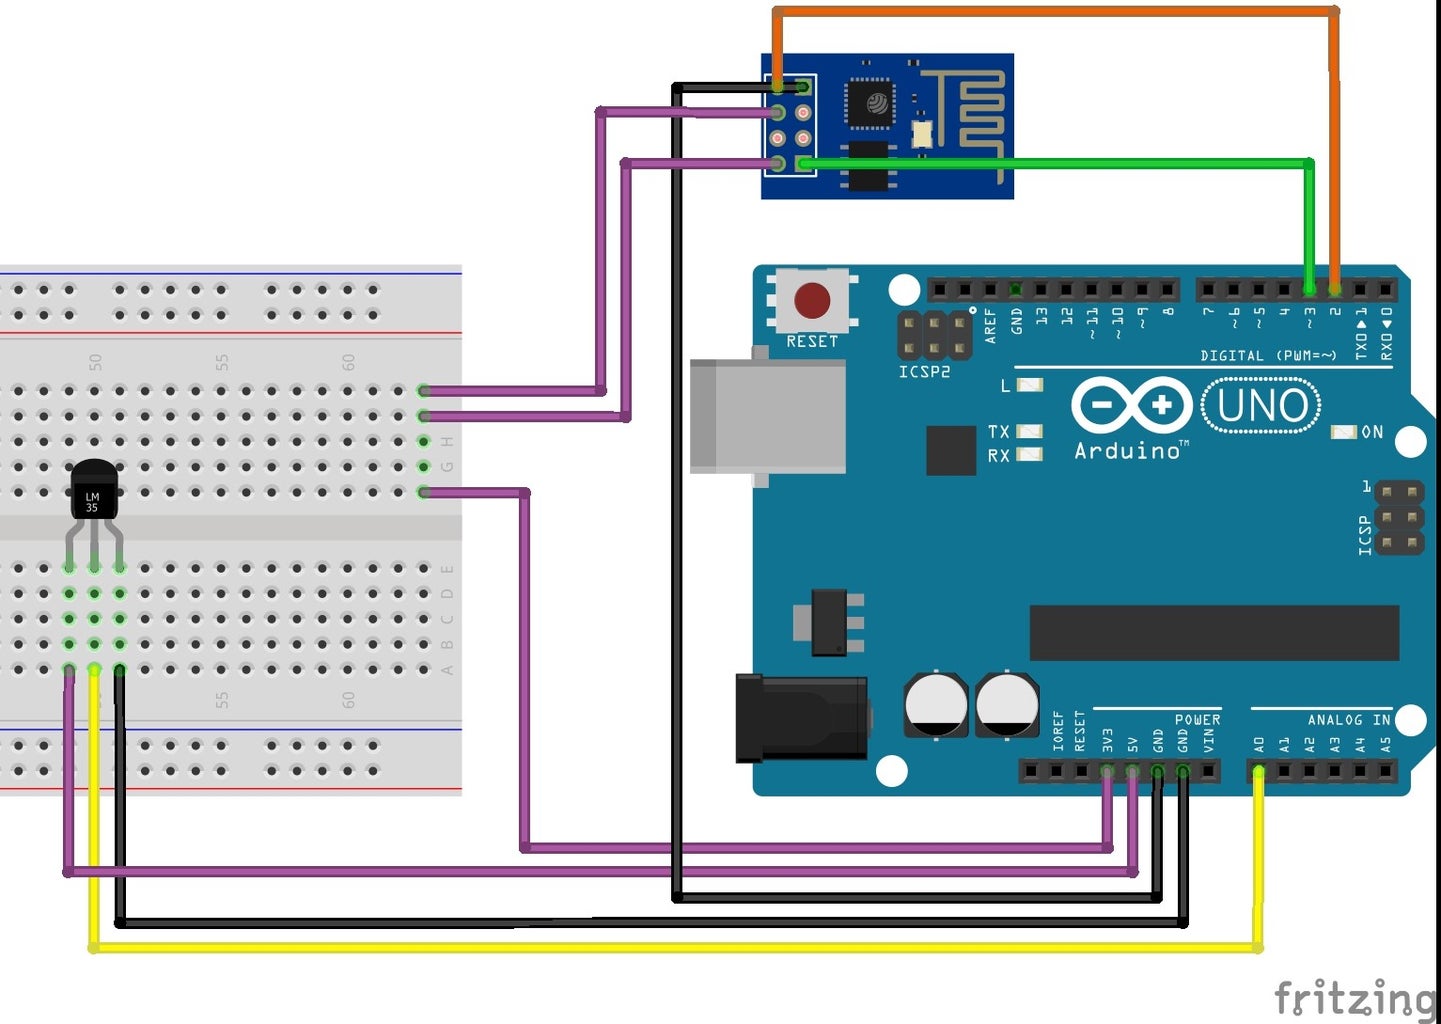
Step 2: Connect the Circuit

Do the Connections as given in the schematic diagram.
Step 3: Connect to the Wifi

After doing all the connection open the Arduino ide. Connect the Uno and select the board and port from a tools menu option. Open serial monitor. Select appropriate baud rate. And run the following commands.
1. AT
You will see OK response on a serial monitor that means Esp module working fine.
2. AT+CWMODE=3
You will see OK response on a serial monitor.
3. AT+CWLAP
List all the access points available.
4. AT+CWJAP="Access point name","Password"
//Enter access point name and password you got in a previous command.
Then, it will connect to that access point and respond OK.
I have attached esp8266 command set pdf.
Attachments

Step 4: Uploading the Code

First, you need to create an account on https://thingspeak.com/ and create your channel. And copy the write api key.This key will be needed in the code.
Do the connection as given in schematic diagram.
Write the code in arduibo ide.I have attcahed code zip file.
Replace the api key in the code.
upload it and you will see the updates on thingspeak.com.

