Introduction: Wing Tip Extensions for Arduino


Greetings,
One late night of web surfing I came across some 45 Degree Extension boards.
Thinking to myself “Wow!” that’s cool and then I looked at the price…$27.00 before S&H.
“Yikes!”
I’ve been looking for an excuse to learn Eagle PCB layout software and this was the project I decided to cut my teeth on…”Wing Tip Extension” was born!
Step 1: Layout

PCB Layout, I’m sure this took longer than it should have but I did learn a lot building this simple board.
I designed this to work with the Ardunio UNO R3 board so that's why there are extra pads than normal.
I designed this to work with the Ardunio UNO R3 board so that's why there are extra pads than normal.
Attachments

Step 2: Etch

Printed the layout on transparency sheets with my laser printer.
Used a Pre-sensitized Board, and 10 min exposure with a fluorescent lamp.
Standard etching technique were used.
Used a Pre-sensitized Board, and 10 min exposure with a fluorescent lamp.
Standard etching technique were used.
Step 3: Cut

Cut the boards to size
Step 4: Clean

Clean off the resist
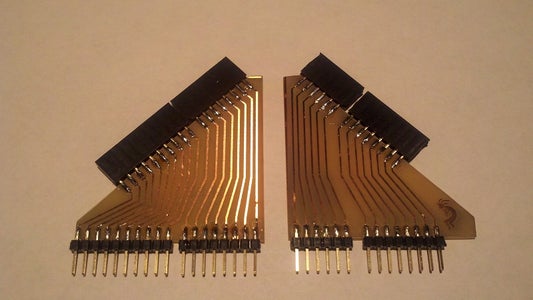
Step 5: Solder
Solder the male & female headers
10 pin & 8 pin for the board on the left
6 pin & 8 pin for the board on the right
10 pin & 8 pin for the board on the left
6 pin & 8 pin for the board on the right
Step 6: Use

Install and use!
As you can see I don't have an R3 board to use...but the extra pins are not an issue.
As you can see I don't have an R3 board to use...but the extra pins are not an issue.