Introduction: 555 Timer to Emit Signal to Interrupt Atmega328
The main goal of this circuit is to save energy. So, I am not going to talk about arduino because the board itself has unnecessary power overhead for a final product. It is great for development. But, not very good for final projects running on batteries. I will use one for my POC but, to save energy, using the Atmega328 standalone will give you better results
I made a weather station(TOBE) that will charge a pair of 3.7 V battery in parallel using a solar panel. My first version went very well thank you. But, I had a problem. The battery usage was greater than the charging rate of the solar panel. I am not going into numbers here. But, after a while, I noticed the battery levels were slowly going down. Aside from the fact that I am from Canada and sun here is not a commodity. I then, used a library to put the Atmega328 to sleep for 8 seconds(there are other timeframes but 8 secs is the higher) and then, come back to work. The usage is very straight forward and it works like it supposed. But, 8 secs was not enough for me.
This because my weather station has 3 components.
- A real time clock
- A DHT11
- Oled display
The clock shows in the display in a minute precision. The Temperature and humidity is not something we need to update as often. So, I needed to come up with something that would allow me to tweak the interval and I wanted to have some fun doing that as well.
I built a prove of concept to have a 555 timer in astable mode to wake up the Atmega328 using external interrupts. That is what I am going to show here
Supplies
For this Instructable we will need the following materials:
- An Arduino board
- A 555 timer chip
- 2 Resistors(1M ohms, 220 ohms)
- 1 polarized capacitor(100uF)
- Jumper wires
- DHT11 Sensor
- Breadboard
Step 1: First the Layout
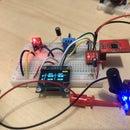
Lets start with the layout in the breadboard. I am using a DHT sensor to point out another way of saving energy in your projects. As you can see, the device is powered on by an Arduino pin. Which will go LOW while Arduino is sleeping, saving even more energy. You could do this to any device that requires less than 40mA to operate.
Step 2: Explanation About the Circuit
I wont go to deep in how the 555 timer works as there are plenty of tutorials around there explaining its operations and its several modes. We are using the 555 timer in an astable mode. That means, in a high level, it will charge the capacitor to 2/3 volts for as much time as resistor 1 determines, than discharge it for as much as resistors 2 determine. We actually dont need to much time in the discharge signal so, you can use a 220 Ohms resistor. Using a 1M ohms, 220 ohms resistor combination will give you a delay of around 1 minute. Playing with the first resistor and the capacitor will give you different times.
Step 3: The Sketch
Attachments
Step 4: Explaining the Sketch
The goal of this sketch is to read the Humidity and Temperature and go to sleep until it gets a nudge to wake up and read it again.
For that, I am setting an interrupt pin as INPUT_PULLUP(more about pullups in another episode). And that pin will have an interruption attached to it every time the work is complete.
Once the interrupt signal comes IN, the code will run again and back to sleep. And so on.
Step 5: Some Numbers
For this POC, I was able to have the measures done in around 3 secs. Then, the device would sleep for around 1 minute.
Using a 0.001 precision AMP meter device to measure current, I saw 0.023-0.029AMPs for the time it was working(~3 secs) and 0.000 while sleeping(~1 min). Of course it is not a Zero reading as we have the 555 running. But, I did not go into Microamps. In anyway, the saving is substantial
Step 6: The Schematic and PCB
For those of you who wants to build the PCB for that, here is the link for it: https://github.com/jrareas/kicad/tree/master/bare_atmega328
There you will find design and schematic which can be sent to any PCB fabrication vendor.
There is also a folder called print_version for those of you who likes pcb etching your own at home like I do.
Step 7: Applications
The applications of that are tremendous. Every time you need an external signal coming in a specific rate you could use this circuit. I am using to set my weather station to sleep and one of the modules will go to sleep along with the Atmega328.
For effective results in saving energy, you should consider to have a standalone Atmega328. I am designing a board with this capability and soon I will be able to hook any Atmega328 project in this concept.
If you have good ideas in how to implement solutions to save energy, by all means, please let me know as I am really into projects running into batteries and solar panels
Thanks for reading and I see you next time with more projects.


