Introduction: Christmas Tree Monorail
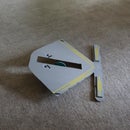
This is a custom designed monorail for use about half way up my Christmas tree.
Step 1:
Print the track and all the other plastic pieces.
Files available at:
http://www.thingiverse.com/thing:185204
Files available at:
http://www.thingiverse.com/thing:185204
Step 2:
Insert a hose washer (drive wheel) around the drive spool.
Press fit the drive spool onto a Pololu gear motor (Jameco #2128219). Press fit the motor into the slot on the drive base.
Press fit the drive spool onto a Pololu gear motor (Jameco #2128219). Press fit the motor into the slot on the drive base.
Step 3:
Glue (superglue) a AA battery holder to the printed base. Connect and solder the wires.
There will be no switch. Installing and removing an AAA battery will turn the device on and off. The AAA battery in the AA holder is easy to put in and out.
There will be no switch. Installing and removing an AAA battery will turn the device on and off. The AAA battery in the AA holder is easy to put in and out.
Step 4:
The track pieces need to be joined (print 12 pieces). I "welded" the PLA plastic together with a soldering iron (outside, it can get smelly). They can also be joined using metal duct tape, but that's kind of distracting visually.
Step 5:
Paint a 1 inch by 2 inch by 38 inch piece of wood (I used oak).
Step 6:
Fasten the wood to the tree using deck screws and the printed bracket.
Step 7:
Slide the end pieces onto the wood.
Step 8:
Place the track on the brackets.
Step 9:
Secure the track with 2-56 machine screws (available at Radio Shack).
Step 10:
Add the tree branches. If you cover the oak cross brace, the monorail track will almost appear to float.
Step 11:
I scanned a clay snowman and printed him in plastic--merged with a monorail "top."
Step 12:
The plastic snowman was painted for visual appeal.
Step 13:
By using the plain monorail "top," it is possible to attach (with velcro) any small object that wants to ride around the tree.
Step 14:
Put a battery in the monorail base, then snap on the top and let him ride.


