Introduction: Classroom Robot Battery Station
I teach several high school engineering courses as well as two levels of just robotics classes that use VEX robot kits. As much as I've tried to create a system to keep all the different robot parts organized in my classroom, when it comes time to actually power up our robots and have some fun, my room starts to look like this,
and this,

and this,

and finally, surprise, surprise, like this!

I've got batteries charging all over the place! This year it was just too much for me to handle so I decided to create a one stop battery and and remote control charging station.
Supplies
Equipment
-Laser Cutter
-Band saw
-Brad Nailer
Materials
-Sand Paper
-Super Glue
-Wood Glue
-1/8" Thick Plywood or MDF
-Scrap Wood
-Brad Nails
-Velcro
-Power Strips
Step 1: Design
My goal was to design a small shelf system where all of our VEX batteries could charge in one spot and be easily visible. The batteries being out in the open in one spot was a big part of the design idea so that I could do a quick scan at the end of a class period to see if everyone had plugged in their assigned batteries to charge. The first thing that popped in my head was something similar to the magazine racks at our city library. I measured the chargers and made a couple of quick reference sketches.


With my idea down on paper I used Autodesk Inventor to create my mostly final design, which ended up looking like this.

Batteries would be stored and charged on the left, remote controls stored on the right. I designed this unit to be assembled through slots, in a flat pack furniture style. I figured if it all fit together well I would just use glue to permanently hold it together. I exported all these pieces to DXF format and headed to the laser cutter.
Step 2: Laser Parts
With my freshly exported DXF files in hand I loaded up my laser cutter with 1/8" thick MDF and started lasering.

After seeing how much MDF I would use I realized I probably should have gone back and redesigned my idea for more efficient use of material. But, I really just wanted to get this charging station finished so my room wouldn't constantly be overrun by charging batteries. I decided to go ahead and cut out the parts and continue with the possibility that I might go back one day and make the design better.
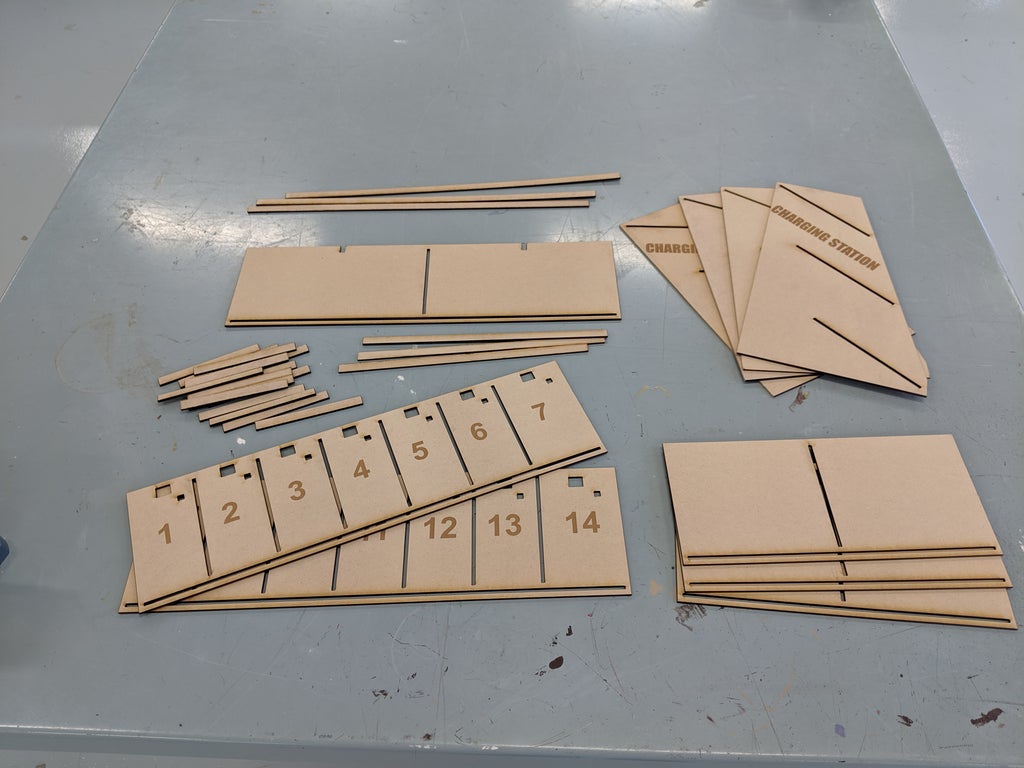
I did make a couple of additions to my parts before I cut them out. The main idea I had was to add in spots for the cords to go through the shelves. My hope was to Velcro the big robot battery chargers to the underside of each shelf so they would be out of the way and look somewhat neat. I also cut out a little square for the light on the chargers that indicates when the battery is completely charged. This idea failed miserably, but more on that later.
Step 3: Assembly
This part was a bear! I probably should have redesigned my idea for better use of material, but I definitely should have redesigned it to be put together in an easier fashion. At the very least I should have taken the time to build some makeshift jigs or fixtures to help me put this thing together without the need for a third hand. I was impatient so I just carried on building. It probably took twice as long as it should have.
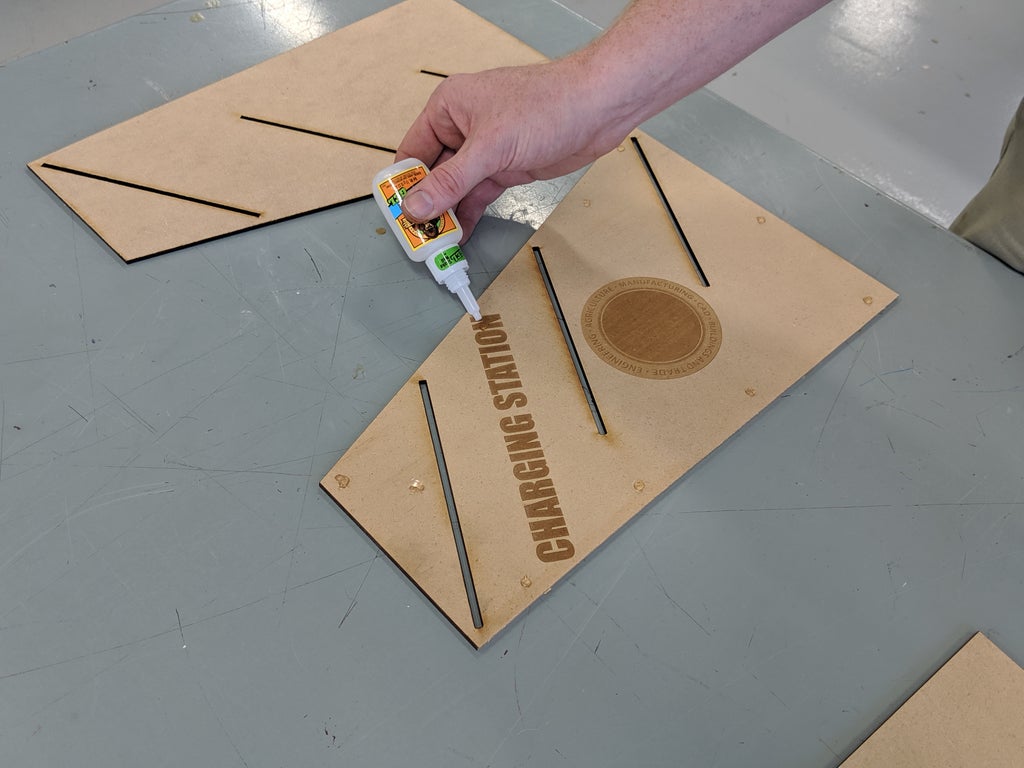
The first step I took was to use super glue to attach two end parts together to make the middle support section of the charging station. This was my first mistake which I touch on later. I tried to engrave my department's logo on one of the ends but it didn't turn out looking very well, so I just decided to use it for the middle section.

Next, I glued the stoppers and dividers to each shelf. I started by putting a dab of glue on each end and inserting each piece into a slot.

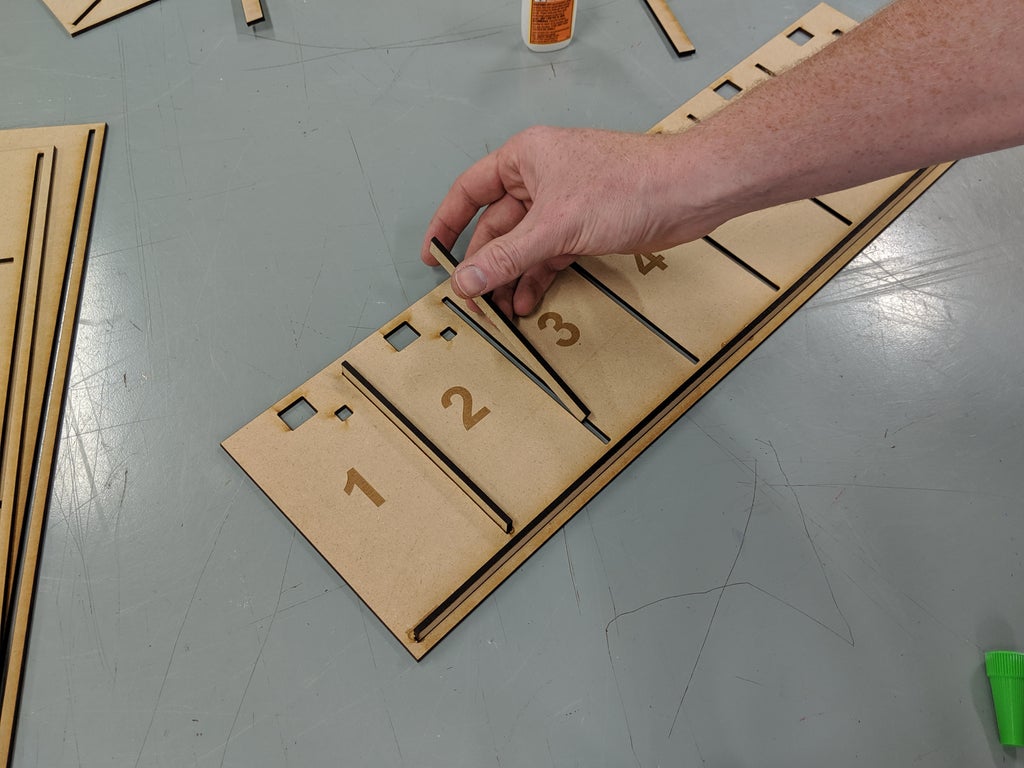
For the stoppers, which are the long pieces at the bottom of each shelf, I then went through and did a little mini super glue fillet weld. I used way more super glue than was probably necessary but again, my mind was on speed more than efficient use of supplies.
After all of the super glue had dried I laid all the parts out to make sure I knew where each part would be going before tackling how to get the whole unit together.

The easiest way I could come up with at the time was to use three try squares to keep each shelf square and vertical and do more super glue welding.

After gluing the battery shelves to the outside end. I let the glue set overnight before I went any further with assembling all the other parts together. When I picked up the next day I slid the middle double layer over the other side of the battery shelves, laid the entire thing onto the angled front face and super glued the underside of the shelves.
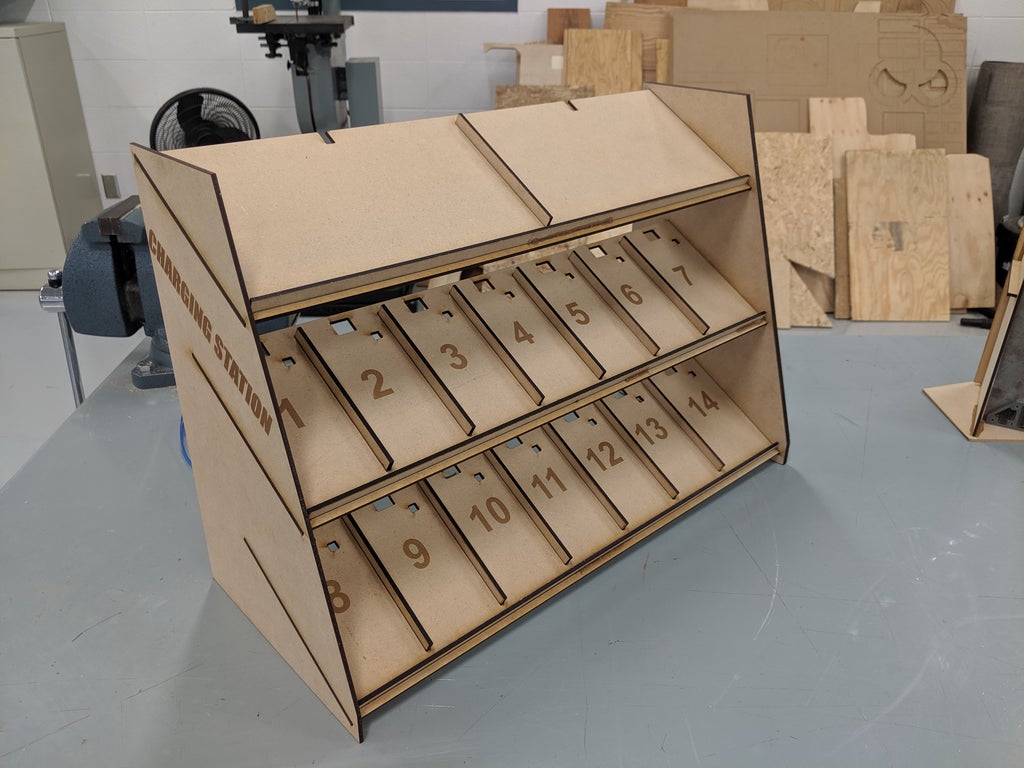
I repeated the same process for the other side, the remote control storage, and then let the glue set throughout the day.

This part was a bit of a hassle as the shelves couldn't go all the way through the slots on because both sides of the shelves had be held up by that middle part. What I should have done was make and assemble each shelving rack, one for the batteries and one for the remote controls, separate and then glue those two units together. If you are going to make one of these I highly recommend following that way of thinking instead of the way I put it all together.
If you are building along you should end up with something like this...

Step 4: Pivot! Battery Charger Shelf
Original idea: Velcro battery chargers to the underside of the shelves, run charging cord through hole at the top of each battery slot, charge batteries easily and efficiently, live happily ever after.
Not so fast.....
Problem 1: The shelf isn't big enough to get all of the chargers and their cords underneath as the shelf is currently designed. I tried several different positions to mount the chargers under the shelf and nothing seemed to work. I probably should have made each battery slot wider, and put the opening for the cord at the bottom of the shelf not the top.
Problem 2: The 1/8" MDF started to bend under the weight of just a few batteries. There is no way I could install the chargers underneath of the shelves and expect the shelf not break under the weight of all the batteries and all the chargers.
New Idea: Create a small box/shelf unit that I can place behind the charging station, where I can neatly mount the chargers and keep them organized.
I gathered a piece of 1/2" plywood. I measured and cut the plywood down to two 20" x 6" rectangles and two rectangles into 8" x 6" pieces.

I applied some wood glue to the ends of the 8" pieces and positioned them flush with the ends of the longer plywood rectangles. Using wood glue and a brad nailer I assembled the plywood together into a box.


I cut four strips of Velcro and applied two strips to each portion of the shelf.
I'll apply the compliment side of Velcro to the chargers so that everything stays in place when I put this whole unit in its more permanent location.


Step 5: Charger Install
With all the shelves made, its time to organize the chargers. The cords on these suckers are way longer than they need to be. which as you can see below, when I don't have a dedicated spot for the chargers to be stored neatly they turn into a huge tangled mess when all fourteen chargers are in one spot.

Oh how naive I was to ever think all these would fit on my little, dinky charging station.
Anyway step one was to corral the mess of cords. I neatly folded the charging end of the cord and wrapped them tight with rubber bands and twist ties. I tried to leave just enough slack for the charger connector to reach the batteries.
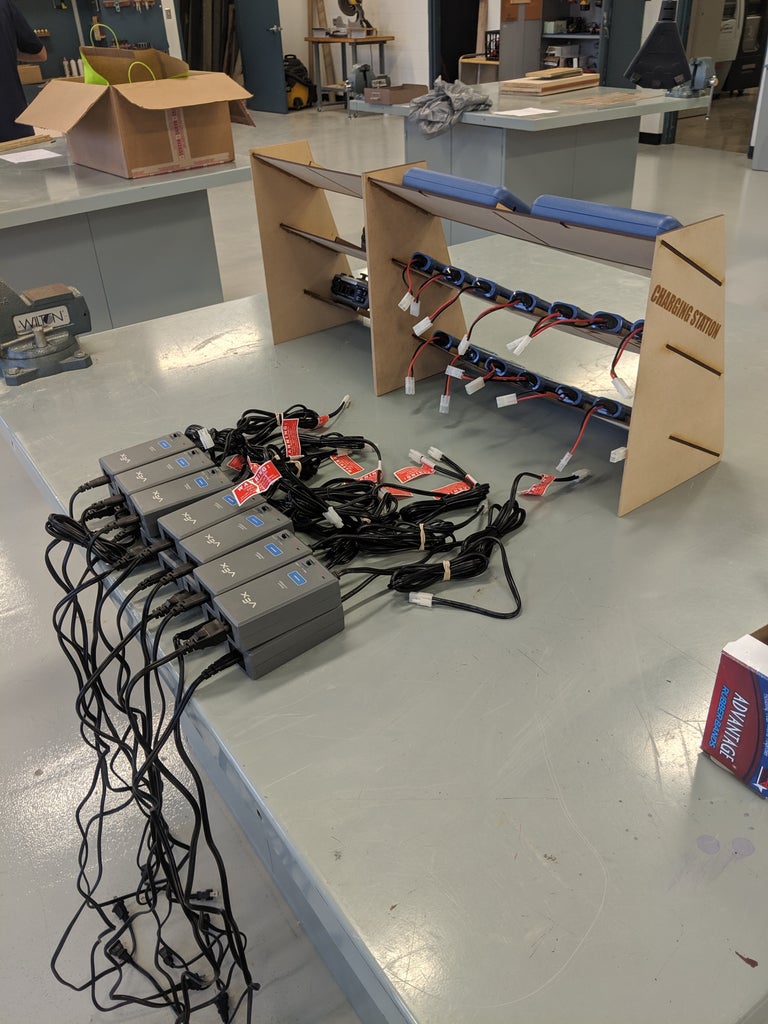
Next I added a Velcro strip to the bottom of each charger and then attached the corresponding side of the Velcro to the shelf I made in the last step. This should help keep all the chargers on the shelf and neatly organized.


These suckers aren't going anywhere!

I placed all the chargers on their new shelf and went searching for their forever (or maybe just this school year) home.

Step 6: Charge Away!
Load up your shelf with your batteries, plug in your power strips, position the charging station in its new designated spot, and charge away.

This works so much better than having all these batteries scattered around the room. And now if a group doesn't plug in their battery before the end of the period I immediately know.
If I redesign this in the future, or if you are planning on making something similar I'd recommend making this out of thicker material. My first thought for this charging station was that I would make it with a CNC router, but for times sake I went with a laser cutter. The thinner material works fine but I can see this not lasting as long as I'd like with high school kids abusing it year in and year out.
Next problem to solve is the storage of the robots themselves!
Let me know if you end up making one of these for your classroom!
If you need any help or clarification on a step let me know in the comments below. I'll try to help as much as I can.


