

Introduction: Easy $5 Lightsabers


Make some awesome Lightsabers for about $5 each!
I recently made a bunch of homemade Lightsabers for my kids and me to play with and use for Halloween costumes. As I was figuring out how to make these, my goal was to come up with a method that balanced maximum coolness with minimum cost and ease of making.
I was very happy with the results!
Read on to see how I made these, and how you can too. Enjoy!
Step 1: They Light Up!


These light up nicely in a half-dark room (1st photo) . . . but in pitch-black they look amazing, especially when viewed at an angle (as in the 2nd photo)!
Before we dig in, I will say that the one major drawback to these homemade Lightsabers is that the blades are rather flimsy. Since these were intentionally made on-the-cheap, that's just part of the deal.
So that said, these are no good for hard play battles! The blades will bend and crease if they are hit too hard.
However, they work just fine for light blade-bonking, sibling-smacking, and fancy-Jedi-swinging.
Alright, let's get to it!
Step 2: Materials


Here are the materials required to make these:
- Clear tube guards for fluorescent bulbs (here are the ones I used). These are in found in the lighting aisles of most large home improvement stores. You need the T8 size. These make the blade portion of the lightsabers. I paid $3.57 each for these.
- An alternate option for the blade portion would be to use colored tube guards. They cost a little more, but might look pretty good. Just be sure to get the T8 size.
- Small 9-LED flashlight from Walmart. The kind needed are typically found on aisle-end displays and cost $1.
- A cardboard tube that fits both the flashlight and the plastic tube guard. More on this in the next step.
- Duct tape (I used black, chrome, gold, and regular grey)
- Masking tape
- Peel-and-stick craft foam
- Mod Podge
The primary tools you will need:
- Cutting mat and clear ruler (similar to the one shown in the last photo)
- Hobby knife
All together, after adding in a small amount of cost for materials in addition to the tube guards and flashlights, I figured each Lightsaber only cost about $5 and change to make. Not bad at all!
Step 3: Cardboard Tubes


When I started gathering materials for this project I picked up a couple of rolls of colored translucent plastic "basket wrap" at Hobby Lobby, thinking I would insert some into the tube guards to create color for the Lightsaber blades.
But I didn't like the way the blades looked with this stuff, so that idea was abandoned.
However, the cardboard tubes that the plastic wrap came on were the perfect size to make the Lightsaber hilts. Both the flashlights and the tube guards fit inside the cardboard tubes with just a little wiggle room, which is easy to overcome.
I unwrapped the plastic from the tubes and re-wrapped it onto scrap pieces of PVC, you know, to not waste it. I'll use it for something at some point.
The cardboard tubes were 30 inches long, so I cut them each into four 7.5-inch pieces.
If you can't seem to find any cardboard tubes (or alternate material that will work), you can simply make your own cardboard tubes as detailed in the next step.
Step 4: Make Simple Homemade Cardboard Tubes


Before finding that the cardboard tubes from the basket wrap would work great, I had made a simple homemade cardboard tube. This is an option if needed; here's how I did it.
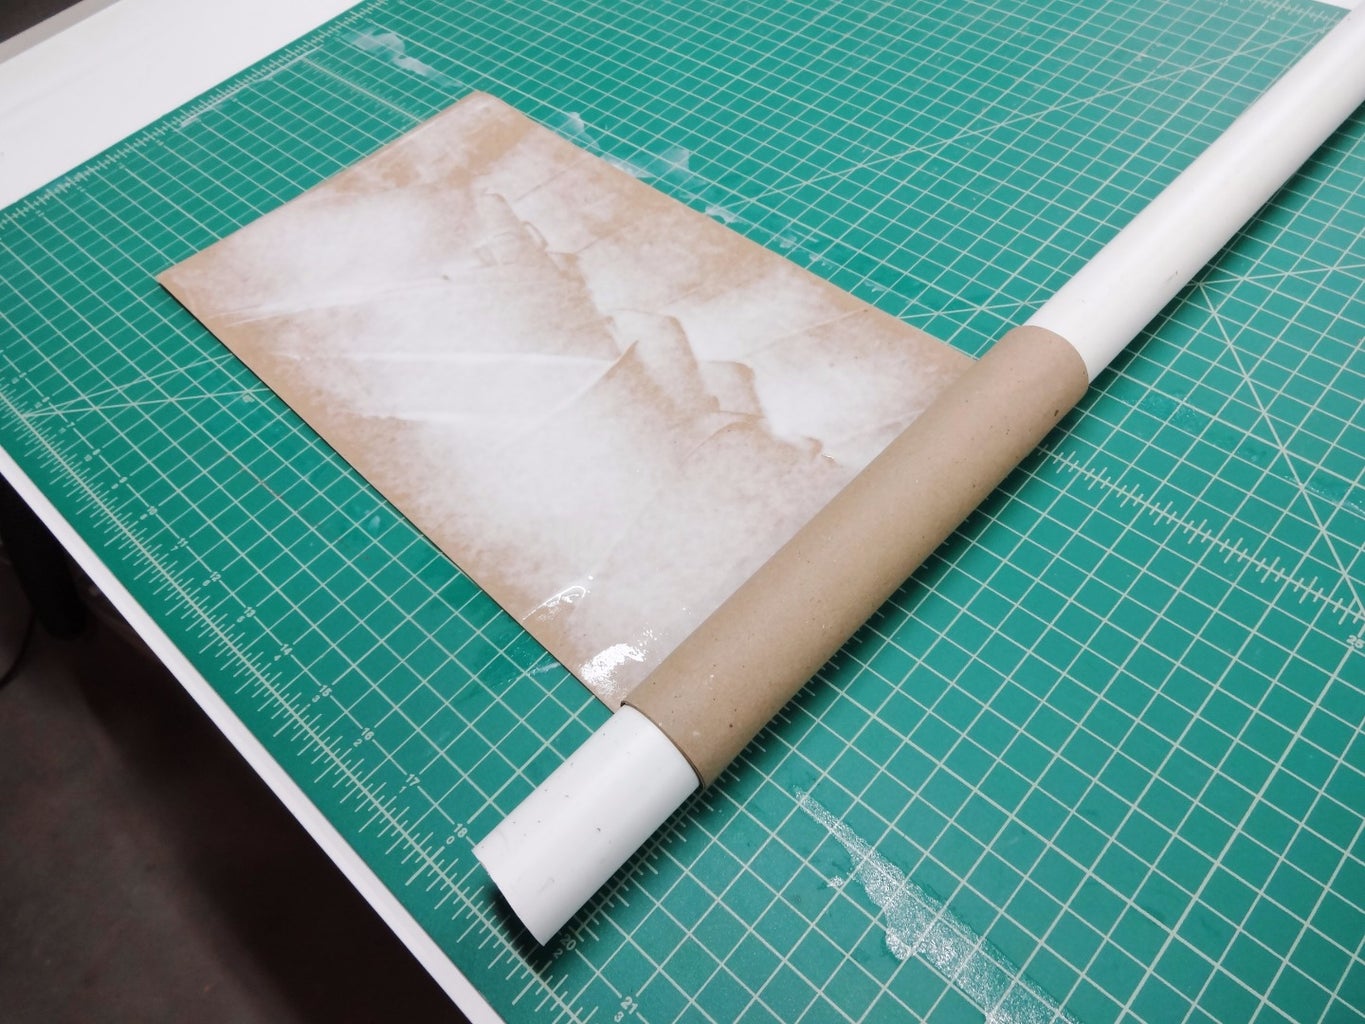
I began with a strip of brown craft paper that was 8" by 30". I spread glue over it as shown in the photos, and rolled it tightly onto a piece of 1" diameter pvc pipe. (Note that the area of the first wrap gets no glue, so the paper doesn't stick to the pvc pipe.)
The cardboard tube was removed from the pvc and left to dry. If you're feeling really ambitious you could make your own spiral-wound cardboard tubes, but that's overkill for this project in my opinion.
This tube is slightly larger in diameter than the ones from the plastic wrap, but still close enough to work very well with the tube guards and Walmart flashlights.
Step 5: Install Flashlights


To begin creating each lightsaber hilt, a flashlight is installed in the ends of the cardboard tubes. The removable battery caps are left exposed, so the batteries can be replaced when needed.
To make the flashlights fit snugly, I had to wrap about 24" of duct table around the front ends. They were then slid into the tubes, and a bead of hot glue was added around the back ends, just above where the batter cap screws into place.
Step 6: Cut Tube Guards

The tube guards are 48" long, which to me is just too long for a good Lightsaber blade.
I cut all of mine down to 36", three or so inches of which will be inside of the hilts.
I measured and marked them with a wrap of masking tape, which aids in cutting them fairly precisely. They can be cut easily with a hobby knife.
Step 7: Color and Sand the Blades


I'll be honest, I tried a lot of approaches to create color on the tube guards. The best way I found was to color the tubes with Sharpie markers. This is cheap and opens up a wide variety of possible colors, even though it is a little bit tedious.
To diffuse the light from the flashlights, I hand-sanded the colored tubes with a fresh sheet of 220 grit sandpaper.
In conjunction with a simple reflector on the end (covered in next step) these blades produce a nicely diffused colored light that I was very happy with.
Step 8: Add Reflectors


The tube guards come with black plastic end caps. These work well to create a simple reflector which helps light up the tubes.
These are made by stretching a piece of chrome duct tape over the inside-facing end of the cap, and trimming it cleanly so it can be inserted back into the end of the tube guard. I added a piece of chrome tape to the outside-facing end of the caps as well, just for looks.
Then to finish off the end, I wrapped a 3/4" wide strip of black duct tape around the ends. See notes in photos for more details.
Step 9: Add Bulk to Hilt-ends of Blades


To make the blades fit into the cardboard tube hilts, I had to add a little bit of bulk with duct tape.
I wanted the blades to be removable and easily replaceable, but I found that with repeatedly removing and replacing the blades, the duct tape tended to snag and get sticky. I added some masking tape over the top which provided a smoother mating surface against the inside of the cardboard tubes. Also, a sprinkle or two of baby powder into the hilts helps make the blades slide out easier.
This step was actually done after the hilts were completed, as each blade required a bit of adjusting and fiddling to make them fit perfectly snugly with their corresponding hilts. For whatever reason, each completed hilt had a slightly different finished inside diameter.
Step 10: Lightsaber #1: Qui-Gon Jinn


I made a total of 8 Lightsabers. Five were loosely patterned after characters' Lightsabers, and three were of my own design.
For the ones inspired by existing designs, I did google image searches to get an idea of the main features and then made simplified versions that tried to capture the likenesses.
This first one is patterned after Qui-Gonn Jinn's Lightsaber.
All of the hilts were decorated by simply covering them with duct tape. Some had built-up layers of tape to create ridges and rings, and all had features like buttons and grippy pads made from sticky-back craft foam.
Once each hilt was decorated as desired, I covered the entire thing with a couple of thick coats of mod podge. This creates a plasticky covering that prevents the duct tape and craft foam from peeling up or falling off. This isn't a necessary step, I but I highly recommend it. It will greatly increase durability and prolong the life of the hilt.
Each Lightsaber had some interesting features and challenges, so I've noted a variety of the techniques I used to make each one in the coming steps.
Step 11: Lightsaber #2: Mace Windu


Mace Windu has a cool purple-bladed Lightsaber with gold highlights.
This was made by wrapping a base layer of chrome duct tape, and then adding details made from gold duct tape and black craft foam.
For all of these sabers, many of the details will be in the photo notes--so be sure to read those.
Step 12: Lightsaber #3: Obi-Wan Kenobi


This is one of my favorites out of the whole set I made. I just really like the way it turned out.
I'll take this moment to point out how I was happy to not include any of the especially un-ergonomic aspects that are so prevalent on Lightsabers. What gives? Why do they always have massive buttons right in the middle of the grip area?
Step 13: Lightsaber #4: Darth Vader


The most classic Lightsaber, in my opinion.
This one was especially fun to make because of the chiseled tip. It wasn't difficult, but it provided an interesting challenge for how I wanted to interpret and simplify the design. See photo notes for details.
Step 14: Lightsaber #5 (custom): the Darksaber


I thought it would be fun to make a Lightsaber with a black blade. The blade was colored with a black sharpie, and after sanding it looks kind of grayish.
I like the clean and simple hilt, but it's probably too boring and not something the Star Wars designers would ever approve of!
Step 15: Lightsaber #6 (custom): the Yellowsaber


This saber was made with a yellow blade and a sort of ovally half-grip. The base layer of tape was black, with chrome shapes added over the top.
Gold highlights on both ends as well as on the button. I thought this was slightly more true-to-form Star-Warsy, unlike the Darksaber in the last step.
Step 16: Lightsaber #7 (custom): the Whitesaber

This Lightsaber is a little bit reminiscent of Obi-Wan's saber with the chrome rings on the blade-end of the hilt. But I mixed it up with no color on the blade, red highlight made from red packing tape, and light gray grips.
There are no rules when you make your own Lightsabers, so it's fun to experiment a little and see what you come up with.
It's easy to put too much detail or too little, and end up with either a gross and gaudy saber or a boring and plain one. Trying to come up with my own versions made me appreciate the balanced coloring and shaping of the ones the designers came up with for the movies!
Step 17: Bonus Lightsaber: the Ultra-Easy Yoda Lightsaber


Since I cut down all of the tube guards used for the blades from 48" to 36", I had a pile of small off-cuts.
I decided to make a very simple version of Yoda's saber with one of these.
This saber does not have a removable blade and was made in just about about 30 minutes. If you're pressed for time, this is a great way to make an even easier prop Lightsaber.
The blade was made just as described in earlier steps but rather than create a hilt, a flashlight was simply pressed into the end of the blade. Duct tape was used to add bulk to the middle section of the flashlight, and then decorative layers of tape were added over the top.
Easy-peasy! This won't last as long as the other versions I made, but it looks pretty cool nonetheless.
Step 18: MAKE the Force Be With You!


These were a lot of fun to make, and my kids and I now have some really cool Lightsabers to play with.
I hope you'll make some of your own. If you do, be sure to share a photo of your sabers in the comment section below.
Thanks for taking a look!

Participated in the
Make It Glow! Contest

Participated in the
Halloween Props Contest 2015


