Introduction: Fully Functional Drag Chain Fusion 360
In this tutorial I've embedded the step by step videos recorded with Auto Desk Screencast on how to build a cable drag chain in Fusion 360.
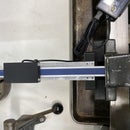
The Chain is based on the Chain I purchased at Amazon.com: HHY Black Machine Tool 7 x 7mm Semi Enclosed Type Plastic Towline Cable Carrier Drag Chain
Once you've completed this tutorial you can base it on any Drag Chain you can find out there.
The tutorial will start with the first step of sketching a single link, followed by the creating of that link.
Next it will start duplicating and joining each link. The videos will show how to constrain the joints such that they mimic the behavior of a true real life Drag Chain.
You can download the Fusion 360 (.f3d) project at https://grabcad.com/library/fusion-360-cable-drag-chain-with-functioning-joints-1
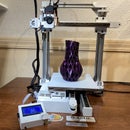
I personally have incorporated this type of Drag Chain in one of my printer designs as seen in the video here.
Step 1: Creating the Sketch
Before you create any object in Fusion 360, chances are you start with a sketch. No different here. The individual link in the drag chain we're building is based on a sketch. The embedded video will show step by step how it is drawn. Since the Link in this chain is very close to Symmetrical, only half is drawn first and by means of using Mirror the second half is added.
Each link in the chain has a protrusion on one side that prevents it from turning passed it's constraints. This protrusion will be used later to determine the angles in the constrained joints.
Step 2: Creating the Link
Through a number of extrusions, combining and cuts of objects the Link is created from sketch that was created in the previous step. Again due to symmetry in a single link, one half is created and completed by means of mirroring itself.
Step 3: Duplicating and Joining the Links
In the previous step we've completed a single link. Now we will start multiplying this link and joining it with the proper rotational joint and apply joint limits to keep the links from moving outside the physical boundaries.
Instead of joining one link after the other, I join two links and combine them in one parent component. I then duplicate this parent component and join it. Again combine these 4 links under a new parent component and 8... 16... 32... 64.....
By doing it this way I drastically reduce the repetition of creating joints.
Step 4: Conclusion
Now you know how to create a fully functional Drag Chain in Fusion 360. Many of the principles show in this instructable apply to other types of designs/constraints inside Fusion 360.
Fair warning, when you create a chain like this with lets say 60 links, the number of joints do take a toll on your computers resources.
Use with moderation and make invisible when possible to not interfere with the rest of your design process.
I hope this was useful.
If you liked this check out my other instructables or visit my website at https://core3d.tech


