Introduction: How to Make a 3D Printed Nail Set Organizer Using Fusion360
I got tired of losing tools in my toolbox, things that don't have holders just roll around every time I open or close a drawer. So, I designed and 3D printed this organizer for my nail sets using Fusion 360. I'll show you how to design this organizer to give small tools a home, keeping them from rolling around and your toolbox tidy.
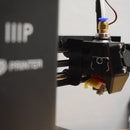
Finished dimensions are 55mm x 80mm x 8mm and the part was printed in PLA on the Monoprice Select Mini 3D printer.
Step 1: Start With a Sketch
I start every project with a sketch. Capturing the critical dimensions on paper before moving into Fusion 360 can really speed up the modeling work. Even very simple designs benefit by clarifying some specific details by just sketching the parts out first. In this case, I traced out one of the nail sets and measured the critical dimensions:
- Shank Diameter: 8.8mm
- Hex Head: 10mm across the flats
- Hex Length: 30mm
Step 2: Create the Basic Form
Starting this part with a Sketch, begin by creating the basic form of the outside profile. In this case, start with the line tool to draw a trapezoid. Then place the three circles that will hold the shanks. Best-practice is to first apply geometric constraints, like equal and horizontal, before applying dimensional constraints. Applying constraints in this way helps maintain the intended shape when changing or applying dimensions. With the sketch complete, extrude the profile 80mm to create the initial shape.
Step 3: Cut the Pocket Profile
With the overall shape created, create a new sketch on the back surface. This sketch will use the polygon tool to create three hexagon shapes concentric with the round slots already created. Make sure to constrain on edge of the hexagon to hold the bottom flat. Again, use the extrude tool, this time to cut away a pocket 33mm in length.
Step 4: Close Up the Back
The last feature needed is to close up the back of the slots. This will prevent the nail sets from sliding out the back of the organizer. Create another sketch on the same surface that the hexagons were drawn on and trace the outside profile of the trapezoid shape. Exit the sketch and extrude this profile 2mm as a Join operation into the shape.
Step 5: Clean Up the Corners
The last step is to clean up the corners. Starting with the four outside corners, add a generous fillet, I used 5mm. Then I like a small, 1mm, chamfer around the bottom edge. I find this makes my prints come off the build plate more cleanly, and the edge is supported better than a fillet. Finally, small round-over fillets are applied to all the remaining edges.
Step 6: Print It and Use It!
The model is now complete and exported from Fusion 360 as an STL file. I'm still using Cura 15.04.06 for slicing. My slicer settings are shown below, and the print time was about 1.5 hours.
Print and Slicer settings were:
- Layer Height: 0.21875mm
- Shell Thickness: 1.2mm
- Infill: 20%
- Extrusion Temp: 195c
- Bed Temp: 45c
Thanks for reading!
I hope you enjoyed this quick tutorial on Fusion 360 and how to design functional 3D printed storage solutions. If you want to see more of what I’m working on, check out the links below.
See you next time.
-------------------------------------
You can also find me at:
YouTube (all my DIY videos)
Instagram (What I'm working on @greatlakesmakes)
My Website (Geek out on some engineering know-how)
Facebook (be my friend?)
My Mini Factory (download the STL files)
-------------------------------------


