Introduction: Plywood Monsters
These cute creatures were made from precisely cut layers of plywood and then stacked together to give them depth. The effect is really great, and with a splash of color these desktop monsters really come to life.
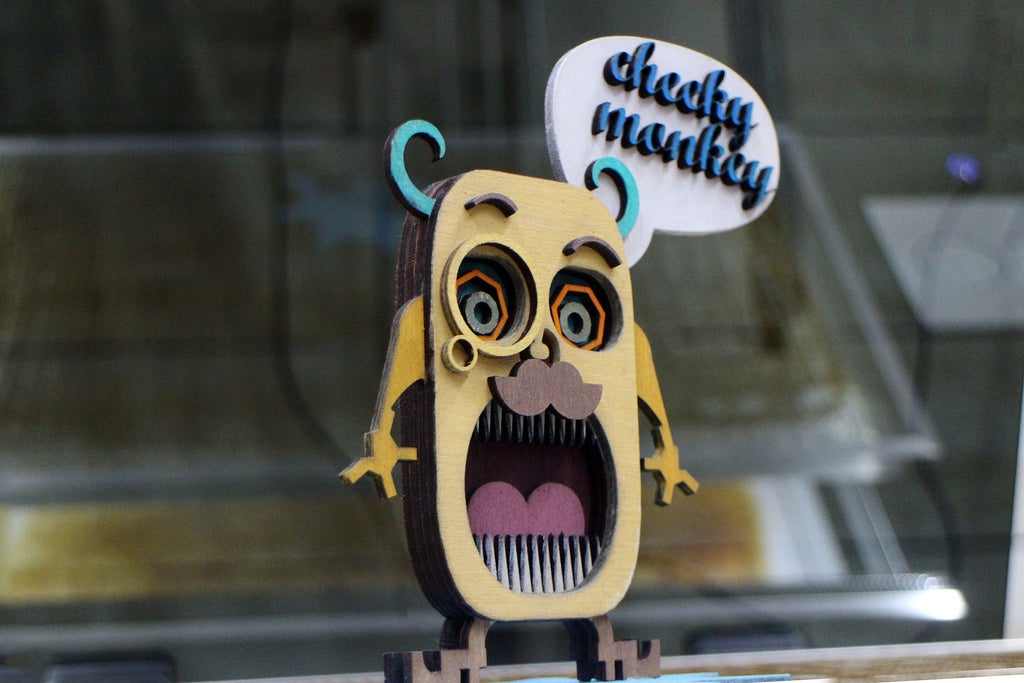
I designed this monster in Tinkercad, a free browser-based CAD program that combines simple shapes to create 3D models. To make the pieces real from the digital design it's possible to cut these by hand it would be a lot of work to get all the parts right. Instead I used a tool that's designed to make precise and small cuts, a 40W laser from Dremel.
DISCLOSURE
Dremel was kind enough to loan me a laser to try out and see what projects I could come up with using Tinkercad. You can find out more about Dremel's new laser cutterhere.
Below you can navigate around my model to see the different layers that were used to create this effect. This model is public so you're welcome to use it or modify it to make your own versions.
Though Tinkercad is most powerful when used as a 3D editor, the program easily exports SVG laser files by taking whatever shape is touching the workplane and making a vector file from that. Using this knowledge we'll design out monster by laying shapes together flat on the workplane in Tinkercad.
You can find my STL files for this monster in the file below :)
Ready to do the monster mash? Let's make!
Attachments
Step 1: Monster Base
Open a new design in Tinkercad. You can make your monster from any shapes you like (and Tinkercad has a LOT of shapes to chose from!), but I'll show you how I made mine.
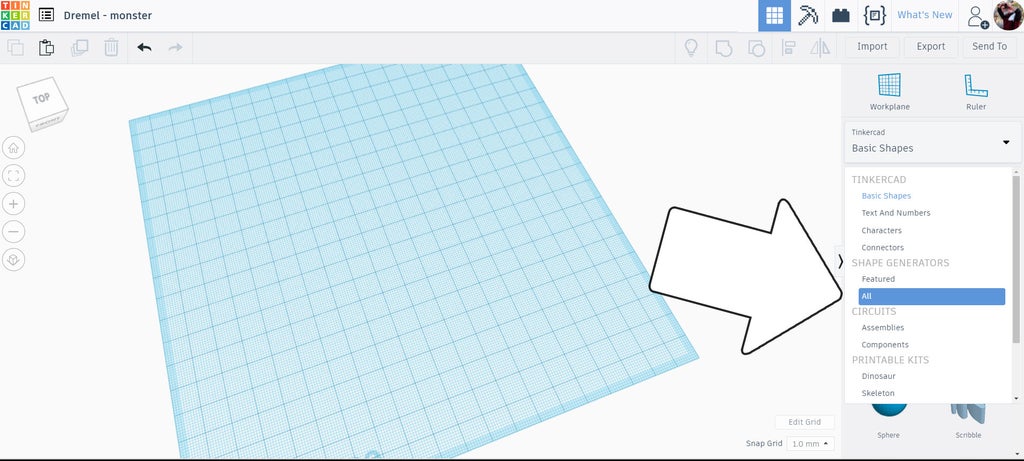
I really like the rounded corners of the softbox, found in the Shape Generators dropdown under "all".
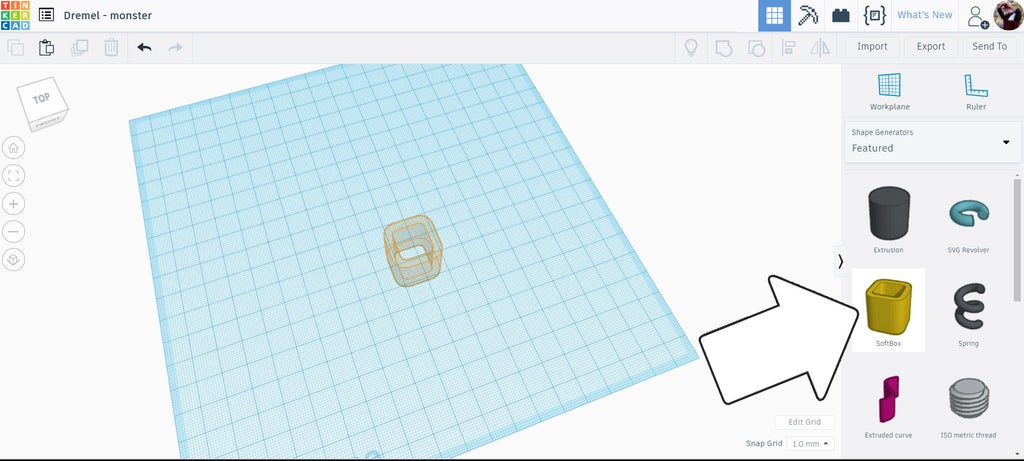
It comes in with an opening through the center, but by using the slider on the "wall" option the inside can be completely filled. I then stretched the softbox to the shape I wanted my monster.
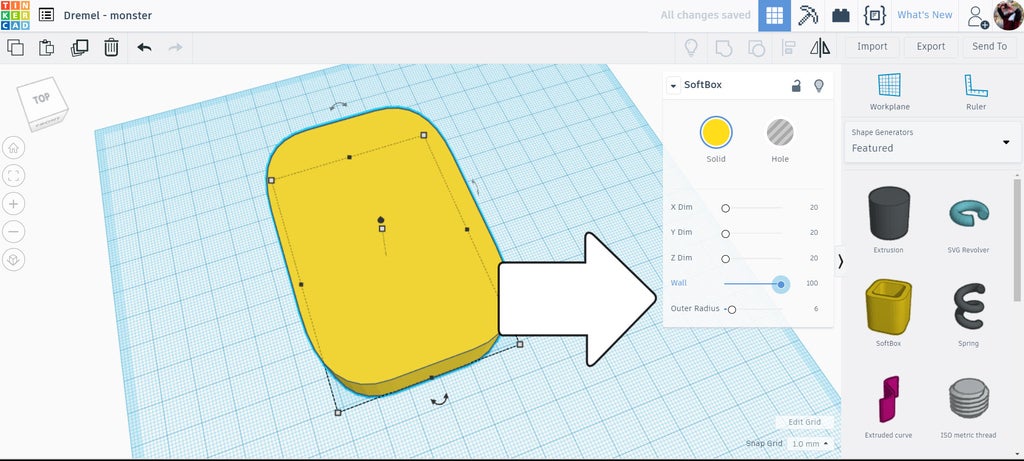
I used another softbox to make the openings for this monster, changing the shape from a solid to a hole. The wall slider was also moved to fill in the insides of the shape.
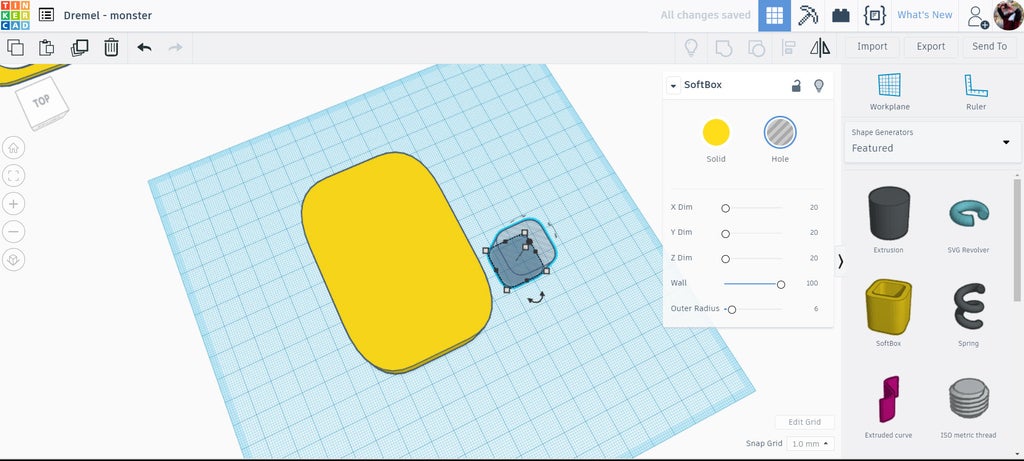
I made one opening for the mouth, then two smaller ones for the eyes. Using the align tool fro mthe top toolbar allows the mouth to be lined up perfectly with the body shape. The eyes were placed one at a time, with the second one being duplicated (ctrl+D) from the first and then slid over while constraining the movement with the shift key to keep it in line.
 |  |
Once everything is in the right place, select the pieces and group (ctrl+G) them together to make the top of the stacked monster.
Step 2: Make a Copy
Make a duplicate (ctrl+D) of the grouped shape and move the copy off to the side. This copy will be the next later down on the stacked monster, so we can dress it appropriately with things like teeth and eyeballs.
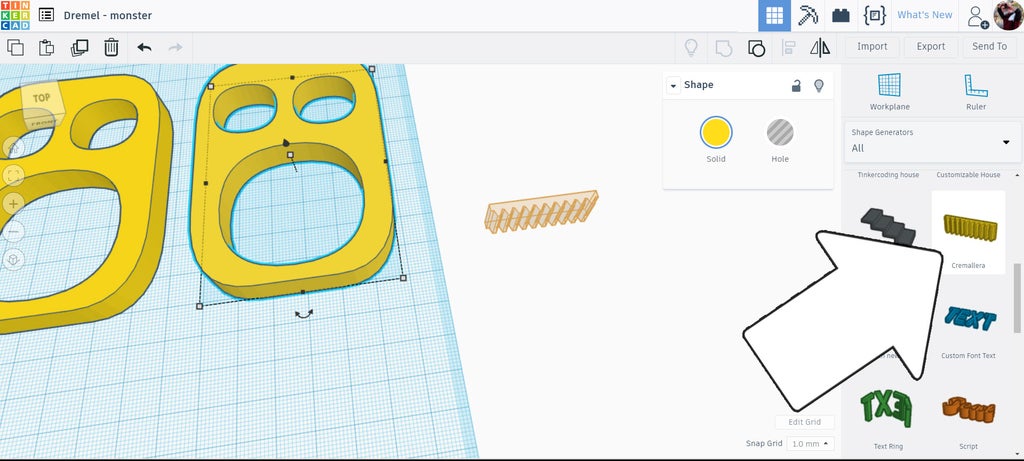
In the Shape Generator dropdown there is a shape called Cremallera (which means "zipper" in Spanish), drag one onto the workplane. We can modify the attributes with the sliders. This is a community shape provided by someone whom speaks Spanish, so I had to guess at a few of the attribute sliders. I found that the "Alts Dents" is Catalan for "tall teeth", this is the slider to make the zipper teeth long and sharp.
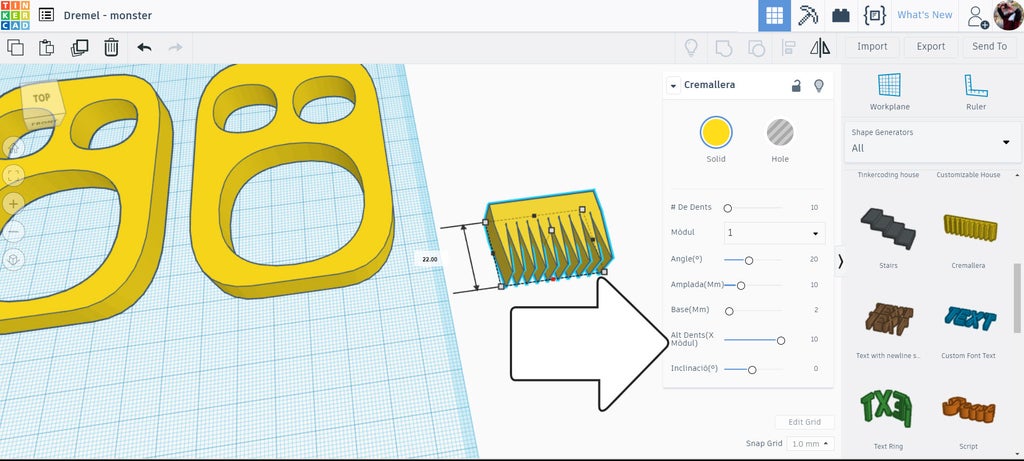
Once I was happy with the shape and dimensions I made a duplicate and then rotated it 180° to make the bottom row of teeth. Both teeth were move into place over where the mouth would be and then grouped.
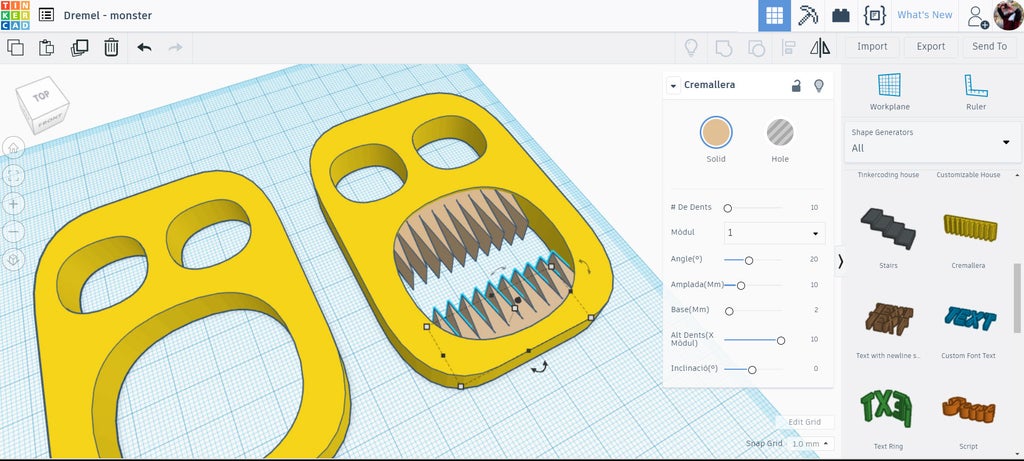
Step 3:
More shapes were added to build the arms, legs, and everything else. I found loads of fun shapes in the Shape Generators section in the dropdown, but there's plenty of good options in the Basic Shapes section, too.
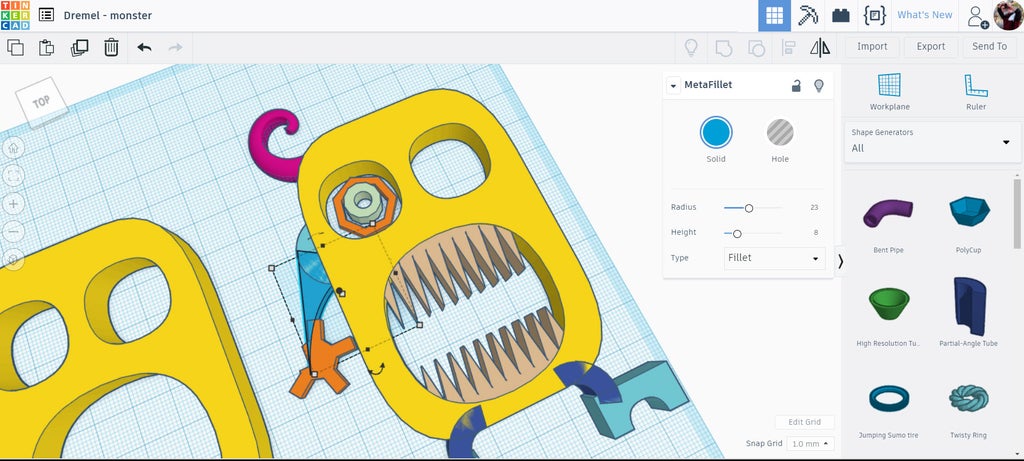
No matter how complicated the shape looks, Tinkercad will only take the outline of whatever is touching the workplane to generate the SVG. So, this means that you can be creative with how you use the shapes in the library. For example, the horns I used had a helical twist off the workplane, but I just used the height arrow on the shape to drag it through the workplane to get the profile I liked, using only part of the shape.
Once one shape is made, make a duplicate then use the flip command from the top toolbar to make a mirror of the original, this works for the legs, arms, and horns.
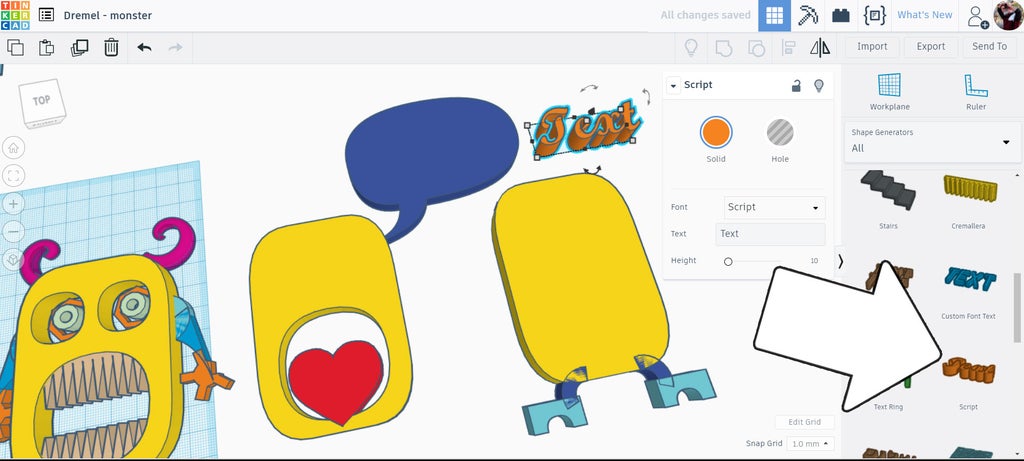
I found the speech bubble and the cursive text in the Shape Generators section, which look great with this monster. I made another copy of the base layer and then put the speech bubble onto that layer, along with a heart shape that would be the tongue inside the mouth opening.
Step 4: Export SVG
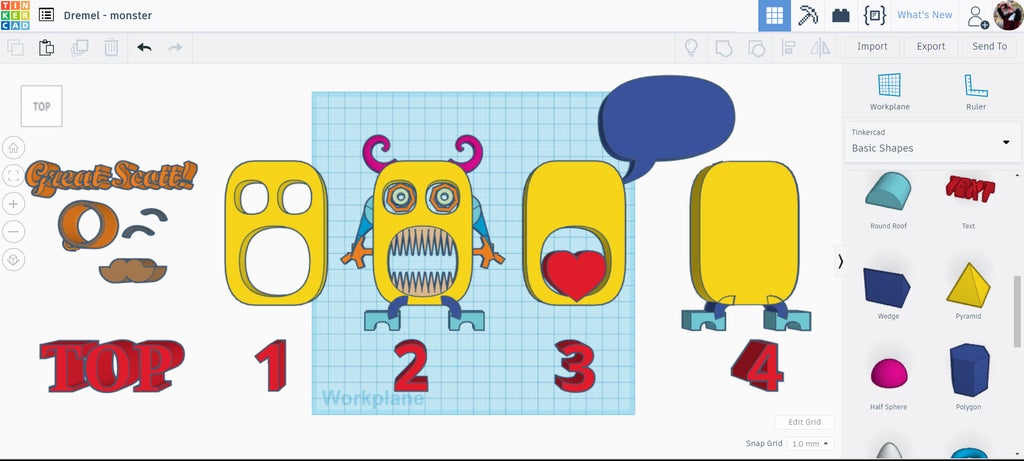
There really is no end to the types of shapes that can be combined to get all sorts of effects. For my design I had 4 layers, with small accents added on top like a moustache and monocle. The bottom layer (layer 4 shown below) acts as a solid backing and a second pair of legs to help support the monster when standing up.
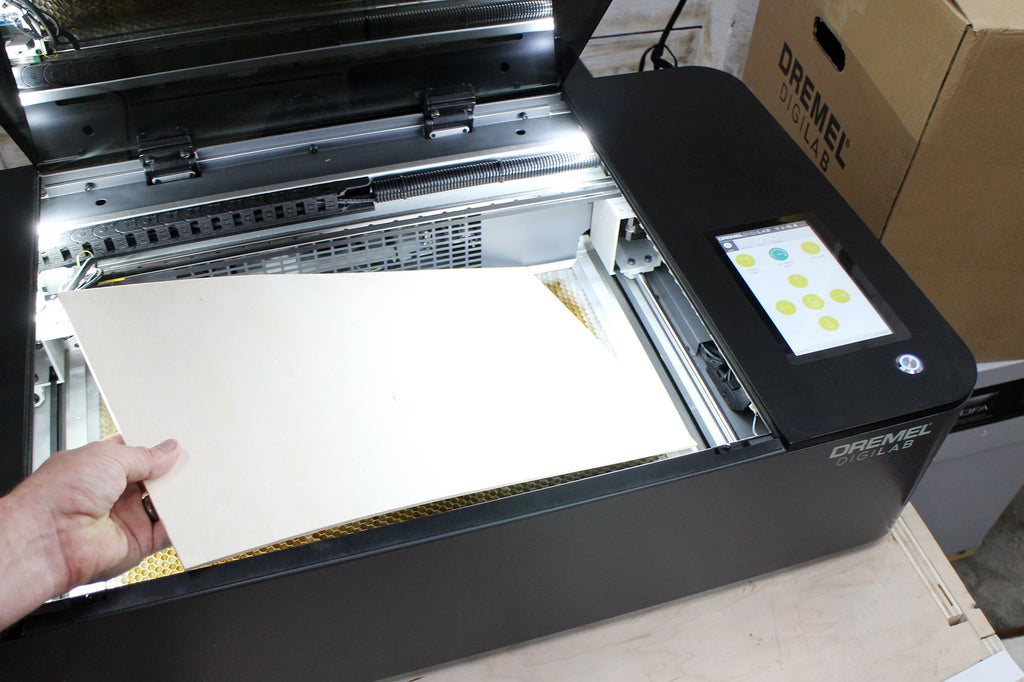
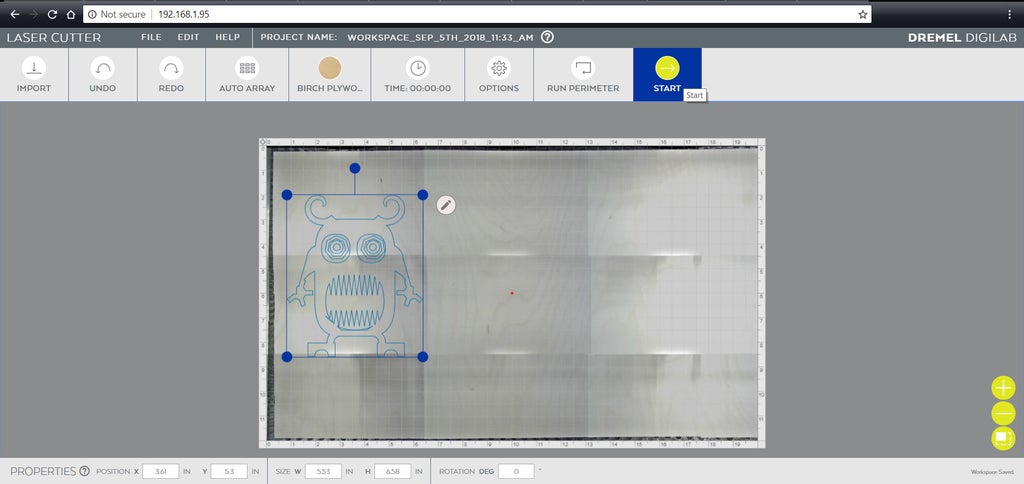
A new 20"x12" was loaded into the laser cutter, then the sheet was captured with the camera on the laser machine, which takes a picture of the material to be laser cut. This is great if you have irregular shaped pieces, or off-cuts that still have space on them for some additional cuts.
The layers were exported individually as SVG files, then brought into the Dremel laser interface using the import button in the top toolbar. Each layer was imported and then placed. The accents like the moustache were easily nested on the sheet of plywood to make optimal use of the material.
Step 5: Lasers!
I cut the monster layers from ⅛" (3mm) plywood. The shapes were nested in the Dremel interface to make best use of the material.

There's a material dropdown in the laser program that allows you to select the material to be cut and then changes the laser settings automatically. ⅛" Birch was selected, then sent to the laser for cutting. This job took about 6 minutes to cut.
Step 6: Painting
These stacked monsters look great right out of the laser cutter, but need some paint to really make them pop.
I used inexpensive acrylic hobby paint and mixed up custom colors that I thought would work well for this monster.
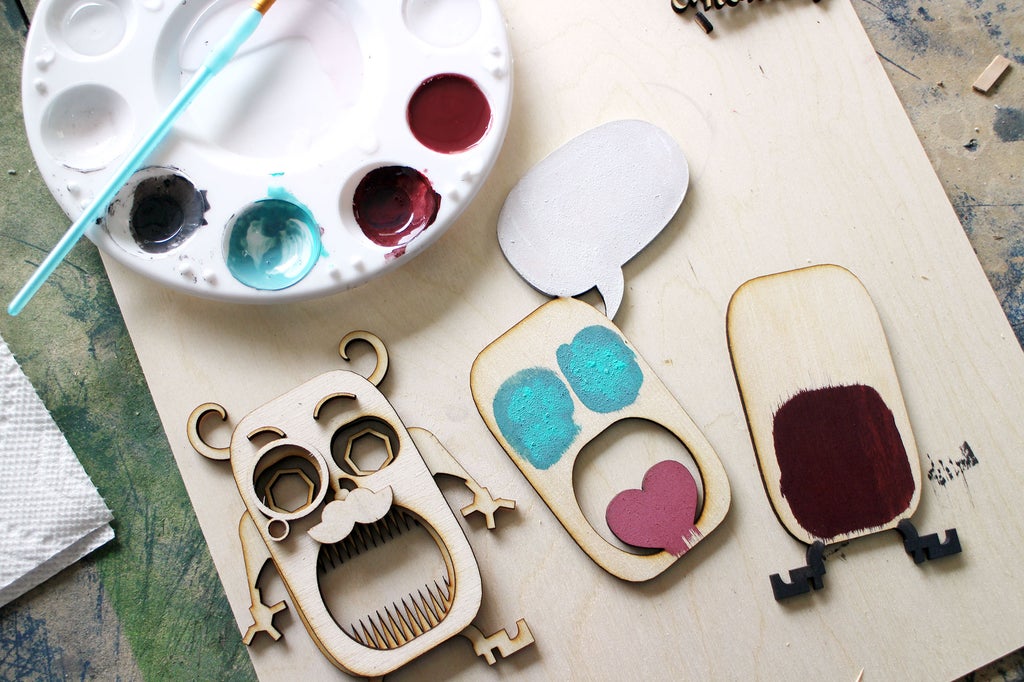
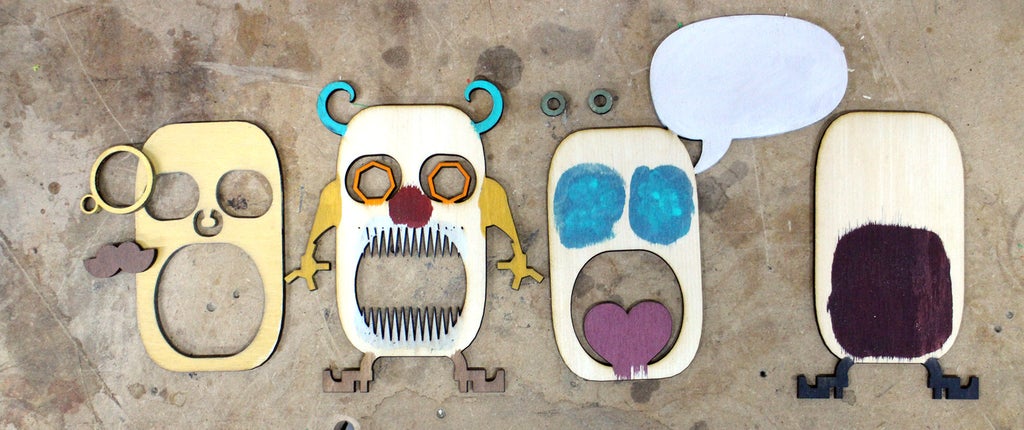
Before painting I stacked up the monster pieces to get an idea of what areas to paint, and what colors they should be. The great thing about the pieces is that there;'s coverage from the piece above, so only select areas need to be painted.

Here are all the pieces I used shown as the paint dries. Some of the pieces may look a little weird when they are apart, but they look great when they are stacked.
Step 7: Glue
Once the paint has dried the slices can be glued together. Instead of gluing everything at once I glued two pieces together and waited for them to dry before continuing. Since there was a few stacks I could let a few pieces glue up at the same time.
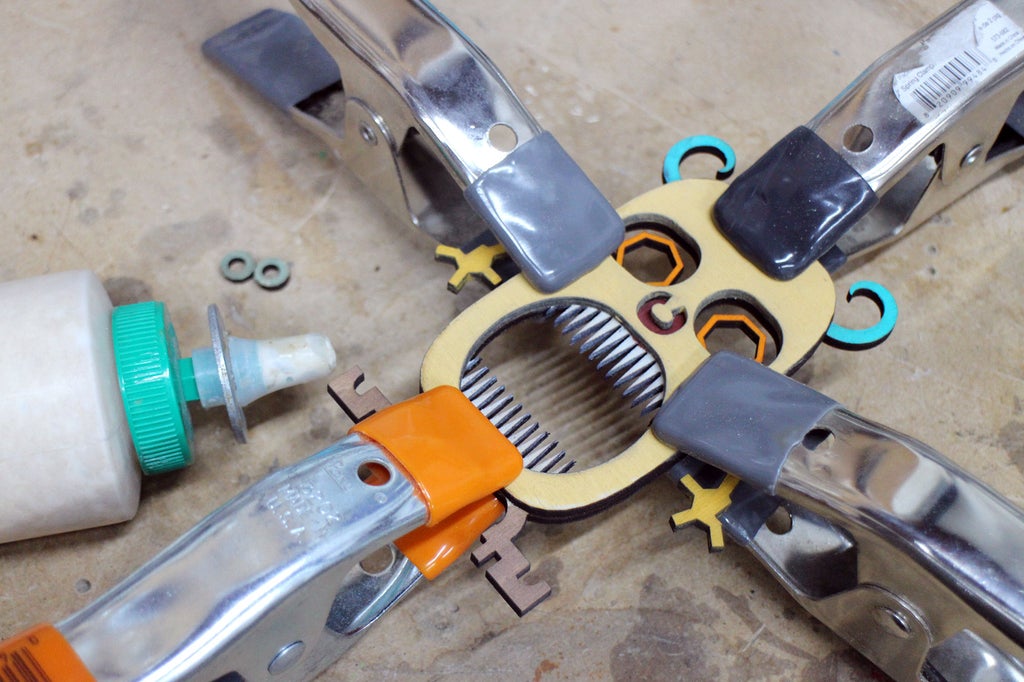
The top accents were glued last, and since they were so small and delicate I didn't bother clamping these parts down.
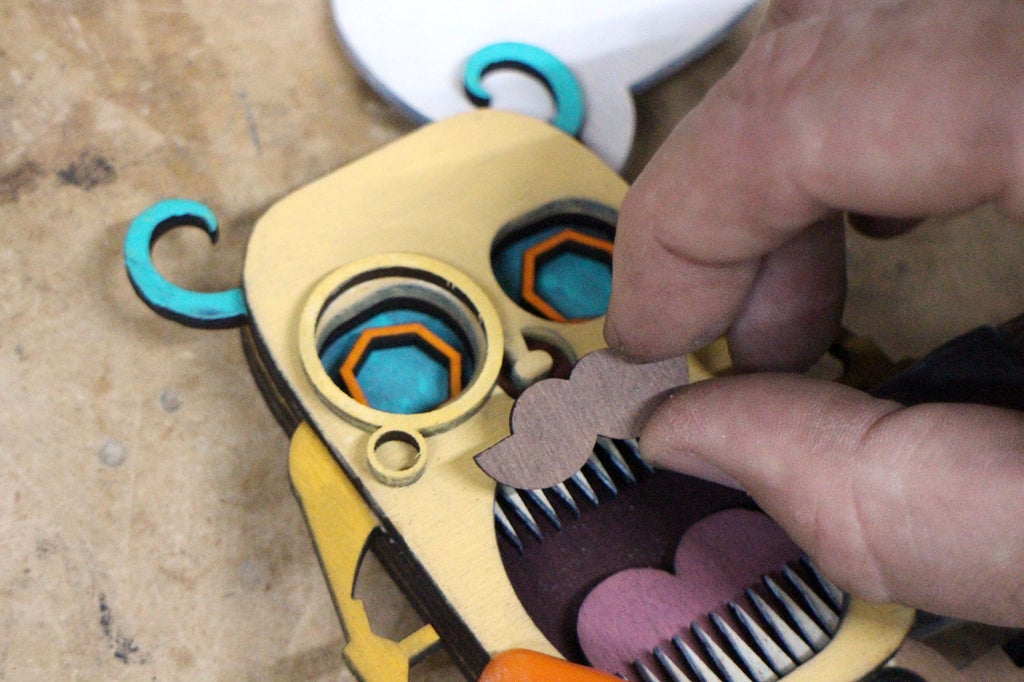
Step 8: Monster Time!
This monster only has 4 layers, with a top accent layer, but there really is no limit to the layering that could be applied. In fact, the more layers there are would increase the complexity and depth (and therefore the interest) of the piece. How about layering different depths in a few areas, what about one giant opening that have muliple depths? The choices are endless!
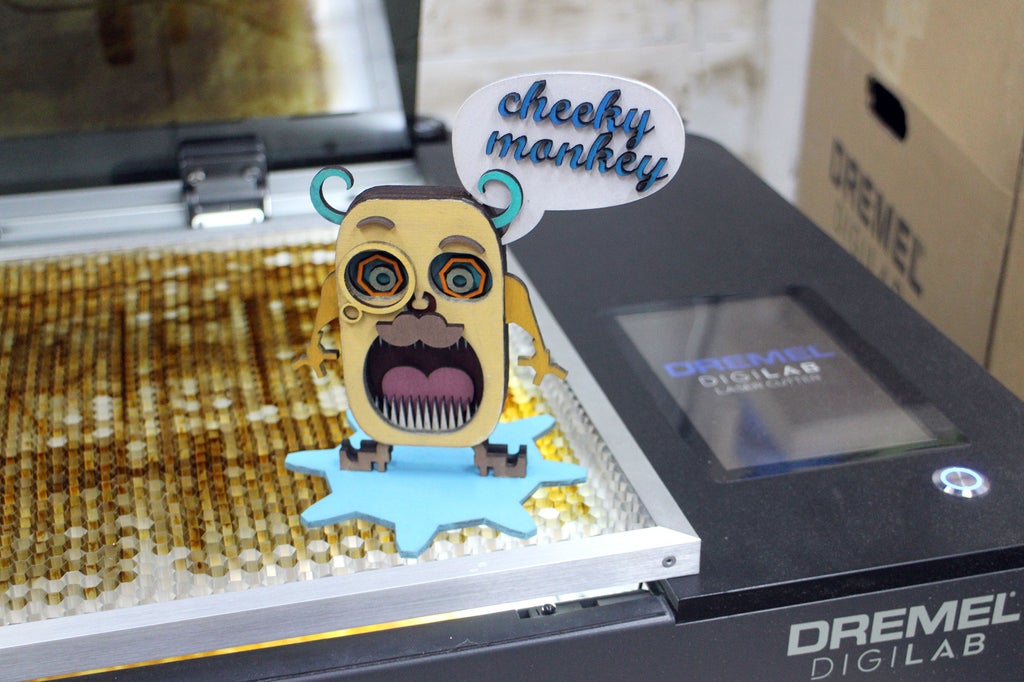
Thought this monster stands on his feet I added a fun base to allow it to stand on all kinds of irregular surfaces. The speech bubble is also a great way to personalize this monster, either with a persons name, or other unique phrase. What would you come up with?
Have you made your own version of this Stacked Monster project? I want to see it!
Share a picture in the comments below.
Happy making :)


