Introduction: Pocket Synth Briefcase
Cheap, but functional custom case for Teenage Engineering Pocket Operator synthesizers. Battery powered, solid and secure, looks good on any kitchen top.
Step 1: The Reason
There are so many cool things about pocket operators, but if you want to use several of them at once, the setup may become a bit messy. Every time when I wanted to play with them, I needed to spend some time taking them out of the drawer, plugging in the cables, choosing the right sync and volume settings etc. Not a big deal one can say, but I've noticed, that sometimes when I had a bit of free time and was willing to jam something quickly, this setup process was something, that stopped me. So I've decided to build a simple case, which I could take out and put away in no time and carry it in a backpack without any risk of damaging the pocket operators, which look quite fragile without the original (pretty expensive) silicone cases.
Step 2: What's Needed
- Teenage Engineering Pocket Operator x 3: amazon.com, amazon.co.uk or amazon.de
- Maker Hart just mixer: amazon.com, amazon.co.uk or amazon.de
- small aluminum flight case: ebay.co.uk
- a bunch of short angled minijack 3.5mm headphone cables: ebay.co.uk
- 3.5mm 3-pole stereo jack socket mount x 2: ebay.co.uk
- a short piece of 1mm optical fiber: ebay.co.uk
- 20mm stripwood, wooden screws, bolts, nuts and small cable holders
- 2mm thick MDF panel from the back of an Ikea picture frame
- utility knife, ruler, pencil, screwdriver, small hacksaw, soldering kit, glue gun
Step 3: Thinking
I find it useful to start pretty much any DIY project by creating a simple actual size 3d model with https://tinkercad.com. This allows me to get the idea of how the thing will look like in the end and make sure, that everything fits well together before I order missing components.
For those, who are familiar with Pocket Operators - I use audio/sync output from the first PO and stereo output from the second and the third. This way I can switch between two modes: external sync and standalone mode, where sync is being produced by the first PO. I use external sync with my Korg Volca Suitcase, which I will hopefully cover in another instructable at some day.
Sync mode settings for POs:
External: SY3 -> SY2 -> SY2
Standalone: SY1 -> SY2 -> SY2
Step 4: Cutting and Screwing
The simple version of the setup is done. I had actually used it for a few weeks before I decided to improve it a bit more.
Step 5: Disassembling, Drilling and Hiding
Step 6: I/O and Soldering
As you may know, Pocket Operators can output signal in such a way, that the left channel is being used to send sync clock pulses while the right channel is outputting the audio. So I've split the output cable of the first pocket operator into two: audio and sync. The first cable goes to the mixer as mono input. The second one splits into two and goes as sync inputs for second and third operators.
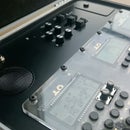
Since the mixer is hidden below the panel and it's impossible to see the LED indicators, I've decided to drill tiny holes in the panel and try using short pieces of optical fiber to pass the light through, and it appeared to be a great idea.
Step 7: Testing
Step 8: Conclusion
I'm really happy with how this thing turned out. The batteries last for weeks, it's portable, solid and it sounds and looks pretty cool.
Future steps to consider: - replace MDF and wood with plexiglass - hide pocket operators below the panel, drill holes and use button caps for push buttons - install integrated speakers into the panel Hope you've enjoyed this project and please let me know if you have any questions regarding it. You can find videos of this and some other projects I have on my YouTube channel. Good luck with your projects!


