Introduction: Restoring Old Kitchen Knives
There are five basic steps to restoring an old knife:
- Find a Knife worth Restoring
- Remove Rust
- Refinish the Blade
- Refinish the Handle
- Sharpen
I like old knives because the quality is there, and they're cheap. They were made before the time when plastic and stainless steel was par, so instead of mediocrity, you'll find high carbon steel and wooden handles. Higher end knives will have brass rivets, and are just beautiful. If you're the type to put a knife away wet, or leave it in the kitchen sink, then older knives aren't for you. The blade will rust, the handles will split from being wet, and you'll ruin a 50 year old knife in a month.
But if you're looking for a quick project, restoring an old knife is really worthwhile. Rust can be removed, handles can be restored or replaced, and as long as there is life left in the blade, you can have a razor sharp knife that will make chopping and cooking at least 3 times as fun.
If you're feeling ambitious and want to make your own knife instead of restoring, check out these Instructables:
- Make a Kitchen Knife by Sam DeRose
- How to make a knife by Phil Reilly
- How to Build a Knife by Basta
- Making a Stock Removal Chefs Knife by Badger the Bladesmith
Step 1: Finding Quality Knives
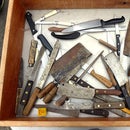
The most important step is to find a good knife. Search local flea markets first, then try second hand stores or craigslist, and then antique shops or ebay.
What to look for:
I basically look for rusty blades and wooden handles. If the knife has a decent weight to it and feels balanced when you pick it up, that's good.
If the handle is a dark wood (walnut, rosewood, ebony, etc.), this usually indicates that it wasn't the cheapest knife when it was new.
Anything old (50+ years) and with a stamped maker's mark should be decent. If someone hasn't thrown it away in 50 years, there's probably a good reason.
The Tang Style will tell you more about the knife. The blade of a full tang knife will have metal that extends to the back of the handle, usually with brass rivets holding the wood scales in place. This is great. Japanese knives may be half tang, but they have laminated steel blades, and are amazing knives. Grab every cheap one you can find.
A magic combination is an old knife with surface rust but no deep pitting (especially near the edge), with wood handles that aren't split, and with a blade that still has some life left in it.
What to avoid:
I avoid plastic handles and stainless steel, but that's my preference. Anything that's badly bent (looking down the edge) or cracked, pass it up. Many old knives will have been sharpened so much that there's not much life left in the blade. You can still get them sharp, but they turn into thin fillet knives, not the chef's knife they were intended to be. If the knife is worn down, but it's from a well known manufacturer (like the Henckel knife in the photos), it might be worth getting anyway.
Don't be too worried if the blade isn't sharp or if the edge has small nicks. Cracks in wood handles can be repaired, and even re-handling a knife isn't that difficult if you have basic tools.
Styles and Stamps:
There are many different types of knives for different purposes. There are small paring knives, steak knives for the table, serrated bread knives, versatile chef knives of different sizes, butcher knives, thin fillet knives, and sashimi knives with a flat side to the blade, and then there are more specialized knives of all shapes and sizes. For a good and quick overview of different knife types, check out this Instructable: The Knife Box, for Culinary students, Chefs, and Avid Cooks! by dustinbikes.
If there is a stamping on the blade, or an etching, or any logo on the handle, you will be able to identify the knife and see if it's worth anything. On a knife from the east, you may not be able to read the characters, but chances are it's worth grabbing if it's cheap.
I recommend buying a few of these knives to practice sharpening, the rest or the restoration process is pretty straightforward.
Step 2: Removing Rust and Refinishing the Blade
The first thing I do is get rid of any rust on the blade. I used to spend a long time sanding the rust away, but now I just make a solution of citric acid and water to dissolve the rust. The advantage here is that it's not as abrasive as sanding, which helps preserve the maker's mark stamped in the blade, and it will even remove rust in hard to reach places.
Dissolve Rust:
Pour a few tablespoons of citric acid powder in a tall container, fill it with warm water, and submerse the blade of the knife. If the handles are wood, avoid getting them wet! As they absorb water, they may swell and crack.
Wait a few hours and let the rust dissolve. Scrub the knife down with a coarse sponge or fine steel wool, and continue soaking until the rust is gone.
Then sand the blade by hand, starting around 320 and working up until you're happy with it. A full polish is possible, it's just a lot of work. Be careful not to cut yourself if the blade is sharp!
Step 3: Refinishing Wood Handles
Tape over the edge of the blade, especially if it's sharp. You will cut yourself if you don't. When that happens, just don't get blood on the handle... it stains.
Clean and Sand Handles:
When I began restoring handles, I would sand with 220 grit sandpaper or lower, and take them up to a 600 - 1000 wet sand. Now I usually just start with #0000 steel wool. This will remove any grime, but it won't take away as much of the patina that the wood has inherited over the years. It takes a long time, especially in tight places, but I like the results and the finish, and there's no worry about removing too much wood and changing the original shape of the handle.
Protect with Oil:
After the handles are sanded (along with the metal rivets and tang), it's ready for oil. I usually just use a few coats of mineral oil. Boiled linseed oil is another good finish that will actually cure, so it doesn't stay as 'wet' as other oils. I like to keep it food-safe, but it's your knife, so go with a finish that you like.
I always leave the sharpening step for last, because even with tape on the edge, it's still possible to cut or stab yourself when refinishing the handles.
If your knife needs new scales, check out this Instructable for tips on re-handling a knife:
- Make a Custom Knife Handle by gabrieltaft
Step 4: Reshape the Edge
If the edge of the blade isn't straight, if it's chipped or the tip is broken, it will take a bit of shaping before you can begin sharpening it.
For damaged blades, it's usually necessary to start with very very coarse stones to get the edge profile back into shape. Older knives are often worn down and concave in the center. To fix this, hold the blade normally and try to cut through the sharpening stone like you were slicing bread. This will remove metal from the high spots, but it will completely dull the edge. Don't do this unless it's necessary, it will remove nicks quickly, but it's hard on the stones.
It helps to mark the edge with a marker so you know where you need to remove material.
If you have a dremel, check out the Instructable: How to Re-Tip a Knife Using Dremel by JFabor.
Step 5: Sharpening
Bevel both edges of the blade by holding the knife almost flat on the stone. Focus on one side of the blade until you can feel a burr on the edge, then flip it over and concentrate on the other side.
Continue sharpening on the coarse stones until it feels sharp all the way down the edge. If one part needs more work (the curve of the tip), focus on sharpening that area.
As you work through to finer stones, the knife should be getting quite sharp. If it's not, go back a grit and fix it.
If you don't feel comfortable sharpening the knife yourself, consider taking it to a good knife sharpener. I can recommend Hida Tool if you're in the Bay Area. They do fine work and it's cheap ($5 -10). But remember, just because somebody charges you to sharpen a knife, it doesn't mean the know what they're doing. If you value the knife at all, be very wary of someone using grinders to sharpen as they can easily remove way too much material from the blade, which will drastically shorten its life.
Here are a few Instructables that go into more detail about sharpening:
- Knife Sharpening Tricks by Tim Anderson
- DIY Knife sharpening kit by Quad89
Also attached to this step are a few PDFs that should be useful.
Sharpening is a whole can of worms. My advice is to get a few sharpening stones, practice, practice, practice and learn by doing. There are pull-through sharpening tools that are quick and work alright, or there are sharpening jigs, but they seem complicated and expensive. Or you can pay a knife-sharpener to do it for you. I had a bad experience with the local knife sharpening truck and after that I vowed to do it myself.
The most important thing is that you hold the bevel at a consistent angle. It's easy to round the edge over when starting out.
Step 6: Caring for Kitchen Knives
A carbon steel knife needs special care, otherwise it will discolor and rust very easily.
After using the knife, wipe it off!
Anything acidic is going to etch and darken the blade. This will happen in a very short time, so get in the habit of cleaning the knife after every use.
Don't put it away wet, ever.
Store knives upside down in a knife block, so the cutting edge isn't touching anything.
For tips on actually using your kitchen knives, check out the book Knife Skills Illustrated: A User's Manual by Peter Hertzmann.
Now that you've got a decent knife to use, check out these Instructables for some ideas on how to store and care for your kitchen knives:
- Rainbow Wood Magnetic Knife Strip by noahw
- Wooden sheath for cook's knife by MrBippers
- Line-Cook Knife Rack by Leche de Pollo
- Care for your Knives by barefootbohemian
- Magnetic knife rack built using hard drive magnets (without power tools) by tzny
- Knife Block -- Free Standing by Phil B


