Introduction: Steampunked Time Traveling Machine
Hi everybody it took a long time of about some weeks to build this new project but now I am proud to present the "Steampunked time traveling machine" to you.
Since I was a young boy I am fascinated of the idea to create a time-machine like it was described by H.G. Wells.
Now as an old Steampunk guy I picked up this idea again and created my own "machine" for time traveling.
This instructable is really extensive and I am sure that you will enjoy the following detailed steps beginning with an old boiler made of copper and ending with a funky steampunked machine.
And here comes a short movie clip as a first impression:
Are you noesy? Then follow me and enjoy this project
Yours Aeonn Junophor
Step 1: First Draft
Some weeks ago I got an old boiler made of copper by fortune. After the first cleaning an polishing the idea of a steampunked time machine rose up in my mind.
So I went down the stairs to my steampunk labaoartory (in german: Dampfkraftlabor) and developed a first draft in which way this funky fantasy time machine might could be constructed.
You can see the result below.
Some days later I made a second draft and started the project as you can see it here using a lot of other instructables about eg copper welding, making a joule-thief, or working with a flash-module of a disposal camera.
The most fascinating aim to me was to run all these different lights measure instruments and the sound module by using only one! 1.5 Volt battery. And it is unbelieveable it really works;-)))))))))))))
Step 2: Modifying of the Old Steam-boiler
After all elements had been chosen the boiler needs a lot of holes to keep the fittings and controls and instruments.
A lot of fittings had to be fixed by welding. So I took this instructable to learn how to do it.
To make the big holes I first drilled small holes, then cut the middle out with metal shears and finished with a file.
A lot of fittings had to be fixed by welding. So I took this instructable to learn how to do it.
To make the big holes I first drilled small holes, then cut the middle out with metal shears and finished with a file.
Step 3: Measure Instruments
For time travelling under time pressure you need some controls an instruments.
These are an old pressure gauge, a new working alarmclock (model "DEKAD" from ikea),and a voltmeter for pulsating direkt current.
These are an old pressure gauge, a new working alarmclock (model "DEKAD" from ikea),and a voltmeter for pulsating direkt current.
Step 4: Blind Flange With Integrated Speaker
I covered the bottom of the boiler with a blind flange made of red fiber and integrated a loudspeaker for transmitting the sound effect.
Step 5: Cooling Spirals
A time machine which works whith plasma energy and time pressure needs also a cooling system
So I created two cooling circuits.
So I created two cooling circuits.
Step 6: The "low-pressure"-plasma Circuit
The low-pressure plalsma circuit is constructed with a flickering bulb covered with a copper net. The top protector is an E27 Centra bulb socket made of brass and glass.
The holder is part of an old glass holder and burner of an petrol lamp. The flickering bulb is driven by an HV-flash module of an disposal camera.
See also this instructable: HV-powersupply
The holder is part of an old glass holder and burner of an petrol lamp. The flickering bulb is driven by an HV-flash module of an disposal camera.
See also this instructable: HV-powersupply
Step 7: The "high-pressure"-plasma Circuit
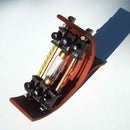
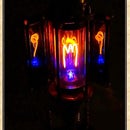
The high-pressure plalsma circuit is constructed with a small neon Tube called IN -24 (I bought them from Mr. Nixie)
with the help of this instructable Steampunk-Light-tube
This steampunk-light-tube is placed in a separate copper tube with 18mm in diameter. The IN-24 neontube istself is hold by two front parts of a cartridge case ; see also the detailesd pictures below.
The IN-24 tube is driven by an HV-flash module of an disposal camera with DC.
See also this instructable: HV-powersupply
Step 8: Joule-thief Illuminated Cutouts
Another application ofthe time machine are the Joule thief illuminatet cutouts.
To build these lights I took this Instructable "Making a JouleThief"
To hide the electronic parts I screwed the cutout holder made of porcelaine into two old brass bulb holders E27 made of brass as you can see.
To build these lights I took this Instructable "Making a JouleThief"
To hide the electronic parts I screwed the cutout holder made of porcelaine into two old brass bulb holders E27 made of brass as you can see.
Step 9: Emergency Stop Valve
Another element of the time machine is the emergency stop valve.
Therfore I took a bursted water tube and placed two green LED inside a exactly fitting plastic tube as you can see.
Both LED´s together are driven by the third Joule Thief of this project
Therfore I took a bursted water tube and placed two green LED inside a exactly fitting plastic tube as you can see.
Both LED´s together are driven by the third Joule Thief of this project
Step 10: Electronic Equipment
The time machine runs with three sperate HV-powersupplies, three Joule thiefs . All these parts are energized with only one 1,5 Volt AA battery.
Th soundmodule runs with three 1.5 Vol coin cells and the IKEA alarm clock runs also with 1.5 Volt from an AA battery.
Th soundmodule runs with three 1.5 Vol coin cells and the IKEA alarm clock runs also with 1.5 Volt from an AA battery.
Step 11: Controlbox
To "drive" the time machine we also need a controlbox. Two switches, one press button and the AA-battery are placed here.
The box itself is made of an old and broken The controbox can be easyhandlamp from the army
The box itself is made of an old and broken The controbox can be easyhandlamp from the army
Step 12: Carrying Straps
The carrying straps are the only part of the time machine, which I really had to buy for this project. Yu will find them at schoolbags made of leather,
Step 13: Time Travelling
At the end of this veeeeerrrryyy long project here are some pictures of this time machine in action.
I hope you enjoyed this instructable
Yours Aeon Junophor
I hope you enjoyed this instructable
Yours Aeon Junophor


