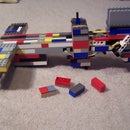
Introduction: The F-1 Lego Grenade + Rocket Projectile Launcher
This is the instructable for my grenade/ rocket projectile launcher. The gun shoots my own kind of big projectile (a rocket), but also shoots a knex fragmentation grenade by https://www.instructables.com/id/Project-X4-XPLODER-Mini-Knex-Hand-Grenade/
Some pros of this launcher are:
-very strong
-can shoot many different projectiles, of different sizes
-accurate(for a grenade launcher)
-range of 25+ feet (depending on what RBs you use)
-the rocket has lots of stopping power
-looks cool
Cons
-long reload time (about a minute)
-no magazine (single fire)
-the top moving panel is annoying
-fairly heavy
Check out my new Website for all my Lego Guns, and videos!!!
http://sites.google.com/site/bblegobrickworks/
The launcher uses a lot of rubber bands (about 10, but depending on the rubber bands, you could have less). The instructions for the rocket is also included.
Step 1: Trigger Holder
Easy
Step 2: Underside
This is the underside of the launcher, as well as the underside support for the rubber band holders.
Step 3: Bottom of the Barrel
This is the 'run way' of the rocket. The lengths are: 6x52 (except for the back part with the hole)
Step 4: Trigger Mechanism
This holds the firing rubber band on one end, and the counterweight rubber band holder on the other side.
Step 5: Building the Sides+back
The front may look weird, but just follow the steps.
Step 6: Rubber Band Holders+ Attaching
These hold the rubber bands in place when firing.
Step 7: Putting It All Together
Put together the underside, trigger holder, and barrel.
Step 8: Top Cover+Sight
The top cover is really easy to make, and you can use whatever sight you want if you dont like mine.
Step 9: Underside Rubber Bands
In this step, I used 3 Rubber Bands, but you may have to use more (or less) depending on the strength of your rubber bands. I also used a rubberband to hold the top flat.
Step 10: Attaching the Firing Rubber Bands
I used 6 Rubber Bands- 2 Sets of 3 Rubber Bands. Each set has 3 bands knoted together into a chain.
Step 11: Ammo- Rocket
This is an easy rocket to make for the launcher. To fire, just put it in front of the trigger with the rubber bands loaded. Another alternative is a fragmentation knex grenade which I DID NOT MAKE. Its called the X4 Xploder, by Darth Trainman, which works with this launcher as well. Heres the link to his instructable: https://www.instructables.com/id/Project-X4-XPLODER-Mini-Knex-Hand-Grenade/.


