Introduction: Toy Mack AC Bulldog Truck - Part 2 - Frame and Steering Linkage
Part 1 dealt with making steel wheels with five spokes and a sturdy hub. This part will deal with the frame and steering linkage for a working steering system. Click here to go to the first in this series.
Tools
- Angle head grinder with grinding and cutting discs
- Bench grinder
- Wire feed welder
- Vise
- Spring clamps
Materials
- 1/2 inch square steel tubing
- 1/8 x 1/2 inch mild steel bar
- 1/4 x 3/4 inch mild steel bar
- 3/16 inch mild steel rod
- 1/2 inch mild steel rod
- 5/16 inch tension pin stock
I found it necessary to build the steering linkage and the frame at the same time so I knew how much space would be needed by the kingpin assembly and wheels before deciding how wide to make the frame, itself. The photo shows the finished frame with the steering linkage and wheels in place. (The steering wheel was not yet built. I clamped a small Vise-Grip pliers to the steering column to be able to manipulate it for testing.)
The full-size truck in the photo is on display in front of a business. It came into the current owner's family through his grandfather who used it and several others in a limestone quarry operation. Mack did not begin using pneumatic tires until about 1925. This truck is a 1922 model. When Mack began using pneumatic tires, it also made kits available for converting from the original hard rubber tires to pneumatic tires. The owner's grandfather bought the kits as soon as possible. The truck is usually in running condition and is driven in parades. When I talked with the owner, in June 2015 the truck was not running for some reason. This truck had sat in weeds for about 40 years before family decided to restore it. Much of the sheet metal had rusted away and needed to be replaced.
Step 1: Kingpin Assembly
I cut a short length of 1/2 inch square tubing and then sliced them along their length to make to "L" pieces. I drilled these for two 3/16 inch holes. The holes are not identically placed, but are a mirror image of one another.
The second photo shows the kingpin assemblies welded up. (As shown, my plan was to have the tie rod behind the front wheels, like many automobiles. But, I began to realize the linkage would be too restricted by the fenders to be added much later.)
Step 2: Attachment for the Kingpin Assembly
Our local hardware store has tension pins in small parts drawers. I bought what is nominally some 5/16 inch tension pins. The inner diameter on these is a tiny bit larger than 3/16 inches. They make a good bearing for the kingpins.
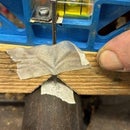
I carefully welded a section of a tension pin to the end of a 1/4 x 3/4 inch mild steel bar.
In the second photo I have cut the 1/4 x 3/4 bar to the desired length and welded it to 1/2 inch square tubing for the frame. (The second photo shows the frame set up on its left side.)
Step 3: Check for Frame Width
The frame is 1/2 inch square tubing. I welded flat steel bar over the ends of the tubing.
See the text boxes on the photo for details on measuring for the cross members of the frame.
I had no plans or suggested dimensions when I began this project. The pipe I chose to use for the wheel rims is 1 7/8 inches in diameter. I looked at various photos I found on-line of Mack AC Bulldog trucks and used a divider to determine how many wheels would fit between various points on the truck. For example, the top of the cab is about three times the diameter of a wheel above the ground. The distance between the rear of the front wheel and the front of the rear wheel is about three and one-half times the diameter of a wheel. Although not completely precise, this gave me dimensions and proportions entirely satisfactory for a young boy to enjoy in his play.
Step 4: Steering Linkage
After I moved the tie rod from behind the wheels to in front of the wheels, I switched from 3/16 inch rod for the steering arms to 1/8 x 1/2 inch flat steel bar. The pivots are 3/16 inch rod welded into one member and passing through a hole in the other member. A short section of tension rod is welded onto the end of the pivot pins and welded in place to function like a collar. See the second graphic for detail on the construction on the steering linkage. (In reality, the tie rod is above rather than below the steering arms.) See the third graphic for details on mounting the steering column.
Step 5: Rear Axle
I welded a piece of 1/2 inch square tubing across the rear part of the frame for a spacer to raise the rear of the frame to the same level as the front of the frame. I welded a 1/8 x 1/2 inch flat bar onto the ends of this spacer piece and drilled 3/16 inch holes through which the axle would pass
The retainer end caps for the wheels are short pieces of 1/2 inch rod with a 3/16 hole drilled through the center. Slip one of these onto each axle after putting the wheel on the axle and weld this piece of rod to the axle. Be careful to leave the fit a little loose so the wheels turn freely. My flux core welder is a little dirty. Sometimes I needed to oil and spin the wheels to make them loosen up after flux dirt got into the wheel assemblies.
Click here to go to Part 3 dealing with various details like the crank, steering wheel, and faux chain drive.


