Introduction: Magnetic Bottle Opener
I happened upon a neat vintage-looking magnetic bottle opener in a high end store the other day and was amused on how simple the concept was and the price they were charging for it. I can't remember the brand of the exact opener I saw, but doing some research I found ones online for sale with prices ranging from $14 - $22. A little research reveals that the original design is by Brendan Ravenhill.
This magnetic bottle opener uses a bent nail to pry of the cap from your bottled beverage, and the magnet keeps the cap from flying away after opening. Another magnet on the side allows you to stick your opener on the fridge for easy access.
I'll show you how to make your own for less than $5 (possibly free if you have the materials on hand!). Not convinced you need one? You might think differently when you see how neat this opener is.
Here's what's I used to make mine:
tools:
| materials:
|
Step 1: Cut Wood + Bend Nail
handle:
For the bottle opener handle I used some scrap 1-1/16" x 1-1/16" (roughly 27mm x 27mm) SPF rail cut into about a 3" (7.5cm) length.
On one end of the handle draw diagonal lines from each corner, where the lines intersect will be the centre of the cross section. This is where the nail will be placed.
My nail was about 4mm thick so I used a 5/32" bit (4mm) and drilled into the line intersection on the handle end, boring about 1.5" (40mm) deep.
nail:
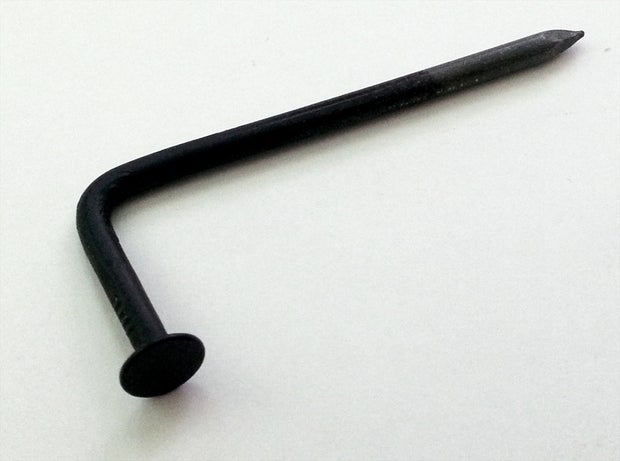
Using a capped bottle as a guide the nail was positioned where the flanged nail end met with the edge of the cap lip, a mark was made where the nail met the drilled opening in the wood handle.
With two vise pliers, the nail was bent in a 90° angle at the mark. Any scuff marks made during bending will be covered in paint later.
Step 2: Adding Magnets
The design of this bottle opener uses two magnets, one underneath to catch the cap when the bottle is opened and another on teh side to hold the opener to an ferrous surface when not in use.
I had some extra 1mm thick neodymium magnets left over from some other projects, I got a stack of 10 here for $5. These magnets are 10mm in diameter, so I used a 10mm drill bit to drill into the underside and side of my handle. I stacked 2 magnets together for each location, meaning I needed to drill a 2mm deep hole or each.
Dry-fir the magnets in the openings, if you go slightly deeper than intended you can easily use the wood shavings to bump the magnets up to the right height. I chose not to install the magnets until the profile was defined (in the next step).
Step 3: Handle Profile
After the magnet openings have been drilled it was time to define the profile of the handle. You can chose any profile you like that will make the handle more ergonomic. With a pencil I scribed soft curves until I had a profile I was happy with.
Using a wood saw I removed the bulk of the wood, then with a rotary tool I refined the shape. Starting with a rough grit sandpaper (80 grit) I smoothed the contours to a nice transition between the curves and the top edges, then I progressively moved to finer grit sandpaper until a smooth finish was achieved; this took about 30 minutes.
Using a wood saw I removed the bulk of the wood, then with a rotary tool I refined the shape. Starting with a rough grit sandpaper (80 grit) I smoothed the contours to a nice transition between the curves and the top edges, then I progressively moved to finer grit sandpaper until a smooth finish was achieved; this took about 30 minutes.
Step 4: Paint + Epoxy
 After the nail was bent I applied a few coats of matte black spray paint (optional). Then, to secure the magnets and nail in place I used a strong 2-part epoxy.
On a scrap piece of cardboard mix equal parts resin and catalyst and mix thoroughly until combined. Dab a small amount of the epoxy in each of the magnet openings and press them home.
The tip and bottom 1/5" (1cm) of the nail was also coated with a thin layer of epoxy, then pressed into the opening on the end of the handle. The location of the nail flange is important to set prior to the epoxy curing, you may need to use a bottled beer to align the nail correctly.
Let epoxy cure overnight.
Step 5: Tea Staining
I wanted to try something a little different with this project, so I decided to stain my wood with a neat method using tea, and a solution of steel wool and vinegar. Using the staining process explained in this Instructable, I was able to easily make the wood look weathered and aged.
The highlights of this method are:
Making iron acetate produces hydrogen gas, do not seal containers and keep in a ventilated area.
Staining will occur mostly on wood surface, be careful if you need to sand afterwards.
The tannin content of the wood is the predominate factor in the darkness of the stain.
The highlights of this method are:
- place steel wool in a container of vinegar, let sit for 10+ hours
- steep black tea for about 1 hour
- apply tea to wood and allow to dry completely
- apply steel wool + vinegar solution to wood
- wood will darken over about 10 minutes
Tea has tannin, a bitter astringent that occurs naturally in many plants.
Tannin is also found in many other organics, such as wood. Wood with high tannin content does not need the tea solution
Brushing wood with tea adds more tannin, allowing the vinegar/steel solution to have a stronger reaction.
When steel wool is combined with an acedic acid (vinegar) it causes the steel to oxidize (rust), making iron acetate
When iron acetate reacts with the tannins and turns the wood a dark colour.
Making iron acetate produces hydrogen gas, do not seal containers and keep in a ventilated area.
Staining will occur mostly on wood surface, be careful if you need to sand afterwards.
The tannin content of the wood is the predominate factor in the darkness of the stain.
Step 6: Sand, Seal...then Open Beers!
 After a few coats of tea and vinegar solution the bottle opener was lightly sanded to remove any imperfections. Then, 3 coasts of polyurethane were applied to seal the wood. In picture #2 of this step you can see the difference in the richness of the grain with just one coat of the polyurethane sealant.
After the sealant was dry I gently scuffed the finish with steel wool to remove some of the shine the polyurethane spray left.
All that's left now is to find some friends and crack a few cold ones with your awesome magnetic bottle opener. Cheers!


