

Introduction: Celtic Knot Bone Pendant - Triquetra Pendant


A couple of days ago I was making a Bone Ring and I had a little piece of bone left over. With that I made a little Triquetra Pendant for my girlfriend. As usual, I used simple tools that anybody can have at home (no fancy lathe or CNCs).
Part of the work was already done for the ring that I made so I will just cite my other instructable: Celtic Knot Bone Ring
The close-up pictures were taken with a Pentax K10 D and a Tamron AF 90mm f/2.8 SP Di macro lens.
The other pictures, with a Pentax SMC-FA 50mm f/1.4.
Step 1: Material


Just one: a Bone! Beef bones are the bigger and the most suitable ones.
In Italy, especially in my region, we prepare a very good sauce with bone marrow. It is called pevarà (sometimes pearà) and it is made of bread, bone marrow, beef broth, butter and a lot of pepper. In fact its name literally means peppered. So that is why I have those big bones lying around.
Cleaning
An important point is the cleaning of the bone. After the cooking the sponge-like part of the bone is full of red bone marrow and that is not good if you want to work with the bone. The best way to clean it is to put it in the dishwasher!
I was surprised, when I first tried this trick, how good it worked. It perfectly cleans every part of the bone and exposes the sponge-like part.
I put also some close-up pictures of the sponge-like part because it is too cool. Our bones have this kind of structure near the ends to make them light but strong.
Step 2: Tools


- Toy vise (I got it when I was a child but I still use it);
- Clamp;
- Very old drill;
- Drill bit for wood;
- Drill saw;
- Drill bit to scrape;
- Dremel;
- Dremel drill press (this is not necessary but very usefull);
- A selection of Dremel bits;
- Compass to draw the Triquetra (again, not necessary but useful).
Step 3: Cutting #1


Now that we have everything we need let us start with the preparation of the bone piece. Be careful: wear eye protection!
With the drill saw I cutted a rectangular piece off the bone, that incidentally is a leftover piece of the Bone Ring.
Step 4: Planning the Triquetra


Using a small compass I drew a preparatory drawing on a piece of paper. With the compass I drew the same design on the piece of bone.
Step 5: Etching #1


With the conic Dremel bit (High speed cutter n. 118) I passed on the pencil lines to mark the drawing.
While on the back I took some of the sponge-like part off.
Step 6: Cutting #2


Now that the drawing is firmly on the piece I cut the triangle away with the drill saw.
Step 7: Drilling #1


With the smallest Dremel bit I drilled holes where the design supposed to have empy spots. Then using the Dremel Engraving Cutter n. 111 I enlarged the holes to the planned shape.
Step 8: Shaping


The sides of the triangle were then scraped to get the real shape. I used a combination of the Dremel bits that I have.
Step 9: Etching #2


Then I etched the design on the piece with my Dremel bits.
Step 10: Drilling #2

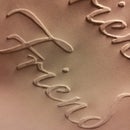
Holding the pendant with a clamp I Drilled a small hole on the side to pass a necklace into it.
Step 11: Done!


I am very satisfied with the result that I got! The etching is good and visible even from a distance. The holes give it a touch of lightness that I really like. I am now looking for a gold or silver necklace that can pass through that tiny hole on the side.

Participated in the
Holiday Gifts Challenge


