

Introduction: DIY Mini Split Installation


I live in the South where the climate is very hot and humid for most of the year. I spend a lot of time in my workshop, so I decided to install a DIY mini split AC and heat pump for temperature and humidity control.
There are several things which are difficult to fully explain with words and images, so be sure to check out the video tutorial above.
Supplies
Step 1: Inspect Unit


I ordered the Mr Cool DIY mini split online and it arrived in 2 boxes: the outside condenser unit and the inside unit. Both boxes were packaged very well. I inspected each part for damage very carefully. The refrigerant hose is connected to the inside unit and wrapped with a plastic coating and tie wraps.
Step 2: Routing Refrigerant

Next, I slowly bent the refrigerant lines to match the location where I planned to drill the exit hole – straight back. The refrigerant lines can exit the unit to the right, left, or directly back (default is left).
Step 3: Mounting Indoor Unit


The first step is to figure out where you will mount the indoor unit and the outdoor condenser unit. I chose to mount the outdoor condenser unit on the wall in the rear of my workshop.
I used the metal bracket and cardboard template to mount the inside unit.
Also, I built a wooden support frame that matched the cardboard wall template and securely mounted it to the underside of the staircase.
Finally, I lifted the unit and set it on the metal bracket.
Step 4: Drill Hole and Route the Lines


I fed the refrigerant piping through the 3.5" hole. I removed the protective passive wrap after the piping was through the wall. Next, I mounted 2 garage bike hooks to the bottom of the staircase so the pipe bundle could rest in them and keep them straight.
Additionally, I put the drain hose through the hole below the refrigerant pipe bundle. Once the wires were routed to the outside, I used spray foam to seal the hole.
Step 5: Assemble and Install Exterior Wall Bracket


I purchased the wall mount for the outside condenser unit separate. I chose the wall mount option rather than mounting the unit on a slab. Moreover, it is easier to assemble the wall mount bracket before installation rather than in the middle of the installation.
First, I made sure the cross support piece was level and secured it to the wall with screws. Next, I slid the 2 support arms on the cross support piece. Then, I slid the 2 support arms on the cross support piece.
Step 6: Mount Outside Condenser


The outside condenser unit weighs 80 pounds. It’s not very heavy, but it is definitely heavy enough to throw out a back. Make sure to get some help to move around the outside condenser.
First, I placed the unit on the support arms and made sure the rubber feet and bolts were aligned correctly. Next, I tightened them with a wrench and socket. I used my magnetic I-beam level to make sure the top of the unit was perfectly level.
Step 7: Connect Lines
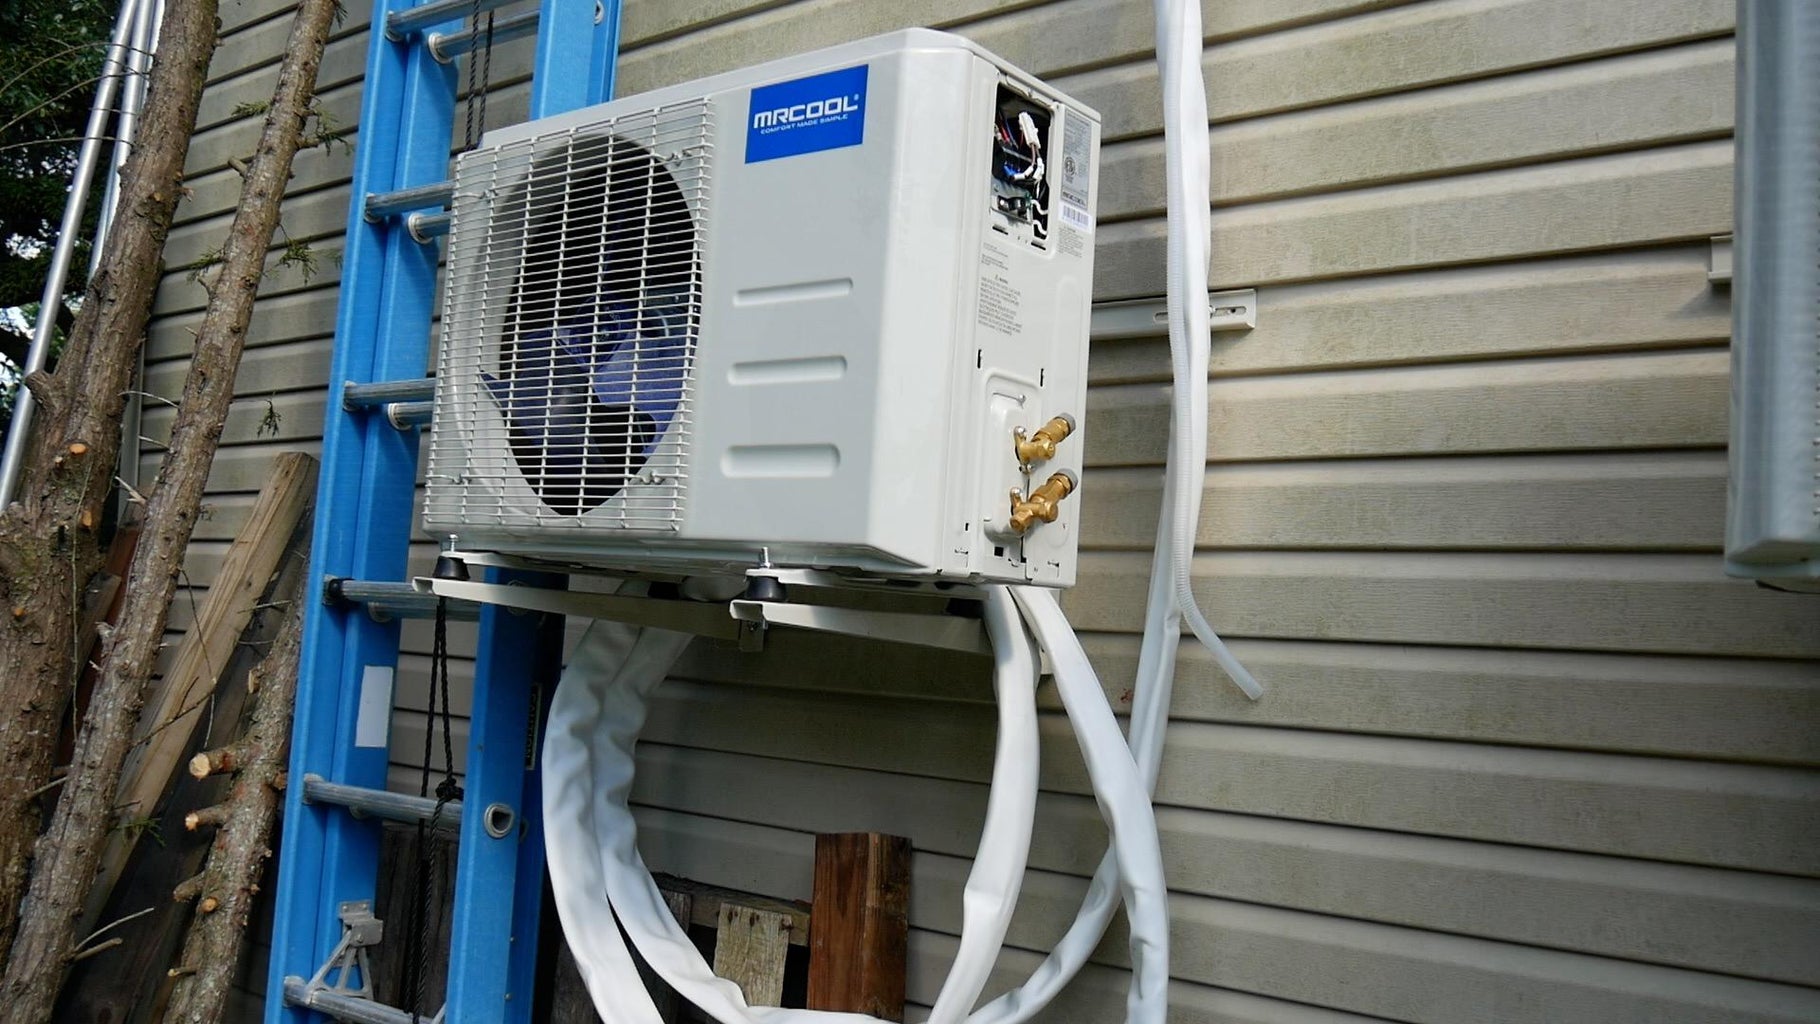


I wrapped the excess refrigerant piping around the outside of the bracket in wide, loose loops. In hindsight, I wish I would have left the excess piping inside.
Then, I removed the top plastic cap to expose the electrical components and the bottom water tray to expose the refrigerant piping.
After removing the plastic seals on top of the high and low side, I immediately attached the refrigerant piping. I aligned the refrigerant pipes and made sure they were not stressed. After I tightened each screw connector by hand, I tightened the bottom screw connector and then the top according to the instructions.
The instructions are very specific, so I made sure to read them carefully.
Also, the couplings work with tapping rings, so they may leak if the pipes are loosened and reconnected.
First, I removed the cover on the top valve and opened the valve with a 19mm hex wrench counterclockwise. Then, I repeated this process on the bottom valve.
Step 8: Check for Leaks

I checked for leaks with a spray bottle that contained dawn soap and water.
Step 9: Connect Electrical Lines

I made the electrical connections, attached the water box and electrical box, and put pipe installation around the refrigerant pipes.
Also, I’m not including the electrical part of the installation process b/c I'm not an electrical professional. As a result, I'm not qualified to provide advice on a potential dangerous task such as this.
I encourage you to call a professional electrician to perform this work because it is not worth the risk.
Step 10: Install Filters & WiFi Adapter


I climbed up my ladder and installed the air filters in the mini split.
The USB WiFi adapter was easy to install in the port on the underside of the door as well
Step 11: Remote Mount

I installed the remote control cradle near the door to my workshop. This will make it easy to access when I come in my workshop and leave for the day.
Step 12: Setup WiFi & Test


The WiFI adapter was easy to setup after getting the mini split in 'AP' mode. Keep in mind, the adapter uses a 2.4ghz WiFi channel. Most home routers only support 5ghz, so make sure your router supports the older 2.4ghz channel. Technology changes rapidly, so the WiFi may be improved by the time you purchase your mini split.
I used my IR thermometer to measure the cold air exiting the unit. This unit cooled my workshop fairly well. Granted, my workshop has a large garage door and is not well insulated, so it doesn't hold the temperature very well..
Step 13: Conclusion

I hope this instructable provided you with value. Please feel free to leave a comment if you have any questions - I'm happy to help.
Be sure to checkout my YouTube channel and my blog for more info on this projects and other DIY tutorials.

Runner Up in the
Anything Goes Contest


