

Introduction: Fridge Monitoring With Arduino MKR1000 and Thethings.iO


Today we will show you how to monitor a fridge using an Arduino MKR1000 and the Internet of Things platform thethings.iO in order to keep your beer (or other beverages) at a cool temperature.
Summer is coming!
We use a one wire waterproof temperature sensor DS18B20 to measure the temperature. The MKR1000 is connected to a local network and sends the data to the platform thethings.iO which we can access from anywhere and that gives a nice visual feedback of our data.
Step 1: Material Requirements
These are the things that we need:
- Arduino MKR1000
- Temperature sensor DS18B20
- 4.7 kOhm resistor
- 3x 0.1" female to (male or male))
- A plastic box (optional)
Step 2: Get an Account at Thethings.iO
If you already have an account you can skip this step.
- Go to thethings.iO
- In the upper right corner click on 'Start now'.
- Register.
Step 3: Create Your First Product
In your account, at the sidebar on the left click on 'Things'.The click on 'Create New Product' and you will see the following screen: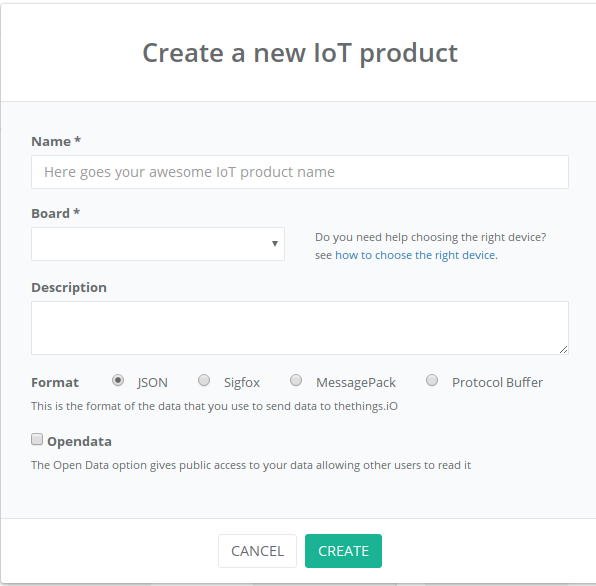
- Fill out the name of your new product.
- As 'Board' choose Arduino.
- If you want, you can add a description.
- We leave the format at JSON.
- Click on 'Create'.
Step 4: Activate Your Thing!
- Click on your new product.
- In the 'Things' section click on 'Get activation codes'.
- Then click on 'Generate Activation Codes'.
- You will be asked how many activation codes you need, leave it at 1 and click 'Generate'.
- After that, you may have to reload the page.
- Then click on the '+' sign on the right side.
- A window opens, click on 'Accept'.
- Congratulations! You have just activated your first thing on thethings.iO!
Step 5: Install the Library for Thethings.iO and the Arduino MKR1000
thethings.iO publish some libraries that make it very easy to make our things communicate with the platform. We will use the arduino library for our project.
- Go to https://github.com/theThings/thethings.iO-arduino... and click on 'Download ZIP'.
- Unpack the archive.
- And copy the resulting folder in your libraries folder.
- Or use the add .zip library option in the Arduino IDE.
- If you use the first option and the IDE was already running, restart it.
Step 6: Connect the Sensor to the Arduino MKR1000
- First, solder the three wires to the sensor cable in order to make it easier to connect the sensor to the Arduino.
- Then solder the resistor between the red and black wire (VCC & GND).
At the end, it should look like this (We didn't have a 4.7 kOhm, so we soldered a few together):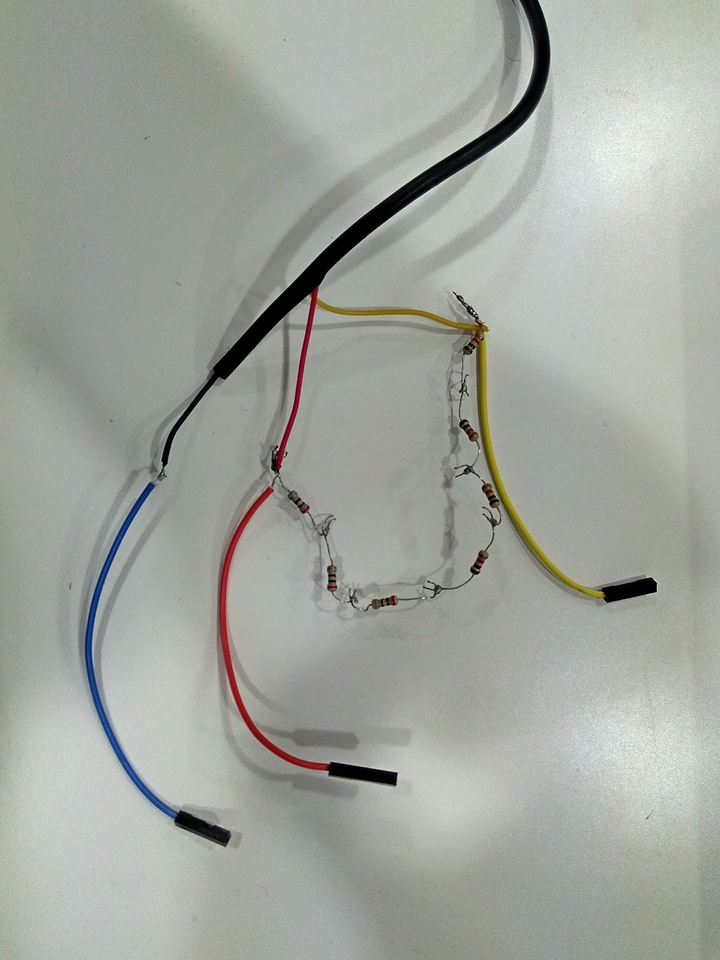
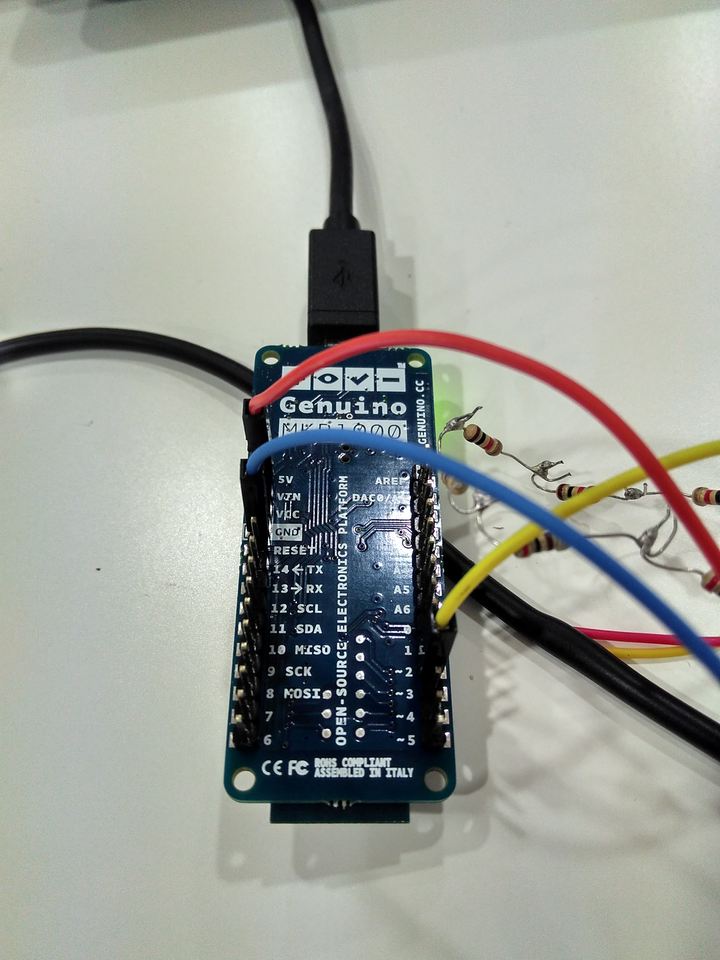
- Next, we connect the VCC wire to the 5V pin of the Arduino.
- Then we connect the GND wire to the GND pin of the Arduino.
- Finally, we connect the signal wire to the pin 2 of the Arduino.
- Connect the USB cable to the computer.
At the end it should look like this
Step 7: Upload the Sketch the Arduino MKR1000
Download the sketch from this tutorial.
#include <WiFi101.h>
#include <WiFiClient.h>
#include <OneWire.h>

#include <thethingsiO_mkr1000.h>


OneWire  ds(2);

#define WIFI_AP "YOUR ESSID HERE
#define WIFI_PWD "YOUR PASSWORD HERE"

int status = -1;
int millis_start;

#define TOKEN "YOUR TOKEN HERE"


thethingsiOWiFi thing(TOKEN);


void setup(void) {
  millis_start = millis();
  Serial.begin(115200);
  startWifi();
}

void loop(void) {
  byte i;
  byte present = 0;
  byte type_s;
  byte data[12];
  byte addr[8];
  float celsius, fahrenheit;

  if ( !ds.search(addr)) {
    Serial.println("No more addresses.");
    Serial.println();
    ds.reset_search();
    delay(250);
    return;
  }

  Serial.print("ROM =");
  for( i = 0; i < 8; i++) {
    Serial.write(' ');
    Serial.print(addr[i], HEX);
  }

  if (OneWire::crc8(addr, 7) != addr[7]) {
      Serial.println("CRC is not valid!");
      return;
  }
  Serial.println();

  // the first ROM byte indicates which chip
  switch (addr[0]) {
    case 0x10:
      Serial.println("  Chip = DS18S20");  // or old DS1820
      type_s = 1;
      break;
    case 0x28:
      Serial.println("  Chip = DS18B20");
      type_s = 0;
      break;
    case 0x22:
      Serial.println("  Chip = DS1822");
      type_s = 0;
      break;
    default:
      Serial.println("Device is not a DS18x20 family device.");
      return;
  }

  ds.reset();
  ds.select(addr);
  ds.write(0x44, 1);        // start conversion, with parasite power on at the end

  delay(1000);     // maybe 750ms is enough, maybe not
  // we might do a ds.depower() here, but the reset will take care of it.

  present = ds.reset();
  ds.select(addr);
  ds.write(0xBE);         // Read Scratchpad

  Serial.print("  Data = ");
  Serial.print(present, HEX);
  Serial.print(" ");
  for ( i = 0; i < 9; i++) {           // we need 9 bytes
    data[i] = ds.read();
    Serial.print(data[i], HEX);
    Serial.print(" ");
  }
  Serial.print(" CRC=");
  Serial.print(OneWire::crc8(data, 8), HEX);
  Serial.println();

  // Convert the data to actual temperature
  // because the result is a 16 bit signed integer, it should
  // be stored to an "int16_t" type, which is always 16 bits
  // even when compiled on a 32 bit processor.
  int16_t raw = (data[1] << 8) | data[0];
  if (type_s) {
    raw = raw << 3; // 9 bit resolution default
    if (data[7] == 0x10) {
      // "count remain" gives full 12 bit resolution
      raw = (raw & 0xFFF0) + 12 - data[6];
    }
  } else {
    byte cfg = (data[4] & 0x60);
    // at lower res, the low bits are undefined, so let's zero them
    if (cfg == 0x00) raw = raw & ~7;  // 9 bit resolution, 93.75 ms
    else if (cfg == 0x20) raw = raw & ~3; // 10 bit res, 187.5 ms
    else if (cfg == 0x40) raw = raw & ~1; // 11 bit res, 375 ms
    //// default is 12 bit resolution, 750 ms conversion time
  }
  celsius = (float)raw / 16.0;
  fahrenheit = celsius * 1.8 + 32.0;
  Serial.print("  Temperature = ");
  Serial.print(celsius);
  Serial.print(" Celsius, ");
  Serial.print(fahrenheit);
  Serial.println(" Fahrenheit");
  if (millis() >= millis_start + 10000){
    thing.addValue("Temperature", celsius);
    thing.send();
    millis_start = millis();
  }
}

void startWifi(){
  Serial.println("Connecting MKR1000 to network...");
//  WiFi.begin();
   // attempt to connect to Wifi network:
  while ( status != WL_CONNECTED ) {
    Serial.print("Attempting to connect to WPA SSID: ");
    Serial.println(WIFI_AP);
    WiFi.begin(WIFI_AP, WIFI_PWD);
    // wait 10 seconds for connection:
    delay(10000);
    status = WiFi.status();
  }
}
You have to change three things in the code, fill in:
- The Essid of your network
- The password of your network
- Your token (Get it by clicking on your product at thethings.iO)
Save it and upload it to the Arduino.
If you click on the serial monitor you should the measured temperature.
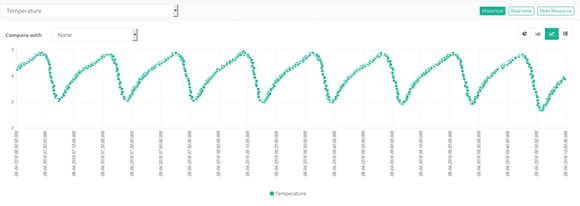
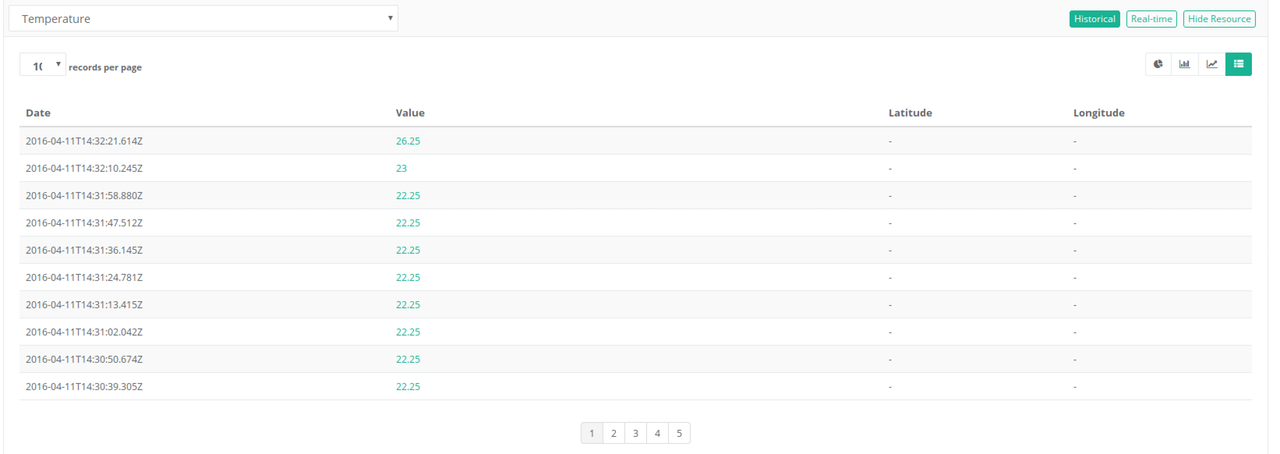
Step 8: See the Data Arriving at Thethings.iO
We are sending the measured temperatue every ten seconds to thethings.iO, so let's see how the data arrives!
- Enter at your thethings.io account.
- Click in 'Things' at the sidebar on the left.
- Click on your product.
- On the right side of the token you use click on 'Details'.
- You wll see this page:
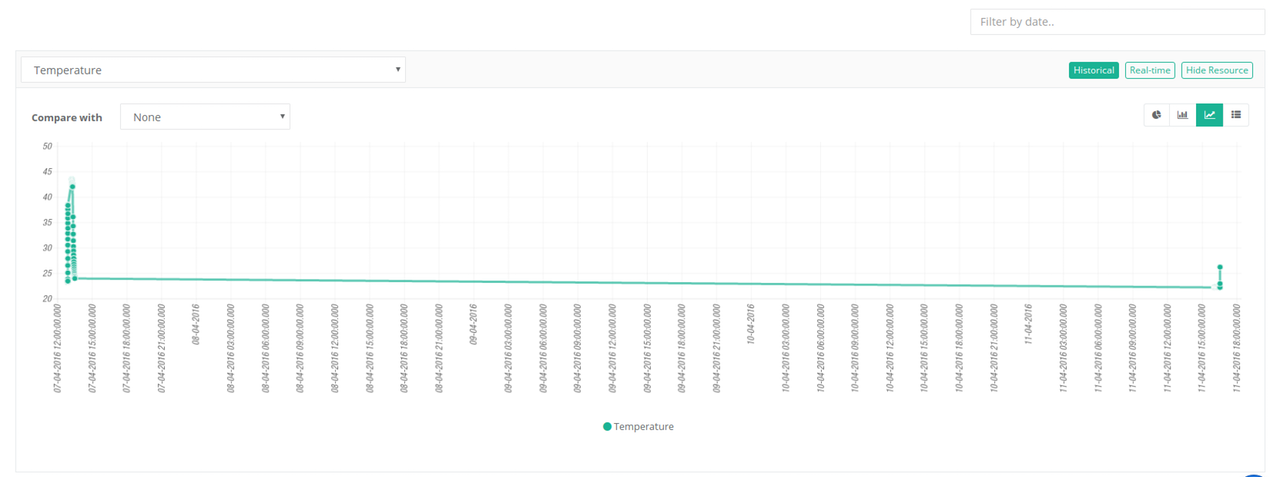
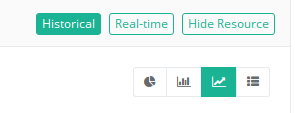
- On the right side, we can play around with different visualizations or click on 'Real-time' and watch our data arriving!
Step 9: Put Arduino in a Box

We put the Arduino in a plastic box. This is optional but it might make it easier to put it on the fridge.
Step 10: Put the Box in the Fridge
The we put the box on the fridge and the sensor inside. Connect the Arduino to a power source.
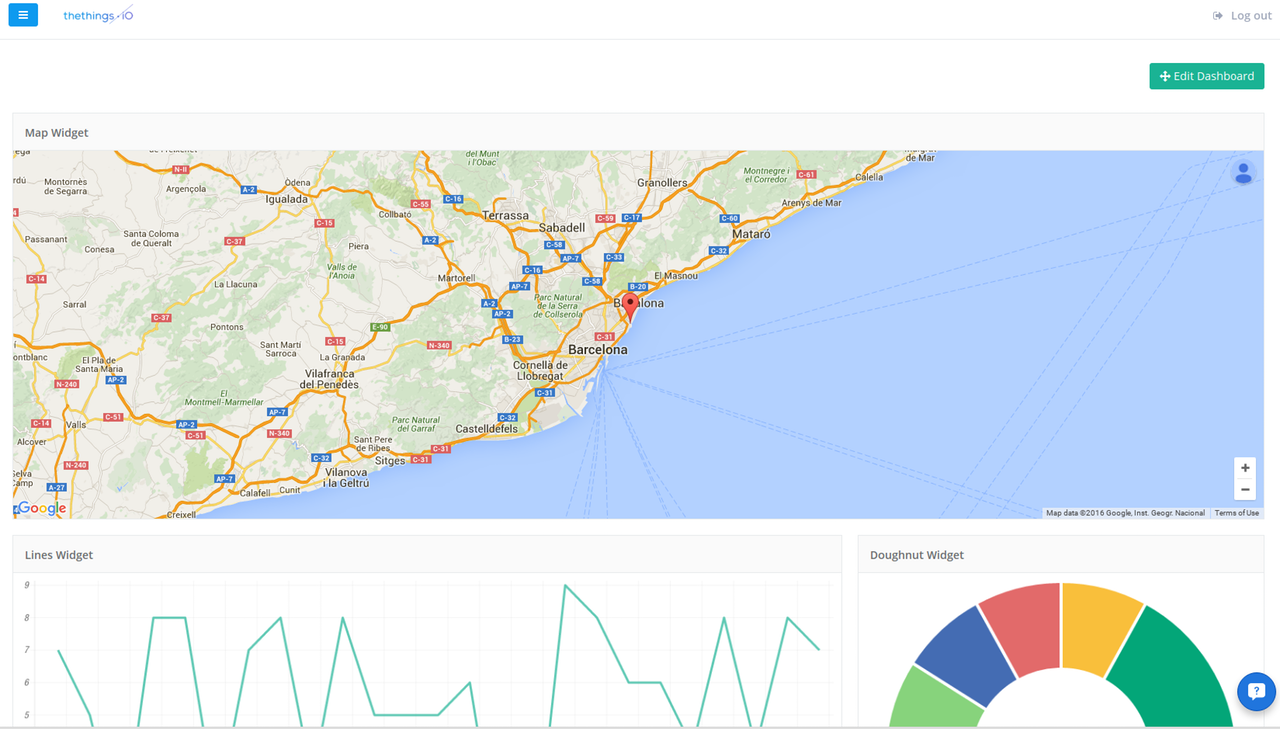
Step 11: Make Some Cool Widgets on Your Dashboard!
thethings.iO has a nice dashboard that we can we customize easily to have a real-time overview over our different things. We will make a cool widget to see the measured temperature from our fridge!
- Go to your account at thethings.iO
- On sidebar at the left click on Dashboard.
- You will see a screen like this:
- At the upper right corner click on 'Edit Dashboard'.
- Then on 'Add Widget'.
- A window opens:
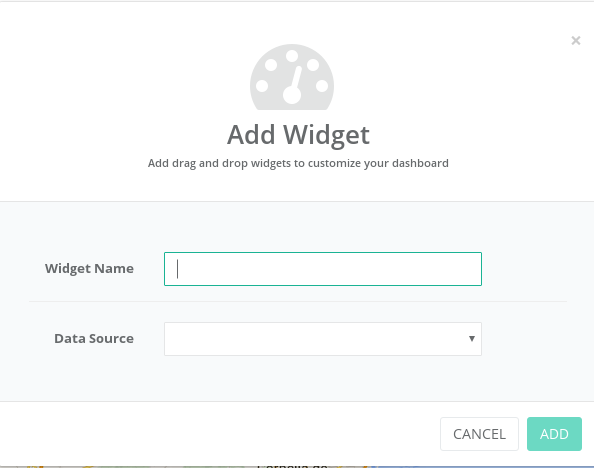
- Enter a name for your widget.
- In 'Data Source' choose 'Thing Resource'.
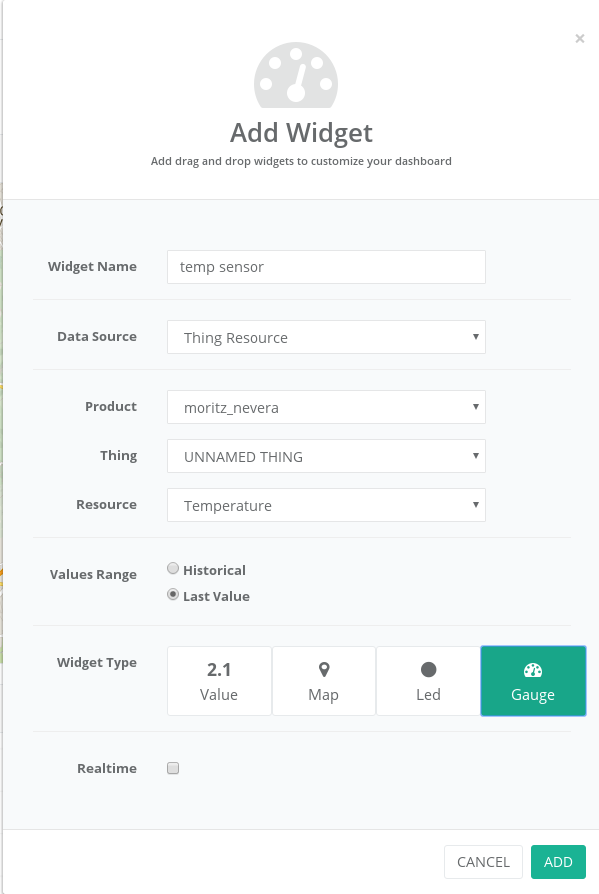
- In Product choose your product.
- Choose your thing.
- In 'Resource' choose 'Temperature'.
- In 'Value Range' choose 'Last Value'.
- In 'Widget Type' choose 'Gauge'.
- Activate the 'Realtime' option.
- It should be looking something like this:
- Click on 'Add'.
- Now, at the dashboard scroll down at you will see our new widget:
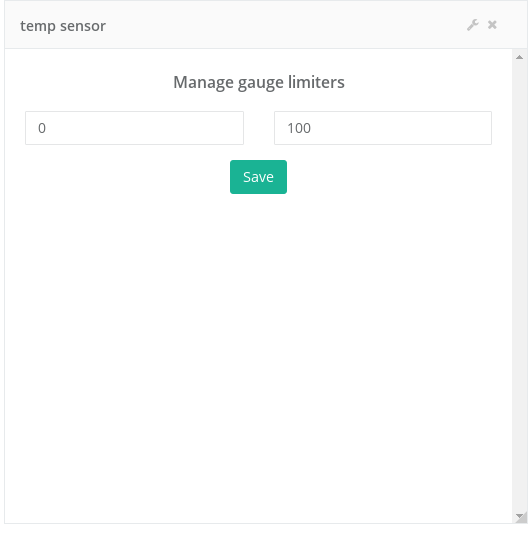
- We still have to choose the limits for our widgets, for now let's put -10 and 40.
- Click on 'Save' and you should see the message: 'Values updated!'
- Reload the page aaaaand:
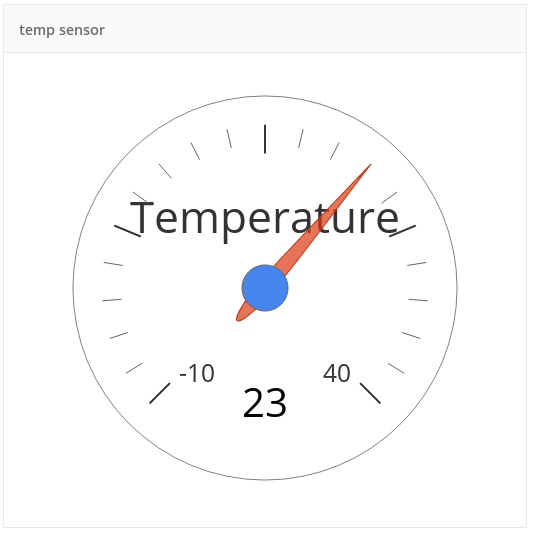
- You can see our beautiful widget!
Step 12: Have a Cold Beer
Cheers!


