

Introduction: How to Build a Boardtrackracer


In a world full of new technologies and on the urge of self driving cars, I wanted to go back in time where simple things as bicycles with engines where the latest technologie. And as usual when there is something to move us around with, we want to go faster. It wasn't safe but for adrenaline junkies I was the thing to do, boardtrack racing. Motorcycles stripped down from everything except an engine and a frame to hold you. Racing in circles on large wooden tracks. Something that would never pass through any safety regulations nowadays. I wanted to try that for myself and build one of those bikes.
In this "instructable" I will show you how I did it. this is not a how to but a project to get inspired by and try it for yourself. Have fun reading!
Supplies
What do you need:
-Suitable donorbike
-Engine, the bigger the better
-Lots of time and patience
-Tools required may vary on the project
-Creativity
Step 1: Find Yourself a Suitable Bike

I’ve had this bike for a couple of years now. It once was a beach cruiser type bicycle with a nice springer front fork. When I found it, it was in poor condition on the scrap metal pile at my friend’s house. I took it home because someday I would make it a motorized bike with a cheap Chinese engine kit. I never bought the engine kit but I kept the bicycle all those years.
Step 2: Find a "suitable" Engine
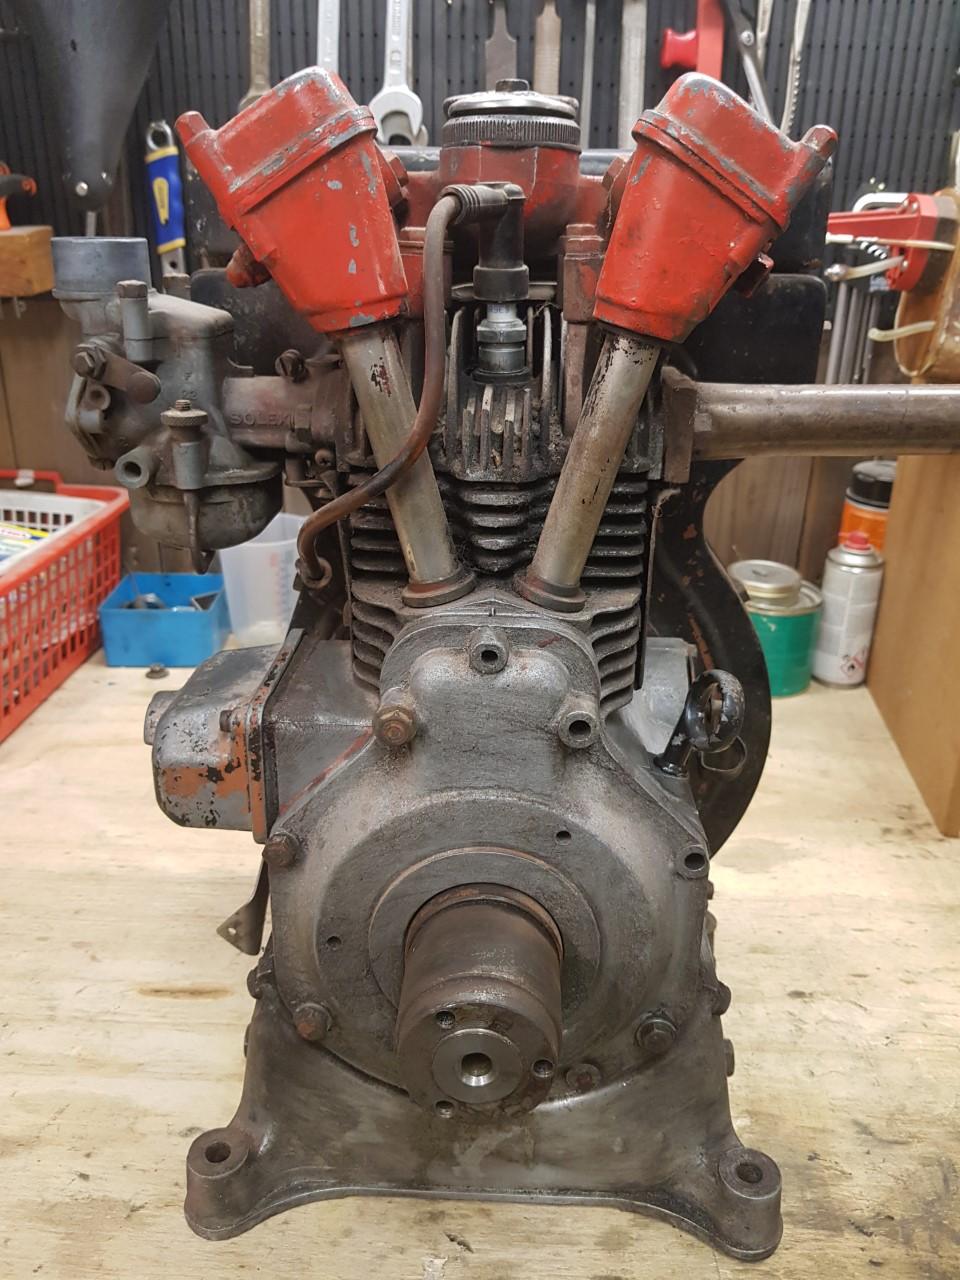
I’ve always thought that the cheap Chinese engine kits where a bit overdone and had a lack of creativity and sound. But than, I found a way better engine to put inside my old bicycle frame. It wasn’t a tiny 50cc two stroke in comparison to the Chinese kit, but it was a 200cc 8hp Bernard four stroke engine out of an old garden tiller. It was in a rough shape but I immediately saw the potential in it. With the nice v-shaped pushrod tubes it reminded me of the old motorcycles of the 1910-20’s
Step 3: Get the Engine Running and in Presentable Condition
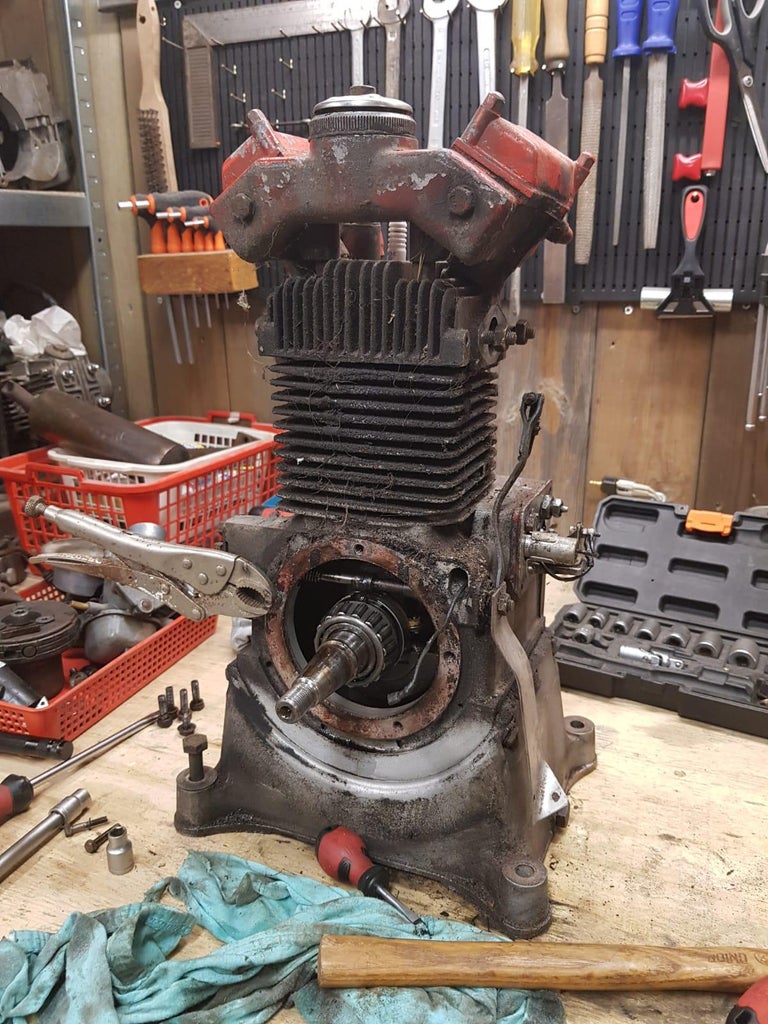


The engine was in a rough shape. There where bolts broken and missing and it had an awful paintjob. I took the whole engine apart and started cleaning and polishing. I soon found out that there was little to no information to be found about these engines. The timing gears where not marked and they fell out of the crankcase. I couldn’t find out how the timing needed to be set so I did the only thing i could think of; I bought another Bernard engine. This one was in running condition but had a gearbox with a clutch mounted on it, wich I didn’t need. So I cleaned this engine as well and exchanged al the good parts over from the first engine. At last I had a running and nice looking engine to put in my frame.
Step 4: Extend the Frame to Make Room for Your Engine


As you can see in the pictures the original frame was a bit to small and would only fit the bare crankcase. So it needed to be extended. This was done by removing the small tubes underneath the top tube and extending the top tube. The downtube was cut an re-bend so there appeared a big gap between the downtube and the original crank. This gap will be filled with the engine cradle which connects the entire frame to create a solid structure.
Step 5: Getting the Power to the Wheel


The Bernard engine was never meant to be used in a motorcycle and didn’t have any connection for a chain sprocket. Because I'm experienced with mopeds I had a lot of old parts laying around. My idea was to use parts from Puch and Tomos mopeds for the drivetrain. The original engine has a flange which was originally connected to a clutch of some sort. This flange has three threaded holes . I used a front sprocket from a Tomos which I drilled a matching three holes in and bolted it to the engine.
I wanted to use the original sprocket mounting of the bicycle wheel on the right side of the bike. The engine however turned counter clockwise and needed to be placed with the sprocket on the left side of the bike to make a forward motion. This meant there needed to be an axle which transfers the drivetrain from the left to the right of the bike. To stay in the same direction I used some old engine parts of Puch and Tomos mopeds to create this axle. On the left side I attached an original Tomos front sprocket attachment, and on the right side I used a Puch front sprocket attachment. Together with some spacers the solid axle is placed in an perfectly fitting tube. To create some lubrication to it all, an original grease cup is fitted to the tube.
For the rear wheel a far bigger sprocket was needed than on the original bicycle. A homemade adapter plate was made to connect the big Puch rear sprocket to the original bicycle sprocket. This contraption could then be simply screwed on to the hub. To keep the sprocket in place an other bicycle sprocket was converted to a locking nut. It was all attached with Loctite to make sure it won’t come loose.
Step 6: Engine Cradle and Footrests


For the engine cradle, two thick pieces of steel were formed in a half moon shape as seen in the pictures. These pieces where then attached to the sump of the engine with three bolts on each side. The cradle is attached to the front of the frame with one long bolt and in the back with two bolts per side.
The original pedals of the bicycle are no longer on it so there needed to be a new place to put my feet on. With the original picture of the Harley Davidson board tracker in mind, I created two steel plates with a pair of retro bicycle pedals. These footrests where placed on the back of the engine cradle with a bolt and a roll pin
Step 7: Give It Some Gas and Try to Stop


As almost all of the used parts, the carburettor was never designed to be used with a throttle control. A set of new brackets gave it the functionality of a twist throttle control. To stop the engine, the Bernard motor was fitted with an ignition killswitch. In making the bike a little bit safer I decided to extend the killswitch to the handlebars, this means that you don't have to take your hands of the handlebars while riding.
Step 8: Make It Look Like You Want


The aesthetics of the bike was one of the biggest reasons i wanted to start this project. The springer fork, long frame and narrow tires just apealed to me. I chose to keep the paintjob close to th one on the Harley Davidson in the intro. I painted the rims black and used a leather bicycle seat. I mixed this with raw metal parts en polished brass. The old moped tank is kept in original state to give the impression that the bike really is that old. Gold pinstriping is added to give a little sparkling and refinement in the rather rough aesthetic of the early motorcycles. The motorcycle even has its own toolkit which is filled with vintage tools.
Step 9: Dare to Ride!


Well this is it. The bike looks the way I want it to look, It runs and is frightening while standing on his stand. The bike is a handfull but that's the way it's supposed to be. No brakes, no clutch, just "gas and go"! I haven't been able to ride it yet because i need to find an open flat road where there will be nothing in my way. The project will never be finished and I will keep fine tuning things. I dare you to build your own so we can have a race!

Second Prize in the
First Time Author Contest


