

Introduction: How to Make an Interactive 2 Player LED Strip Game Using Arduino


Hi welcome to my instructables, in this project I have made an interactive Arduino project.
This is a fun game project where 2 players can enjoy their time by racing against each other, I would highly recommend you not to miss building this project, the more the LED more the fun.
You can also set up this in a big hall, this is like a race tracks the bigger it is more interesting would be the game.
Fun Tip: Why not try to make this project for the weekend and invite your friends over to have quality time by playing this game!!
What is this project about?
This project is nothing but a lengthy LED strip controlled by 2 toggle switches, when the game is started the player has to push the toggle button as fast as they can, upon pressing the toggle switch the LED from the strip start to move.
I have made green and red colors, suppose player 1 is green color and player 2 is red, each player has to be very fast to reach the end of the LED, whoever wins the entire strip glows with that color.
Suppose player 1 wins green colors light up and in the case of player 2 red colors.
Note: Kindly note that normal LED strips or single-color led strips won't work for this project, the type of LED strip is different, you can know more about this in further steps.
If you don't like to read you can jump to the video given at the end of this project.
Supplies


Arduino Nano
This is the microcontroller board that will control the LEDs in our project and read input from the toggle buttons.
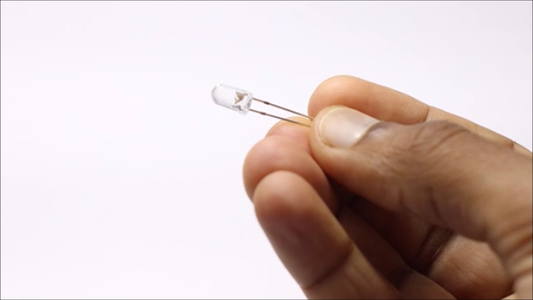
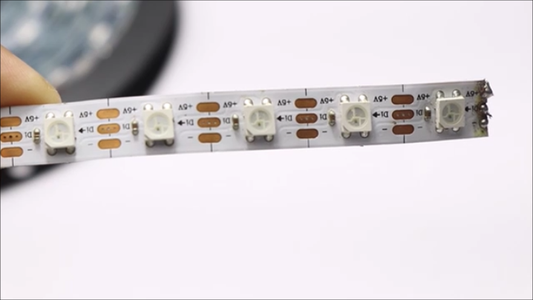
120 ARGB LEDs(more on these LEDS below)
These are the addressable RGB LEDs that will form the display for your LED game, in my case i have used 120 you can use as per your wish just make sure you are using decent power source to power them.
Toggle Buttons
These buttons will be used as inputs to control the game.
Indicator Bulb
This bulb will serve as an indicator for the game if the power is on or off
External Power Bank
To power the Arduino Nano.
Breadboard
To make circuit connections
Arduino IDE and programming cable
For uploading programs to the board
What are ARGB Leds?
The ARGB LEDs are addressable, meaning you can control each LED individually. It can display almost any color as it is RGB,
You can program the Arduino Nano to display various patterns, colors, and animations on the LED strip based on your LED game logic.
These come with 3 pins, 2 for + and - supply and one for digital signal, make sure you check for the direction of data/signal flow before connecting to arduino.
Step 1: Circuit Diagram


This is the circuit diagram that I used to build this project, let me explain the circuit component-wise to make it a lot easier for you to understand.
ARGB LED
There are 3 pins on an ARGB strip, 2 for power supply and one is for Signal, The signal pin of the ARGB strip is connected to pin A0 on the Arduino Nano. This connection allows the Nano to send control signals to the ARGB LEDs and control their color and brightness.
Toggle Buttons
The toggle buttons are connected to pins D6 and D7 on the Arduino Nano. These pins are set as input pins and will read the state of the buttons (pressed or released) the other terminal of these buttons are connected to gnd.
Indicator Bulb
The indicator bulb is connected to pin D3 on the Arduino Nano. This pin is set as an output pin and will control the state (on/off) of the indicator bulb.
Thank you PCBWAY
I thank PCBWAY for sponsoring this project
They provide an amazing service if you are willing to make electronic projects they can provide you with any type of PCB as per your requirement
They have come up with an initiative of sponsorship schemes, Know more about this here https://www.pcbway.com/project/sponsor/learnsponsor.aspx
For high-quality Flex Board, i recommend you to use PCBWAY click here to get your PCB today
Don't have a 3d printer to print things for your projects?
No worries! PCBWAY can print for you As low as 4.98$ a piece, click here to get your prints https://www.pcbway.com/rapid-prototyping/3d-printing/
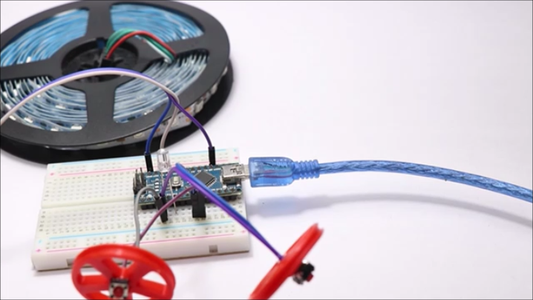
Step 2: Assembling the Components
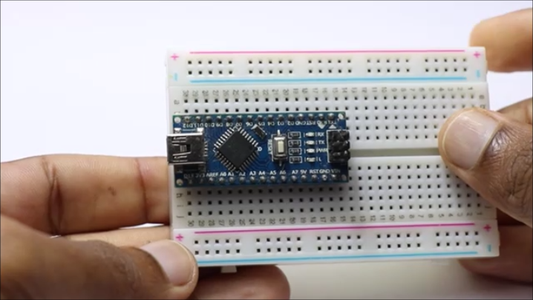

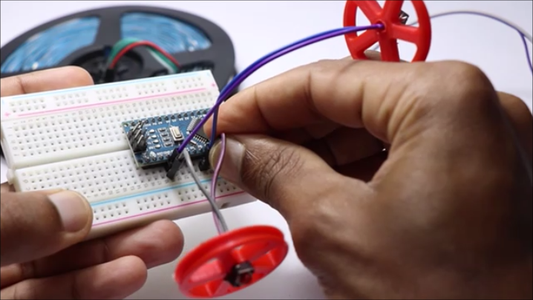


Start by attaching the Arduino Nano to the breadboard, now with the help of jumper wires start to make connections.
Connect the ARGB LED strip wires to the breadboard.
I started to connect the toggle buttons first, make sure that you use enough length wires for toggle buttons as these are the parts that control the game means more actions will occur.
After the 2 toggle buttons are connected connect that indicator LED to the breadboard
This completes the connections, now we can upload the code to nano..
Step 3: Arduino Code

To upload the code first we should connect the Arduino nano board to the computer, a programming cable can help us to do this.
Connect the cable between the board and the computer, open Arduino IDE, and paste the code given below.
Here you should select the number of LEDs in your strip, in my case I used 120.
Check for the type of board and com port number and click on upload code, within no time code will be uploaded to the board.
After this step the LED starts to glow, but we should properly set this LEDs that i will be doing next
Attachments

Step 4: Setting the Game


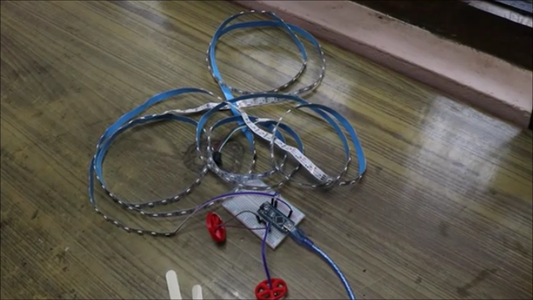
I found that the game would be much more exciting if the LED strip are put in a wider area.
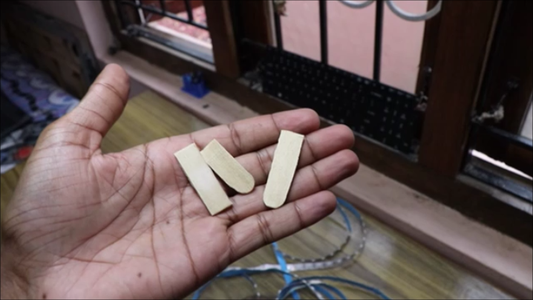
Doors, old TV stands, and big tables are a good spot to install these, with the help of some popsicle sticks i was able to install these games on my old desktop table.
Make sure you use hot glue to stick popsicle sticks to the table so that you can remove them easily later if you want to.
Step 5: How to Play


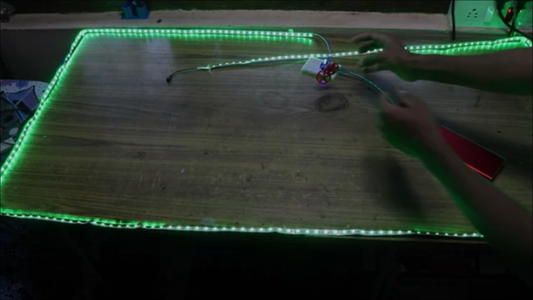

Call your friend whom you want to play with, hand over one toggle button to him you take the other.
You can identify yourself with colors, player 1 green is and player 2 is red.
Switch on the project(USB power supply) and when the LED appears on the start point of the LED strip start to press the toggle button as fast as possible.
You can check where your competitor's lights are and take faster action.
Whoever reaches the end first the entire color of the LED strip will turn on to the winner's color.
The winner will be the winner anyhow! No cheating works here.
Step 6: Game Play Video
This video shows the gameplay, note that I didn't have any friends while building and testing this project! so I had to play the 2 players by myself, I used both of my hands, each hand representing one player.
You can watch the video where I have included the building process also, Thank you for showing interest.


![Tim's Mechanical Spider Leg [LU9685-20CU]](https://content.instructables.com/FFB/5R4I/LVKZ6G6R/FFB5R4ILVKZ6G6R.png?auto=webp&crop=1.2%3A1&frame=1&width=306)


