

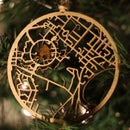
Introduction: Laser Cut Living Hinge Globe Light


Earlier this summer, I designed and made a globe(ish) puzzle as a gift for my niece. It took a ton of work and wasn't actually round (4th photo shows what the shape looked like with no countries on it), which was disappointing, so I thought I could make a better version with actual curved sides.
In the past couple months I've been trying things with new map projections and living hinges and thought there must be a way to make it possible. It's still not perfectly round, but definitely an improvement! With living hinges, the shapes are never solid so some light gets through, but I thought it would be really neat to add in even more holes and turn it into a light-up globe. Adding in enough holes to make it work as a light while still being sturdy enough to stay in one piece was the next challenge, but I think it worked out pretty well!
I did some searching and the closest thing I could find was this video of a basic globe shape, but nothing with countries on it (and no cut files available!). Please share if you find something similar though!
If you're simply looking for the cut files, jump to Step 5 where I've attached them. If you want to learn about the different globe projections that I used and how I created the model, keep reading :)
Supplies
These are the tools that I've used to create and put my maps together. There may be other ways of doing thing, and I'd love to see them if you have different ideas!
Software
- QGIS - QGIS is a free and open-source GIS software. I'm using QGIS 3.16.4-Hannover. Some of the processing tools I use for this project were not available in earlier versions, so it's important to be aware of that as the tools change and improve with every version that is released!
- Inkscape - Inkscape is a free and open-source graphics editor. I'm using version 1.0.2.
- Laser controller software - My makerspace uses Lightburn, but any controller software that accepts .svg files (which pretty much all of them should!) will work.
Tools and Materials
- Laser cutter
- Wood, paper (haven't tried this yet but I think it would work well!), etc. I used 3mm poplar and 6mm Baltic Birch plywood.
- Lights! I used "fairy lights" that were left over from my wedding, but any sort of light should do. The files can certainly be modified to accommodate a larger bulb/cord if you want!
Step 1: The Gore-y Details

A physical globe is generally made up of a number of gores that are lined up next to each other to make a sphere. My initial thought was that I could take an image like this and just use image editing software to separate it into sections and work with those, but that felt like it would be a one-off thing rather than a repeatable (and educational!) project.
After spending and inordinate amount of time browsing stackexchange for solutions to create a set of map gores in QGIS, I stumbled on this really informative question and answers and specifically Marcin Ciura's link to his Quora post where he mentions the benefits of the Cassini projection. Searching for more about the Casssini projection led me to find some inspiration for the basic construction strategy from this project by Spyridon Staridas and this one from Esri employee John Nelson. Both of these projects utilize the commercial ArcGIS software, so my goal was to figure out how to make things work in QGIS.
This photo shows this map projection in QGIS using the Natural Earth 110m Land Vector. The vectors on the Natural Earth site are in the public domain so they're free to use for any purpose. I'll be using the 110m set to delineate the land border areas for my globe. This map provides only a rough outline of land areas, but that's perfect for this globe as it simplifies what will be cut with the laser later on.
At first look, the Cassini projection is super wonky and doesn't really make any sense (especially bad in this view where Indonesia happens to cross the bottom border and jumps to the top of the map). But if you focus solely on the central portion between the two poles, you can see that the map really doesn't seem distorted at all and actually looks like one of the gores that we want to make! The shaded area shown on the right side of the photo ranges from -30 to +30 degrees.
Step 2: Modifying the Projection


The "default" Cassini projection is centered on the Prime Meridian and equator (0° longitude and latitude), so I needed to create a new projection for each of the map gores centered on a different line of longitude. Based on what I'd seen, it seemed like 12 gores was pretty standard, so I had to split the map into 30 degree sections and create a new projection for each centered on a different line of longitude.
This image shows the 30° wide map strips that will become the globe gores in gray and the projection centerlines as the dotted black lines. This map is shown in the EPSG:4326 projection, which will be used for a number of the steps done later in the project.
If you want to use more than 12 gores or shift your gores so that they aren't split the same way as mine, you can certainly do so! Just be aware that if you want a gore that crosses the +/-180° line, there may be some issues that you'll have to address with map features wrapping around the edges.
Creating new projections
Thankfully it's pretty straightforward (though not entirely intuitive at first) to create new projections in QGIS:
- Click on Settings>Custom Projections
- Click the plus sign to create a new projection
- Add a name (I use the center line of longitude for my map strip) and make sure that WKT is selected in the format box
- Click on the copy icon
- Search for "Sphere_Cassini", select it and click OK
- Then in the parameters box:
- Scroll down to the very bottom and delete the last line, and the change the comma on the second to last line to a closed bracket.
- Scroll back up to the "Longitude of natural origin" parameter and change the value after the comma there to the centerline of the map strip.
- For each of the rest of the custom projections, I'd recommend copying from the previously defined projection - that way you don't need to erase the last line every time and just need to change the longitude parameter.
Step 3: Stripping Things Down


Each strip of the globe consists of a number of different features as shown in this picture. The left side of this photo shows the map in the EPSG:4326 projection, and the right shows what it looks like in its modified Cassini projection. This one has its center at -135°.
Notice how straight lines on the EPSG:4326 projection turn into curvy lines on the modified Cassini projection and vice versa! It was important to create each feature in whatever projection I wanted it to be straight in. Maybe someday I'll get around to fully documenting this build, but it would take a long time to organize all of the random pieces of my files and things that I tried at this point. If you're interested in getting more details, please let me know!
Parts of each strip (also shown in individual photos):
- Black living hinge cut lines: These are put on the top and bottom of each strip at latitudes above and below 60°. I created a full grid of these cut lines to start with, then deleted the middle latitudes to create this layer. I originally tried to keep wavy lines throughout the map but the tips ended up being too fragile and snapping off frequently so I changed to just lines. These lines are created in one of the modified Cassini projections, then reprojected to EPSG:4326. In the 4326 projection then, they can be easily arrayed across the entire map.
- Blue engraved countries: These areas are engraved into the wood using the laser cutter. The laser uses a lower power setting and fills in the areas to darken the wood there. I used what's called a dissolve operation in QGIS to eliminate the borders between countries in the EPSG:4326 projection and create totally solid areas. To split the dissolved layer into distinct strips, a clip operation was used with the map strips described in the next step. In the clipping tool, it's possible to iterate over all features in a layer, so I iterated over each strip to clip out just the countries within that strip. The result of this operation gives 12 new layers.
- White living hinge cut lines: These lines are cut into the engraved country areas so that they can bend. These were created using the full living hinge cut line grid. I merged the 12 country layers into one, then ran a negative buffer on that layer. In doing so, I created a shrunken version of the countries. This was then used to clip the hinge lines grid. I buffered the countries so that the cut lines wouldn't run all the way to the edges. By doing this, I avoided creating areas that would be fully cut out by the hinge lines.
- Strip with wavy cutouts: This piece serves as the main part of each globe gore. I thought it would be cool to do a wavy living hinge cutout for ocean areas, so that's what I went with. The ocean waves were created by first drawing a zig-zag shape in the EPSG:4326 layer, smoothing it out, buffering it, then arraying it across the whole width of the map for areas between -60° and +60° of latitude. This wave array was then subtracted from a whole map extent, merged with the countries layer, then dissolved with the countries layer. The result of this is a map where the waves only exist in the ocean areas.
- Buffer area around hole: The holes in the top and bottom of the strip allow it to line up properly on the globe frame. If I had just cut a hole in the middle of the living hinge cut lines, the map would likely snap apart in those areas so I created a buffer around the hole with no cuts in it. I created this layer in a modified Cassini projection by creating a point at the center width-wise of a map strip at +/-70° latitude then creating a 6mm square around it by converting between physical units and QGIS "map units".
- Hole for alignment: This is used to line the strips up on the globe frame and was created in the same way as the buffer area but using a 3mm size instead of 6mm. In this image, one of the holes is partially covered by the engraving layer. The engraving layer will end up being cut first, then the hole will be cut out of the piece after that, so what's shown in the image doesn't make a difference on what ends up being cut!
Once all of the layers shown in photos 2-6 were created, I ran the process to clip iteratively again. In the end, I had 4 different "types" of layers (the buffer and holes were used to cut or clip other layers so they weren't created as their own layers), with 12 different layers in each, for a total of 48 layers.
To keep track of them, I grouped them into 4 groups, then created what are called "themes" in QGIS. Themes allow you to quickly display or hide layers. To create a theme, select all of the layers that you want in that theme, then click the "themes" icon in the layers panel>"Add theme". I'd create a theme for all of the features in one strip, then move on to the next until I had all 12 themes.
Step 4: A Bit of the Process and Things I Learned


The first part of making the map was creating a grid that served as the border for each gore. Starting from a new project, I did this using the 'Create Grid' tool in QGIS. I made sure that the projection selected was EPSG:4326, choosing a horizontal spacing of 30 degrees and a vertical spacing of 1 degree (shown in the first image).
Reprojection
The 1 degree spacing is necessary for changing between the EPSG:4326 projection and the modified Cassini projections. QGIS uses nodes to translate between projections and then connects the nodes with straight lines. If a rectangle created in the EPSG:4326 projection only has nodes on its 4 corners, QGIS translates those to a modified Cassini projection as points on the North Pole and South Pole but doesn't have any intermediate nodes to work from. So instead of creating a curve that makes up the border of the gore, it just creates straight lines between the two poles.
I've illustrated this in the second image. The left half shows a map section with two pieces in the EPSG:4326 projection, and the right shows the modified Cassini projection. The 2 piece grid turns into a diamond, since there are nodes at the poles and the equators that QGIS can use to transform between the projections. The grid with 1 degree spacing has many more nodes, so QGIS can create a much smoother transformation between projections.
The 1°x30° grid is dissolved using the 'left' field to create solid polygons. These polygons maintain the nodes from each of the original rectangles, so they show up as smooth(er) shapes in the modified Cassini projection (as shown in the 3rd image).
This same process is required for other reprojection operations in the project. For example, the lines that were straight living hinge cut lines in a modified Cassini layer had to have more nodes added to them using the QGIS 'Densify by Count' or 'Densify by Interval' tool. In doing so, the lines end up curved when reprojected to EPSG:4326 where they can be arrayed across the map. Then when each section is viewed in its appropriate Cassini projection, it shows up straight again because of the additional nodes. Densification is also used for the buffer and cutout squares.
Themes
The themes I created in the previous step were really useful for creating a layout in QGIS. In the layout manager, I was able to create a sheet the size of my sheet of plywood (300mm x 600mm) then create 12 different Maps in the layout with heights of 300mm and widths of 50mm. For each map, I could add a single theme and assign a projection to create a full view of all of the gores of my map. This made it really simple to make changes to the map. If I had to change something, I could make the change, add it to the theme, then the change would be reflected in the layout view. Super handy!
From the layout, I could export an .svg file, open that in Inkscape to make some final edits and ensure all of the sizing was correct, then send it to the laser cutter.
Step 5: Cut Files
The cut files are attached as .svg files here. Please let me know if you'd like an additional format and I can try to get it to you, though most laser software should be able to use .svg! I'd love to see this project done with paper or other materials. I can also send along my .qgz project file if anyone is interested in modifying that! It's rather messy right now, but I can clean it up if someone wants to try and make changes.
In the 'living hinge globe gores' file, the black lines are supposed to be used for cutting and the blue used for filling/engraving. I had an error pop up once in Lightburn that the blue shapes weren't all closed, so I used a tool in Lightburn to close all shapes. Looking at the file in Inkscape however, I checked for open shapes and couldn't find any, so I'm not sure what the deal was. Please let me know if you run into the same issue!
I used 6mm Baltic Birch for my stand, but have attached a 3mm version as well in case that's all you have.
Depending on your laser and the exact thickness of the material that you're using, you may need to modify the frame files slightly to get things to fit together properly. It should end up being snug enough that the pieces hold together without glue. That way you'll be able to replace the lights if they burn out! Be sure to test out a single section before committing to cutting all pieces at once in case they don't fit!
I created a different type of round section for the ribs to slot into that had a hole in it that would allow a cord/rod to go through for use as a table or pendant lamp. I made it after I put my globe together so that's what's in the file instead of the one that I used. If you use the files to create a table or pendant lamp, you should just be able to snap the top or bottom few millimeters off of each globe strip to fit the cord or rod through. You should also use all rib pieces that don't have the longer tip so that the cord can fit between them.


Step 6: Cutting!


Finally time to cut things out! I did 6 strips at a time on the laser cutter at my local makerspace and each took around an hour and a half to run, so it's definitely not a quick process.
Step 7: Frame Layout!


The frame is designed to be assembled in two sections that can then be put together. This way, a light can be put inside the globe and taken out later if needed.
The ribs for the frame are designed as two separate types. I wanted to get the tips of the ribs as close to each other as possible at the top and bottom of the globe so that the individual gores would bend down to almost flat on the top and bottom. 4 ribs with longer tips are spaced out as shown (blue and 2nd image) so that their tips almost touch. The other 8 ribs (yellow and 3rd image) are slotted in between them so they don't interfere with the longer ones. I didn't think to take a picture of this with the actual ribs there, sorry!
Step 8: Getting the Gores on the Ribs


I broke a lot of pieces putting the globe together... Thankfully I did a lot of the assembly at the makerspace so I could pop back to the laser cutter to make new cuts as needed. I found that shifting the alignment holes up and down by about a millimeter each helped prevent the pieces from snapping (this change is reflected in the .svg files attached earlier). In addition, I tried dampening the backs of the pieces to help them bend.
Other wood might behave differently, so if you're having issues with snapping, it might be worthwhile to try steaming or soaking the wood before assembly. I was hesitant to completely soak the wood since I didn't want to lose the darkness of the engraved section.
Just take things slow and try to bend the gores a bit before trying to put them on the ribs. I found that doing so created some tiny cracks along the edges (where there were no living hinge cuts) and allowed the pieces to bend more easily. I assumed this would happen since I didn't extend the living hinge cuts all the way to the edges of each strip, so it wasn't a problem!
Step 9: Assembly


Once all the gores are on and everything is in the right order (very important!), I found that the easiest way to assemble was to set the rib-holding pieces on the table with the notches facing up, then glue the outer two gores on, then the next two, and so forth until all of the pieces were in place. I was a little disappointed to discover that the gores didn't fit snugly together with no gaps between them, but that's okay! I put some small pieces of scrap wood between them to even out the spacing a bit.
Step 10: Gluing the Tips


As you can see from the first photo, the tips of each gore stick out above the top of the globe. I used hot glue to secure the tips to the ribs. This probably should have been done before putting the ribs in their spots since it was challenging to get the hot glue down into the little cracks, but it worked well enough. In the 3rd photo, the bottom tips are glued and the top ones aren't. The tips don't perfectly line up at the poles but I think it still looks great!
Step 11: Assemble the Stand and Add the Lights


Assembly of the stand is pretty self-explanatory - just slot the pieces together!
For the lights, I used little string lights commonly known as "fairy lights". They've got a little battery pack attached to them, so I slid the wire through one of the wavy cuts at the edge of one of the gores.
With the lights in place, slot the little H-shaped wood pieces into the notches in the rib holders and stick it together! Put it on the stand and light it up :)
Step 12: Final Thoughts and Ideas
Doing this project, I learned a ton about different projections and how they work (though I still have a lot to learn!) and map themes in QGIS. It was challenging to do most of the design edits in QGIS rather than resorting to Inkscape for that sort of stuff, even though I'd normally be more comfortable doing so in Inkscape. It was definitely worth it though, as QGIS made it easy to change features in bulk; in Inkscape, I feel like I would have spent a lot more time changing individual features on the gores.
I'd love to see what other people can come up with based on this design. It would be super cool to see different materials used, coloured lights, a table or pendant lamp, or even a set of wall lights with part of the globe on each! Please share your creations if you do make something!

Second Prize in the
Lamps and Lighting Contest


