

Introduction: Obstacle Avoiding Robot Using Microcontroller (Arduino)


In this instructable, I will teach you how to make an obstacle avoiding robot that works with Arduino.You must be familiar with Arduino. Arduino is a controller board which uses the atmega microcontroller. You can use any version of Arduino but I have used the Arduino Uno r3 on my robot.
The code is very easy and the circuit has only 4-5 wires. The robot also uses the L293D motor shield which is Arduino compatible, to drive the motors. So, the shield fits straight onto Arduino, making everything easy... Basically, our robot is a car which moves forward and if any obstruction comes in its path, it stops there, moves a bit back, and then its head rotates left and right. Then it compares the distance and the robot turns in the direction with more distance. Then the robot again moves forward in that direction repeating the whole process again. To detect the distance, the robot uses the HC-sr04 ultrasonic sensor. So this sensor sends ultrasonic sound waves, every 10 microseconds, and if any obstruction is ahead, the sensor receives the echo. Based on the travel time, it knows the distance between the sensor and the object. So let's start...
Step 1: Parts Required

So to start any project, we need to collect the parts required first. All the parts required are mentioned below:-
- Arduino
- L293D Motor Shield
- Chassis(including motors and wheels)
- Wires
- Battery holder
- Micro servo motor
- the HC-sr04 ultrasonic sensor module
- holding bracket for the sensor
So collect these materials and move on to the next step.
Step 2: Assemble the Chassis


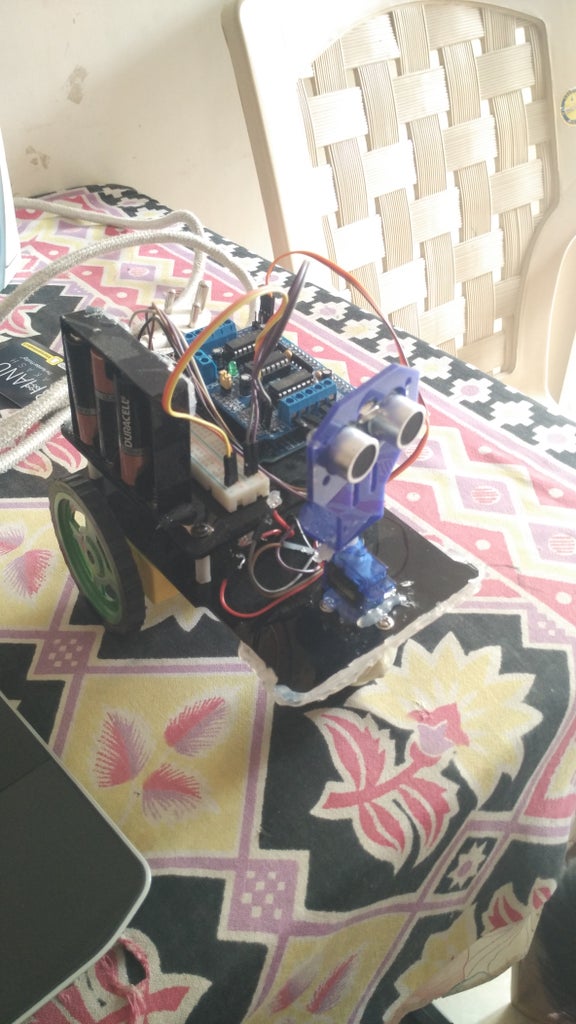
Now, assemble your robot body. Everyone may have a different chassis. So assemble your chassis accordingly. Most of the chassis come with an instruction manual and even mine came with it so have a look at it and build your chassis accordingly. Then, attach the components to the chassis. Arduino, with the motor shield attached to it and also the battery holder must be fixed on the chassis. The servo motor must also be fixed on the chassis at the front. The long servo head must be stuck below the HC-sr04 bracket. The sensor must be fixed into the bracket and the bracket on the servo motor.
Don't stick it onto the servo motor because it can later be arranged in case of mispositioning. Just fix it. Fix it in such a way that the sensor is facing the front (the eyes are facing the front). Attach wires to the motors and keep ready for the next step. Also to the sensor.
Step 3: Main Connections

So now we are going to do the connections. There are not more than 5-6 connections, so it will be a piece of cake. Make the connections of the sensor according to the diagram given above. Servo motor and dc bo motors can be connected to the shield. Connect the battery to the shield and connect the shield to the Arduino board.
Step 4: Arduino Code

So this is the last part of completing our robot. So this deals with the software and not the hardware. So we have to program our Arduino. I have uploaded the code of Arduino. You can also use another code or write your own. I have just uploaded it for reference.
Attachments

Step 5: Run
So we have built our OBSTACLE AVOIDING ROBOT. Now its time to play around with our cool robot and try new experiments in our code.

Participated in the
Microcontroller Contest


