

Introduction: Paris Table


Inspired by the general shape of the city of Paris, I made a table with all the major roads - and my home - on it
Supplies
- Access to a CNC router
- 3 ply plywood - or the wood of your choosing
- Some coffee table legs
- Some epoxy resin
- A bit of paper
- A lot of patience !
Step 1: Getting the Data


All of the data I used for making this table is from OpenStreetMap : when you visit the website, you have the option to export whatever viewport is currently displayed. In my case, the whole area of Paris was too big to be downloaded using the regular export, so I used the "Overpass API" version in order to get a (huge) SVG file.
The next step was cleaning up that SVG, using Inkscape. First of all, I removed everything that was outside the ring road that surrounds Paris, so that I was left only with the elements from inside the city in the stricter sense.
The other thing I did was to remove the layers I wasn't interested in : I only kept what were called the "major roads". They were still on a few different layers but at least I no longer had everything else on the map (minor roads, points of interest, etc.)
I then realized that most of the time, one street would be composed of several segments, some of them on different layers, rather than a single line. While this is OK for displaying, it meant that whatever software I was going to use for the CNC was going to jump between paths, rather than cutting one road in a single path. As it takes some times for the CNC router to travel from one place in the design to another, I did my best to combine the streets manually, or at least make them as long as could be.
This data processing part was definitely the longest, especially since my computer would struggle with all the paths of the Inkscape file (Illustrator didn't even manage to open it) so whatever operation I was doing always took ages.
The good news is, the final file is attached to this step if you want to make the same table ;-) !
Attachments

Step 2: Prototyping


One thing that I forced myself to do for this project and that was crucial was to prototype : using cheaper or used stock, I made several smaller versions of the table to see what the carving would look like, test different widths for the roads, and see how much time the CNC router needed to carve the table
Step 3: Cutting the Table


Then came the moment to go for it, and actually carve the table. The process took about 3 hours, using the Shopbot that the now defunct Techshop Paris had. All of the roads were engraved using a 60 degree bit, and the Seine river was carved using that same bit with a much deeper setting. Once the carving was done, the following toolpath was a cut all around the shape of the city using a 6 mm endmill.
I then proceeded to sand down the surface of the table since there were a few wood chips on the top.
Step 4: Be Happy With the Table So Far


At this point I took the table home to see if it fit in my studio apartment the way I wanted it to. I also dry attached the black legs that I wad bought for the project, but I was a bit overwhelmed by them.
Step 5: Add the First Layer of Resin


The next step was done at home, which you should only do if you have an extremely well ventilated area and are able to sleep elsewhere while the resin cures. Please also wear adequate protection gear such as masks, gloves and goggles.
I taped the whole outline of the table with some high temperature tape, in order to withstand the heat generated by the resin but also since it was rigid enough to hold its shape and act as a sort of dam.
I then poured about 5 mm of resin on top of the table, and let it cure for 12 hours (out of the 24 recommended hours)
Step 6: Adding the Home Pin and the Second Layer of Resign


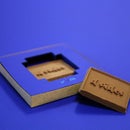
Now that I had a semi solidified layer of resin, I used some heavy turquoise paper to cut a heart shape and put in on top of the table, placing it on the map where my apartment is. I then proceeded to add the second layer of resin, so that the heart would "float" between the two layers.
Step 7: Adding a Fillet, Sanding and More Sanding


After the resin had completely cured, I removed the tape from around the table, and cleaned it with some alcohol to remove the sticky residue. While the overall result was satisfactory, you could still see some wrinkles in the resin from the tape not being folded in places - which was pretty much impossible to avoid, as it was standing on its own. I decided to use a handheld router and a roundover bit to smooth out the outline of the table.
This worked perfectly and I was left with a smooth rounded shape, except the outline of the table now had a sanded texture, when the top of it was still glossy. I then proceeded to sand down the outline, starting at a rough 240 grit all the way down to a 3000 grit (using wet sanding for the last layers). I also used a polishing compound to make the surface even glossier. Most of the materials I used were from a headlight polishing kit, but I suspect there are some resin specific products as well.
Step 8: Add New Legs and Enjoy the Table


I went back to using hairpin legs for the table and they were indeed more suited for the project thanks to their tapered shape. I've been using the table ever since, the resin top means that I can spill stuff (like soy sauce) on it or even draw on it with a chalk marker without worrying, as a simple swipe with a wet cloth will get it back in condition.

Participated in the
Woodworking Contest


