

Introduction: CUBOTone: a Rubik Cube Solver Robot, With Raspberry Pi and Picamera


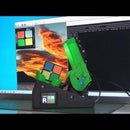

This robot detects and solves a 3x3 Rubik cube, tipically within 1 minute.
It uses a Raspberry pi and a PiCamera.
The robot works autonomously, or by sharing graphical info with a screen (or PC)
All coded in Python, also the solver made available by Mr. Kociemba (https://www.speedsolving.com/threads/3x3x3-solver-in-python.64887/) who I like to thank.
For the vision part I've used CV2 python library.
The exact same python script also works on PC with webcam, to detect the cube status and to obtain the suggested moves by the solver.
Supplies
Parts to buy are on below list, with links to the shops and parts I bought myself.
A better view on the needed parts is provided on the "How_to_make_a_Rubik_cube_solver_robot_....pdf" file
Attachments

Step 1: Read First

I strongly suggest to give a look to the "How_to_make_a_Rubik_cube_solver_.....pdf" file, where different aspects of this projects are described

Step 2: Getting Confidence With the Vision Part
As I'm quite a basic programmer, my first step has been to write a Python script on a laptop (with webcam), aiming to check whether I was able to detect the cube's facelets, related colors and to interact with the solver.
Only when I accomplished this part, I did order the robot's material ...
While porting the script to the Raspberry pi, I realized it was convenient to have the exact same script (Cubotone.py), that adapts its functions according to where it's working (PC or Raspberry pi).
Another step that could be done, before making the robot, is setting up Raspberry pi and PiCamera; This will further build confidence with the Vision part and the system.
At "How_to_make_a_Rubik_cube_solver_.....pdf" chapter 15 are listed all the steps to get the Raspberry pi working.
Starting from October 2022, it is available a simplified installation process for Rasperry Pi via GitHub, that takes care to install/upload all the needed libraries/files: https://github.com/AndreaFavero71/Cubotone
Step 3: Make the Robot

Parts with complex shape are 3D printed, while the box is made by plywood.
Annex the stl files for the printed parts, and for the box (that could be eventually be 3D printed).
In the annex instructions "How_to_make_a_Rubik_cube_solver_robot_.....pdf" are explained the steps to follow during the assembly; Electrical connections are also explained.
Attachments
 Cube_holder_lower_part.stl
- Cube_holder_upper_part.stl
- Foot.stl
- Foot_hinge.stl
- Hinge_upperCover_Lifter.stl
- Lever_link.stl
- Lifter.stl
- Lifter_servo_holder.stl
- Motor_support.stl
- Motor_sync_disk.stl
- Panel_back.stl
- Panel_bottom.stl
- Panel_front.stl
- Panel_left.stl
- Panel_right.stl
- PiCamera_holder.stl
- Power_connector_inner_part.stl
- Power_connector_outer_part.stl
- Rpi_holder_back.stl
- Rpi_holder_front.stl
- Panel_top.stl
- Upper_cover_leds.stl


Step 4: Enjoy the Results
The robot makes a collage with the taken images of cube's sides, the detected and interpreted colours; The collage are saved by the Raspberry pi in a folder, and by time the amount has grown.
The saved pictures have all the same dimensions, and it is fun when scrolling the folder.... at the end I could not resist and I made a video

Participated in the
Robots Contest


![Tim's Mechanical Spider Leg [LU9685-20CU]](https://content.instructables.com/FFB/5R4I/LVKZ6G6R/FFB5R4ILVKZ6G6R.png?auto=webp&crop=1.2%3A1&frame=1&width=306)


