

Introduction: Balcony Railing Height Extension With Glass - Kids Safety | DIY


In this instructable, I'll show how me and my father installed glass panels, as an extension to the current glass railing, on my apartment's balcony.
Why did we make this extension?
Well, it's enough to understand why, by watching the 13 seconds video on the next step, which was taken by the security camera on our balcony. So start by watching and then continue reading.
- Unlike most of my projects, this one isn't fully documented in video. To see my other full projects' videos, check out my YouTube Channel, and subscribe if you like it :) Thanks!
Supplies
Materials:
* Glass panels (in my case - 10mm tempered / toughened glass)
* Stainless steel Glass Holders / Clamps (in my case - for 10mm-12mm), with rounded or flat base according to the connected surface.
* Stainless steel 90+180 degrees glass holders.
* Stainless steel screws
* Wall screw anchors
* Metal ring for each screw
General List of tools I'm using - https://www.itzikdiy.com/tools-list?m=1
Tools in this Instructable:
* Measuring tape
* Drill
* Drill driver
* Screwdriver
* Hex key
Step 1: Video - Why Did We Make This Extension?
So, if you watched the video (BTW, it was blurred on purpose), you can understand why did we want to extend the railing height :)
I have 2 boys who like trying new things, and climb on things (like most of the kids, but maybe extra).
When we bought our apartment few years ago, we knew that someday we'll need to extend the railing, but finally, we did it right after this dangerous event occured.
I can't image what would happen if the kids would drag the chair with the backrest towards the railing and climbing, and not on the armrest...
Although the extension, we tied what's possible to the wall, including the furnitures on the balcony, and we don't let the kids go out alone, to avoid such cases again.
Nothing can't really stop the kids from the danger - Only adult presence!
We moved from a house with a backyard to this apartment, so for the kids, currently the balcony is their backyard. They like to spend a lot of time there, but it requires supervision.
Step 2: Video - Installing the Extension
Well, you already understood that I have a security camera in the balcony... so without special intension, I had a record of the installation.
I made this.quick 1 minute video . You can't see the full details here unfortunately, but it's nice to watch in fast forward if you like.The kids are coming to check the place at the end :)
The full details are in the next steps and photos.
Step 3: The Railing Before the Extension


Basically, the height of the current railing from the floor, was 135cm, which is pretty good.
The standard here, is 105cm from a place that can be stepped on.
Sometimes the railing starts directly from the floor, so the total height is 105cm, but in my case it had additional concrete belt of 30cm. (see photo)
Most of the time, the important thing is the total height, since if the kids climb on any furniture, it usually starts from the floor, so the 135cm counts in this case.
I decided to add additional 28cm (26cm of the glass panel + 2cm of the brackets gap height), so the total new height now is ~163cm. (see second photo).
Step 4: The Existing and Extension Railing Materials

Each balcony can have different type of existing railings surface - it can be wall, metal, glass etc.
Depending on the railing type, and its top surface material and structure, you shoud consider which extension materials and connections to use.
In our case, the existing railing was glass surrounded by aluminum. The top of the railing was rounded aluminum profile, with 7cm diameter, as can bee seen on the photos.
We decided to extend the railing with glass panels, so it will be clear and not noticeable too much.
I was afraid that using glass, will reduce the air coming to the apartment, but finally, it's not noticeable. We have great wind from this side :)
Step 5: The Glass Holders / Clamps - Closed


There are different accessories for attaching glass for railing.
I decided to use glass holders / clamps, as seen in the photos. Also in this type, there are some materials and shapes. I used stainless steel holders (it's better, due to outdoor use in rain etc.)
These specific holders could fit for 10mm or 12mm glass, so it came with 2 optional hard rubber parts (next step photo), to use according to your glass (mine was 10mm).
There are holders with rounded or flat base, which should be selected according to the attached surface.
In my case, I used rounded base for the current railing aluminum, and flat base, for the side attachment to the wall. (more details later).
Step 6: The Glass Holders / Clamps - Open

In order to open each holder, you need to open 2 hex screws using hex key.
After removing the cover (one side), you'll see something like in the photo.
You can see the hard rubber of 10mm glass and the hole at the bottom.
Step 7: Installing the Glass Holders / Clamps


The holders should be installed after opening them. (The cover will be installed later after inserting the glass), so I opened all in advance.
I had total of about 6 meters railing. 1.5m on the left side --> 90 degrees corner --> 4.5m on the front.
On the left and on the right, I had walls which I could use to connect the glass as well, and it's good for harder upper connection, instead of connecting only to the bottom railing.
So, I used one holder, on each wall side - straight base holder.
Installation process:
I drilled on each wall, about 20 cm from the existing railing (first photo), put plastic screw anchor and connected the holder to the wall, from the hole in the holder, using screw and metal ring (see previous step photo). I used the rings since it's big and the screws had smaller head.
Later, I connected all bottom rounded base holders. I put them in distance of about 70cm from one to another. You can put additional holders more crowded, but I saw other installations with this distance and it seems pretty strong. (Keep ratio of safety versus appearance). Also in my case, the connection to the wall helps with the strength.
I drilled holes on the aluminum rounded railing, and connected each holder with screw and metal ring.
Note - the diameter of the railing is 7cm, but the brackets rounded bottom is for about 45cm diameter. There is no issue as you can see on the photo, since it sits tight. If the railing was smaller than 45cm diameter, it could be more loose.
(The photos here are after closing the cover with the glass)
Step 8: All Glass Holders / Clamps Installed


In these photos, you can see all the holders installed on the walls and railing.
I closed them with the cover, but later removed the covers, before installing the glasses.
Step 9: Installing the Glass Panels

We ordered 3 pieces of glass (in my case - 10mm tempered glass):
- 1 piece of about 26cm H * 150cm W (for the shorter side)
2 pieces of about 26cm H * 220cm W (for the 4.5 meters side)
As you can see on the photo (and also on the quick installation video), we hold a very long glass panels.
We wanted to have less connections between glass panels, so we ordered the 220cm glass.
In retrospect, I would order smaller panels. It was very heavy and cumbersome to work with, so I recommend to use smaller panelswith more connections between the panels (see later steps for panels connections).
Due to the use of the long panels, something little dangerous happened - see step 16.
You need to calculate the accurate width of each panel and the spaces between them, so there won't be installation issues later. I leaved about 1cm space between each panel, and 0.5cm space near the wall holders.
If it's too small, you can play with it a bit. If it's too big, there can be a problem. (The distances may be changed according to the used accessories)
Installation process:
We put each panel on the opened holders on the wall and railing, then put the rubber and holder cover, and tighten with the 2 hex screws on the cover, using the hex key.
We didn't closed very tight, but enough to hold the glass safely, in case that we'll still need to move the glass.
After all panels were in place, we tighten each hex screw well.
Step 10: Installation Closeup - Left Wall Connection


Some closeup photos of the left wall connection.
Step 11: Installation Closeup - Right Wall Connection


Some closeup photos of the right wall connection.
Step 12: 180 Degree Glass Holders


In order to have a stronger "one-piece" build, all panel were connected to each other.
On the single straight connection, we used holder for 180 degrees, as can be seen on the photos.
These specific accessories I used are easier to use, since they can be installed from the top of the glass using screws which press on the glass. The disadvantage, is that you can push them up, but if they're tighten well, it's not easy, and specially not for kids.
(The other option, is to use different connections, which require holes in the glass. The holes needs to be done before the glass is being tempered. Using the accessories with holes and screws, may require that the glass panels will be very close to each other, and also longer).
Step 13: 90 Degree (Corner) Glass Holders


On the single corner connection, we used holder for 90 degrees, as can be seen on the photos.
The installation is like described above for the 180 degrees one.
Step 14: Final Look From Inside the Balcony


This is the final result, from the inside of our balcony.
Step 15: Final Look From Outside


Some photos from outside, below the building, and from our neighbors balcony.
Looks like a sort of aquarium :)
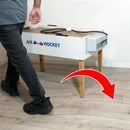
Step 16: Too Long and Heavy Glass Panels :(


As I wrote in step 9, we used very long glass panels. in retrospect, it was very heavy to carry and I should of order smaller ones.
My neighbors knew that I'm going to install the railing extension at my balcony, so they ask if I can install for them as well. I'm a very good neighbor, and I helped of course :)
The dimensions weren't similar but almost the same.
But, there was a bit dangerous event during the second installation. One long panel slipped from my hand while we lifted it up, and fell on the floor, on one of its corners (see photos). It did not shatter, but broke slightly in the cornerץ
Luckily, it didn't hurt my foot or leg... and it just required to order a new glass.
So smaller glasses, did I mention it? :)
Step 17: Done


That's it! What do you think?
If you liked my instructable, you can visit my starting YouTube channel to see additional fully video documented projects and subscribe in order to support me!
Thanks!
---------------------------------------------------------------
P.S - This project should be done carefully. It's being used for kids safety, and also uses heavy materials like the glass panels, which should be attached very well.
I was looking at my friends apartments with similar work as an example, and also consulted with professionals before making it.
Do it on you own risk and be careful.

Participated in the
Backyard Contest


