

Introduction: Exotic Wood Trivets


The urge to make some new trivets came upon me...
I made some out of solid wood -- those are quite simple and straightforward to make. They were intended as prototypes, but turned out good enough to keep.
The others were a bit more involved to build.
They are made of two layers of laminated strips of wood. One key design choice is that the two layers of wood are arranged so they are oriented perpendicular to each other. This gives an interesting look, but should also help with wood stability, since I have in effect created a custom piece of "plywood". (The third photo is an animated GIF which shows both sides.)
Step 1: Option: Video Build
If you'd like, you can watch a youtube video of this project build.
Otherwise, read on!
Step 2: What NOT to Do

Here is what NOT to do...
I made these other wooden trivets almost 15 years ago. The one on the left is cherry, and the one on the right is maple. They've been used almost daily since then. These were an extremely simple project, as you just take a piece of square wood and then run it over the dado blade to make grooves. The cuts are halfway through the board, and after each cut you flip the board over, turn it 90 degrees, and make another cut. The result is the pleasing waffle-type look to the trivet.
The downside is that the one on the left is rather fragile, since the cuts were so close together. First the remaining strips of wood are just very narrow, so they break easily. But also remember that half the cuts are cross-grain cuts, which means the leftover wood is that much more fragile. (cross-grain bits of wood can snap very easily.)
The maple trivet was not so fragile, as I left wider strips of wood behind, but this one warped almost immediately. This is possibly because it's a trivet, so it may be exposed to damp pots. Or more likely it is because I removed so much wood that it lost a lot of its' inherent strength and rigidity from the original board which allowed the wood to move in this way.
Bear in mind, I'm a woodworker. So I like making new things, and I always have extra scraps of wood laying around. So it is really no big deal to make some new trivets. But on the other hand, that doesn't mean that I want to intentionally make something that is fragile or prone to warping.
Step 3: Plans and Prototype


After some consideration, I settled on this as one design that I wanted to make - a series of holes. There is one hole in the center, then another set of holes arranged in a circle around that, and then a second set arranged in another larger circle. I drew this up in Sketchup, printed the pattern out at 100% and used it as a template to drill out the 3/4" diameter holes.
I grabbed a scrap of cherry wood, planed it down to a bit over 1/2" thick (1.25cm) and used it as a prototype to test out the hole-drilling pattern. It turned out great and so I'm keeping the prototype.
Step 4: Glue Up Small Strips


I went digging through my stash of exotic offcuts and glued together small strips to make up my trivet blank.
In this one there is a strip of Padauk in the centre (the reddish wood). Moving out from the centre are two strips of Maple (thin white wood) followed by two strips of Cherry, followed by two strips of Osage Orange (the yellowish wood), two more strips of thin Maple, and finally two strips of White Oak on the outside edges.
This is exactly how I make cutting boards also, but since trivets are so small I can use up some even smaller strips of wood. Many of these would otherwise be destined for the burn box.
I glued and clamped all the strips together and then planed them down. The third photo shows my other glued up panel. This one also has a strip of Padauk in the centre. Moving out from that are two thin strips of Maple, two strips of Walnut, two more thin strips of Maple and then Cherry and finished off with some not-so-white Maple.
Step 5: Glue, Pin, Clamp


I trimmed the pieces down, slathered on the wood glue, and then glued two pieces together, orienting the two layers at 90-degrees from each other.
My rough blanks were wider than 6" (152mm) , so I could use some 23-gauge pins right along the edge to prevent the two pieces from slipping around when clamped. It looks like a ridiculous amount of clamps in the third photo, but I want to be sure to get a good connection along the whole surface -- I'm not clamping that tightly, I'm just making sure there is pressure everywhere on the two faces.
("I have enough clamps" -- said no woodworker, ever.)
Step 6: Drill Dril Drill


I was almost tempted to stop at this point, since the two pieces were gorgeous when cut to size. Having the two faces oriented at 90-degrees to each other gives a cool look.
Note that I also prepared a walnut 6x6 blank (152x152mm) out of some scrap wood that I had found. The cherry prototype had turned out so well that I thought I'd make another.
I trimmed the trivet blanks to final size of 6x6" (152x152mm) and proceeded to drill out my hole pattern. Here I have used spray adhesive to attach the pattern, and then just drilled through the pattern.
There are actually two boards taped together, so I am drilling two trivets at the same time.
Step 7: Cutting Dado Slots


I then set up a 1/4" dado blade (6mm) in the tablesaw and set that to just a hair above halfway through the trivet blank. I then cut three times through each face of the piece. One cut was centred on the central Padauk strip, and the other two cuts were centred on the the two walnut strips.
Step 8: Rounding and Finishing


I then took the pieces to the router table where I used a 3/16" roundover bit (4.75mm) to round the edges of the piece.
After that I used a roundover bit in the palm router to round over the edges of the holes that I drilled through the trivets. (not shown in photo) I had tried this on the router table, but it just felt safer to me using the palm router.
After that came finish sanding and a few coats of spray lacquer.
Step 9: Finished Photos


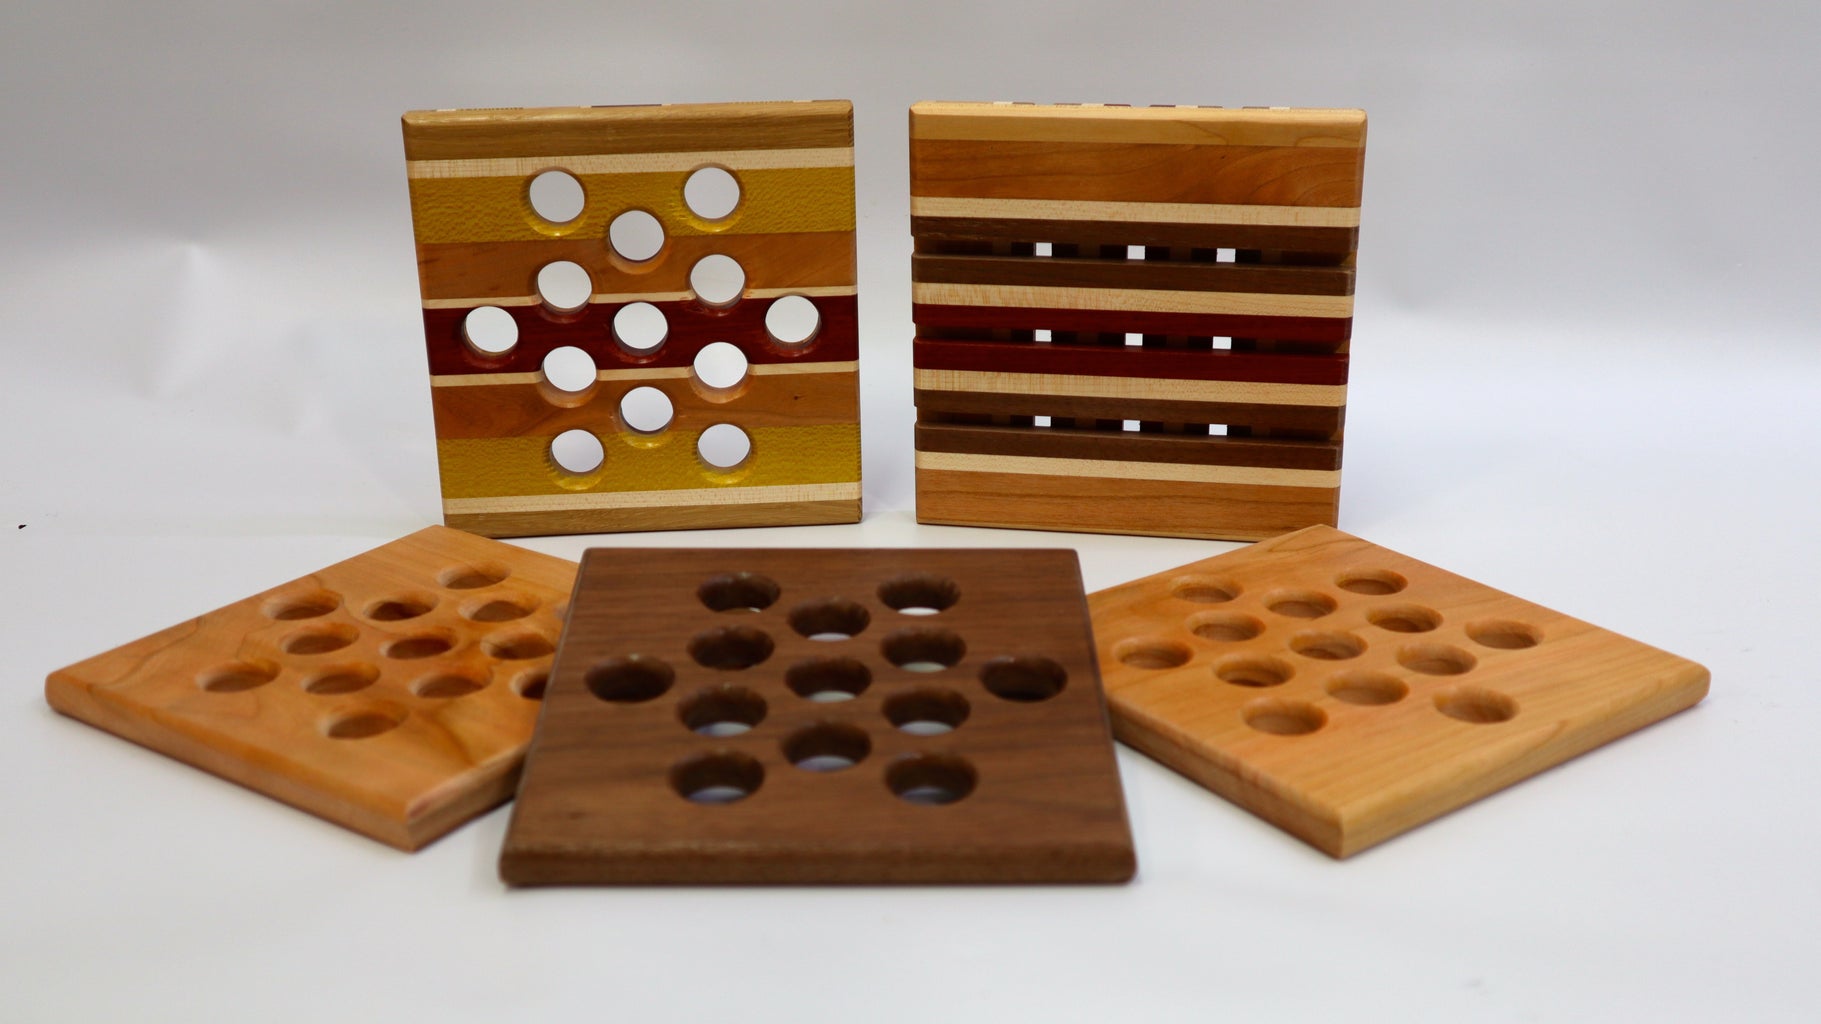
Here are some photos of the finished trivets.
They all look lovely, but the two made with wood strips are, IMHO, the standouts. I think they're stunning.
In the second photo you can see how the two sides of those trivets are oriented at 90-degrees to each other.
This is one of those projects where I think the reality turned out to be far better than what I had been imagining in my head as I planned it.

Participated in the
Woodworking Contest


